18 Creative Gel Toe Nails Designs and Cute Toenail Inspirations
1. Vibrant Gel Toe Nails with a Splash of Color
Discover how to transform your toes into a canvas of creativity with vibrant gel colors that pop. This design mixes bold hues with artistic patterns, perfect for any occasion.

Step-by-step
- Begin by prepping your nails: clean, shape, and buff gently.
- Apply a base coat, then choose your vibrant gel colors.
- Use a fine brush to add creative strokes or geometric patterns.
- Finish with a clear top coat to seal in the design.
Picture this: Imagine your toes glowing with brilliant colors, each nail a masterpiece bursting with energy and life. The design exudes a playful yet chic aura, making your pedicure the centerpiece of any outfit. The final result is a stunning display of creativity that leaves a lasting impression.
2. Chic Minimalist White Toe Nails with a Twist
Embrace simplicity and elegance with a modern white gel finish that highlights your natural beauty. This design uses clean lines and subtle accents to create a timeless look.

Step-by-step
- Start with a smooth base and perfect your nail shape.
- Apply a pristine white gel polish for a sleek foundation.
- Add delicate accents like a thin line or a tiny dot in a contrasting shade.
- Seal the design with a glossy top coat for a polished finish.
Picture this: Visualize perfectly shaped nails dressed in pure white with a surprising twist of accent detailing. The minimalist design radiates sophistication and modernity, ideal for a refined yet trendy style. Your toes will look fresh, neat, and effortlessly elegant.
3. Sparkling Gel Toe Nails Designs for Special Occasions
Add a touch of glamour to your pedicure with sparkling gel finishes that capture the light. This design is perfect for events where you want to shine and feel extra special.

Step-by-step
- Prepare your nails by cleaning and filing them into your preferred shape.
- Apply a shimmering gel polish base that catches the light beautifully.
- Use a glitter top coat or add delicate sparkle details on each nail.
- Cure under the UV or LED lamp to secure your design.
Picture this: Envision each toe reflecting dazzling sparkles with every step you take. The shimmer creates a luxurious feel, as if tiny stars are dancing on your nails. The overall effect is both festive and elegant, making your pedicure the perfect accessory for any celebration.
4. Cute and Playful Toenail Nail Art Designs
Turn your toes into a playful gallery with cute, hand-drawn designs that exude personality. This style is all about having fun and letting your creativity run wild.

Step-by-step
- Start with a clean, smooth base coat to ensure your design stands out.
- Choose soft pastel colors to create a playful background.
- Draw simple yet adorable motifs such as hearts, stars, or smiley faces using a fine nail art brush.
- Seal your art with a clear top coat to make it last longer.
Picture this: Picture your toes adorned with tiny, cute designs that bring a smile to anyone who sees them. The playful motifs contrast beautifully with the soft pastel background, creating a whimsical look. The final design radiates joy and creativity, making your nails a conversation starter.
5. Bold Geometric Gel Toe Nails Designs
Embrace the power of geometric shapes to create a bold, modern pedicure. This design uses clean lines and contrasting colors to produce a striking visual effect.
Step-by-step
- File and shape your nails to a sleek, uniform look.
- Apply a bold base color that will make your geometric accents pop.
- Use masking tape or nail strips to outline geometric patterns.
- Fill in the patterns with a contrasting gel color and finish with a top coat.

Picture this: Imagine your nails showcasing a series of sharp, defined geometric patterns that scream modern elegance. The contrasting colors create a dynamic interplay that catches the eye instantly. Each nail is a mini work of art, blending structure with creative flair.
6. Elegant Nude Nails with Subtle Accents
Create a chic and understated look with elegant nude tones enhanced by subtle yet sophisticated accents. This design is perfect for those who prefer a refined, natural style.
Step-by-step
- Begin with a clean, natural base by shaping and buffing your nails.
- Apply a nude gel polish that complements your skin tone perfectly.
- Add a delicate accent such as a thin gold or silver stripe across each nail.
- Top off with a clear, glossy finish to highlight the elegance of the design.

Picture this: Envision your toes wrapped in soft, neutral tones with delicate metallic accents that catch the light ever so slightly. The overall effect is elegant, refined, and effortlessly stylish. Your nails evoke a sense of calm sophistication that is both modern and timeless.
7. Trendy Pastel Gel Toe Nails Designs
Step into a world of soft hues with trendy pastel gel polish that makes your toes look fresh and inviting. This design is a celebration of light, breezy colors that are perfect for any season.
Step-by-step
- Prep your nails by cleaning and applying a base coat.
- Select a range of pastel gel polishes to create a soft, gradient effect on each nail.
- Use a blending brush to merge the colors seamlessly, creating a dreamy finish.
- Seal with a top coat to enhance the pastel glow and durability.

Picture this: Imagine your nails transitioning through gentle hues of pink, blue, and lavender, creating a mesmerizing gradient effect. The soft colors evoke feelings of warmth and tranquility. Your toes look effortlessly chic, perfect for any relaxed yet stylish look.
8. Beach-Inspired Gel Toe Nails Designs
Bring the serene and refreshing vibe of the beach to your pedicure with designs inspired by ocean waves and sandy shores. This design incorporates elements that evoke the spirit of summer.
Step-by-step
- Start with a smooth base coat to ensure a long-lasting design.
- Choose cool, ocean-inspired gel colors like turquoise, seafoam, and coral.
- Use a fine brush to create wave-like patterns or sandy textures on your nails.
- Finish with a top coat that adds a glossy finish reminiscent of sunlit water.

Picture this: Picture your nails capturing the essence of the beach, with cool blues and gentle waves that mimic the ocean’s movement. The design feels like a mini-vacation on your toes, refreshing and rejuvenating. Each step radiates the calm and beauty of a seaside escape.
9. Spring-Inspired Gel Toe Nails Designs
Celebrate the season of renewal with fresh, spring-inspired gel nail art that bursts with life and color. This design is a tribute to blossoming flowers and crisp, clear days.
Step-by-step
- Clean, shape, and prime your nails to set the perfect stage.
- Apply a light, pastel gel polish as your base color.
- Add floral motifs or delicate vines using contrasting gel colors.
- Seal with a clear top coat to ensure the design remains vibrant and durable.

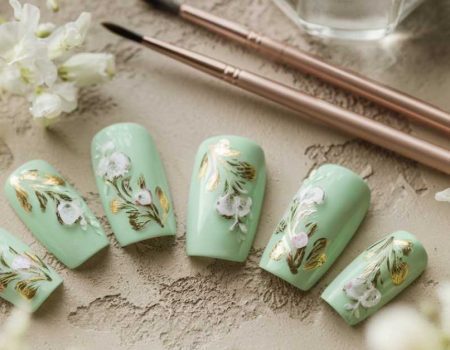
Picture this: Visualize your nails adorned with tiny, blooming flowers and gentle vines that evoke the freshness of spring. The pastel base and intricate floral details combine to create a look that is both delicate and joyful. Your pedicure will feel like a walk through a blossoming garden, full of promise and renewal.
10. Simple Toe Nail Art for a Clean Look
Opt for simplicity and elegance with a straightforward yet stylish toe nail art design that highlights clean lines and a polished finish. This design is perfect for everyday wear and versatile for any style.
Step-by-step
- Prepare your nails by ensuring they are clean and well-shaped.
- Apply a solid gel polish in your chosen color for a uniform look.
- Use a fine nail art brush to add a simple accent line or dot on one side of each nail.
- Apply a clear top coat to lock in the design and add shine.

Picture this: Imagine your nails with a sleek, uniform color accented by a single, elegant line that adds a touch of sophistication. The simplicity of the design makes your toes look effortlessly chic and refined. Each step produces a look that is both modern and timeless, perfect for daily wear.
11. Artistic Swirls and Dots Gel Toe Nails
Unleash your inner artist with swirling designs and dot accents that make your pedicure a playful canvas of creativity. This design is all about expressing your unique style in a fun, creative way.
Step-by-step
- Begin with a smooth base coat and your preferred gel color for the foundation.
- Use a thin brush to create swirling patterns across each nail.
- Dot in contrasting colors to add depth and dimension to the swirls.
- Finish with a clear top coat that enhances the fluidity of the design.

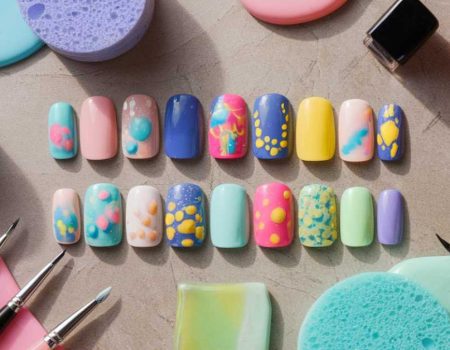
Picture this: Picture your nails coming alive with artistic swirls and colorful dots that seem to dance with every movement. The design feels both spontaneous and meticulously crafted, reflecting a perfect blend of creativity and precision. Your toes become a canvas of playful art, radiating joy and individuality.
12. Elegant French Toe Nail Art with a Modern Twist
Reimagine the classic French manicure by adding a modern twist that infuses creativity and bold colors into a timeless design. This style is both elegant and unexpected.
Step-by-step
- Shape and clean your nails to create the perfect canvas.
- Apply a natural base gel polish for a clean look.
- Instead of the traditional white tip, choose a bold gel color or add a subtle gradient to the tip.
- Seal the design with a top coat that enhances the modern twist.

Picture this: Imagine your toes sporting a French manicure redefined with vibrant accents and unexpected color transitions. The elegant base contrasts beautifully with the modern twist on the tip, creating an eye-catching design. Your nails exude confidence and sophistication, merging tradition with contemporary flair.
13. Intricate Lace Patterns on Gel Toe Nails
For a touch of delicate beauty, try intricate lace patterns that transform your toes into works of art. This design is perfect for those who appreciate fine details and a feminine touch.
Step-by-step
- Start by prepping your nails with a clean base and smooth surface.
- Apply a soft gel polish that will serve as the background.
- With a steady hand, use a fine brush or nail art pen to draw intricate lace patterns on each nail.
- Complete the look with a clear top coat to protect the delicate design.

Picture this: Visualize your nails adorned with delicate lace details that evoke the beauty of vintage elegance. The intricate patterns create a sense of delicacy and refinement, making your pedicure a true statement of style. Each nail tells a story of artistry and grace, drawing admiration with every glance.
14. Bold Metallic Accents on Gel Toe Nails
Elevate your pedicure with bold metallic accents that add a futuristic edge to your nail art designs. This look is perfect for those who want to combine sophistication with a dash of daring.
Step-by-step
- Clean and file your nails to create a smooth surface.
- Apply a dark or neutral gel polish as the base color for a dramatic effect.
- Use metallic gel polish to create striking accents such as stripes, dots, or geometric shapes.
- Seal the design with a high-shine top coat for a dazzling finish.

Picture this: Picture your toes highlighted with bold metallic accents that catch the light with every step you take. The contrast between the deep base color and the shimmering metallic details creates a look that is both edgy and refined. Your nails radiate confidence and modernity, making them a standout feature of your style.
15. Fun and Flirty Confetti Gel Toe Nails
Infuse your pedicure with a burst of fun using confetti-inspired gel nail art that’s all about celebration and joy. This design is playful, energetic, and perfect for brightening up your look.
Step-by-step
- Prepare your nails by ensuring they are clean and smooth.
- Choose a vibrant base gel polish to set the festive tone.
- Sprinkle confetti-like dots or small shapes in contrasting gel colors over your nails.
- Seal with a clear top coat to lock in the lively design.

Picture this: Imagine your nails covered in a joyful array of tiny confetti dots that sparkle with every movement. The playful design feels like a mini celebration on your toes, filled with energy and charm. Each nail is a burst of happiness, making your pedicure a delightful expression of fun and creativity.
16. Nature-Inspired Floral Gel Toe Nails
Celebrate the beauty of nature with floral gel nail art that brings a garden of blooms right to your toes. This design is a fresh and natural approach to nail art that’s both romantic and vibrant.

Step-by-step
- File, shape, and clean your nails to prepare for a delicate design.
- Apply a soft, natural base gel polish reminiscent of a clear sky.
- Carefully paint tiny flowers and leaves using a fine brush and contrasting gel colors.
- Top with a clear coat to preserve the delicate details of your floral design.

Picture this: Visualize your toes transformed into a miniature garden bursting with blooming flowers and lush leaves. The soft base perfectly highlights the vibrant floral details, creating a look that is both natural and enchanting. Your pedicure feels like a fresh breath of spring, filled with the gentle beauty of nature.
17. Ultra-Modern Neon Gel Toe Nails
For a bold, futuristic twist, try neon gel nail art that makes your toes glow with energy and excitement. This design is a daring choice for those who love to push creative boundaries.
Step-by-step
- Begin by cleaning and shaping your nails for a flawless start.
- Choose a dark or neutral base gel polish to make the neon colors stand out.
- Use neon gel polish to create vibrant patterns or accent lines on each nail.
- Seal your design with a glossy top coat that enhances the neon glow.

Picture this: Imagine your nails lighting up with electrifying neon hues that contrast dramatically against a dark base. The vivid colors radiate energy and creativity, turning your pedicure into a futuristic statement piece. Each step leaves you with a look that is bold, unapologetic, and utterly captivating.
18. Edgy and Unique Abstract Gel Toe Nails
Step away from the ordinary with abstract nail art designs that break the mold. This edgy style is all about mixing colors, shapes, and textures to create a truly one-of-a-kind look.
Step-by-step
- Start with a clean base and shape your nails to perfection.
- Apply a solid gel polish as the foundation for your abstract design.
- Experiment with different colors and brush strokes to form abstract patterns on each nail.
- Finish with a protective top coat to secure your innovative design.

Picture this: Picture your nails as mini canvases of abstract art, where every brush stroke is a unique expression of your creative spirit. The unconventional mix of colors and patterns results in a look that is both edgy and intriguing. Your toes become a statement of individuality and artistic flair, inviting admiration and curiosity with every glance.
