
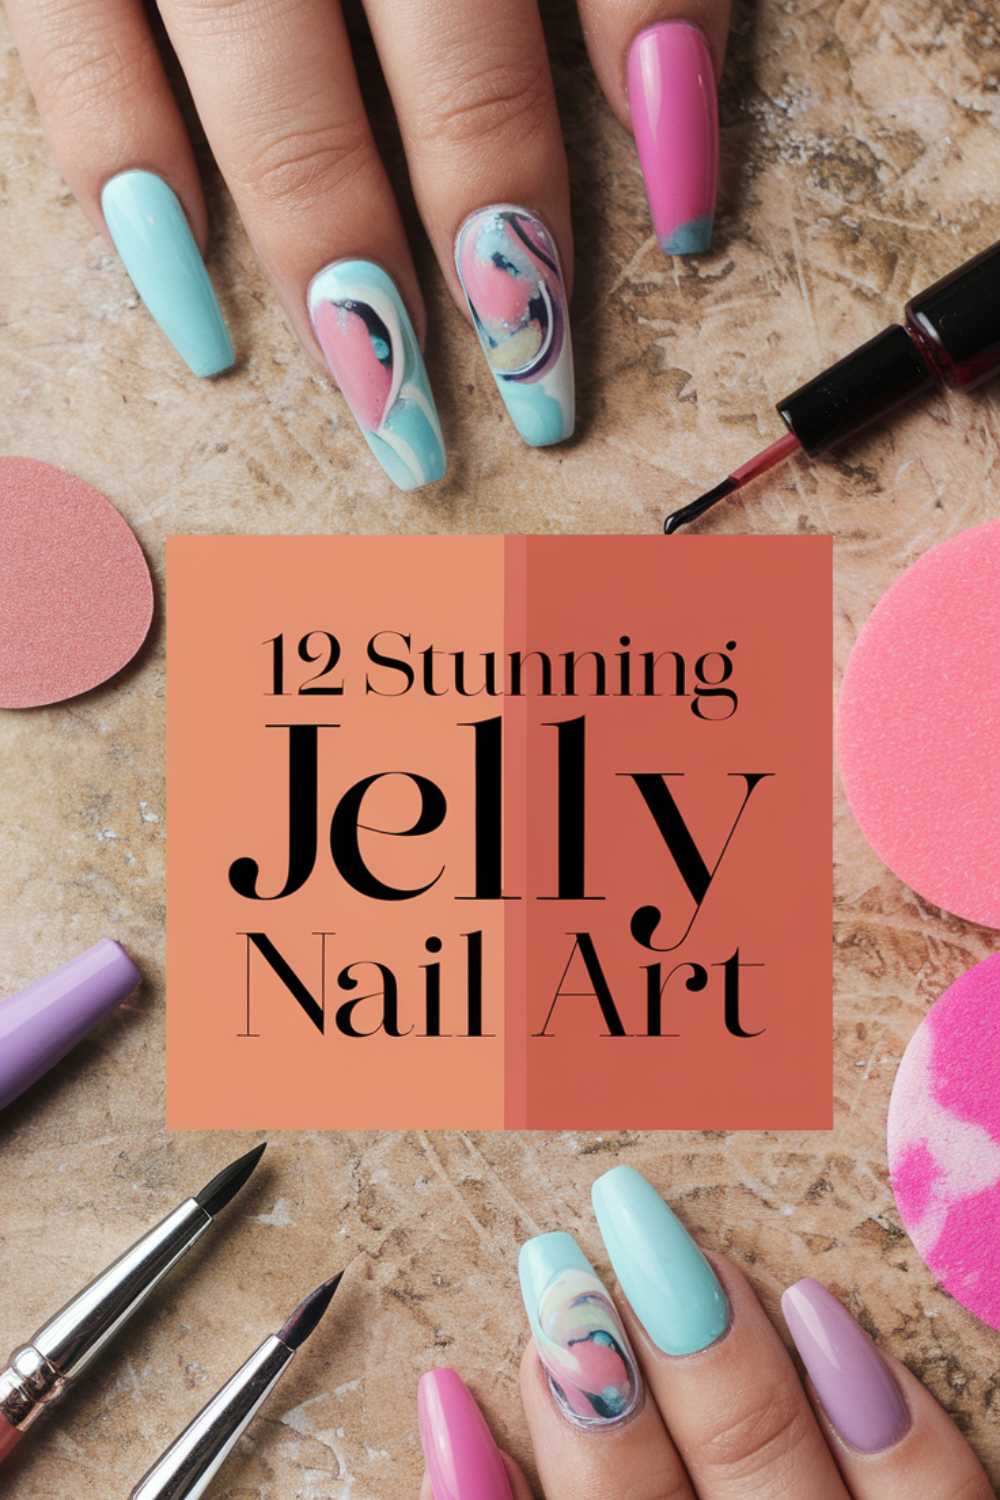
Your nails can be a playful canvas that reflects your vibrant personality and creativity. In this guide, we explore 12 stunning jelly nail art ideas that transform your nails into dazzling works of art. Each design is crafted with step-by-step instructions to help you achieve a bold, glossy finish that exudes fun and flair. Let these ideas inspire you to experiment with unique colors, textures, and creative techniques that bring a modern twist to traditional nail art.
1. Classic Jelly Nail Art
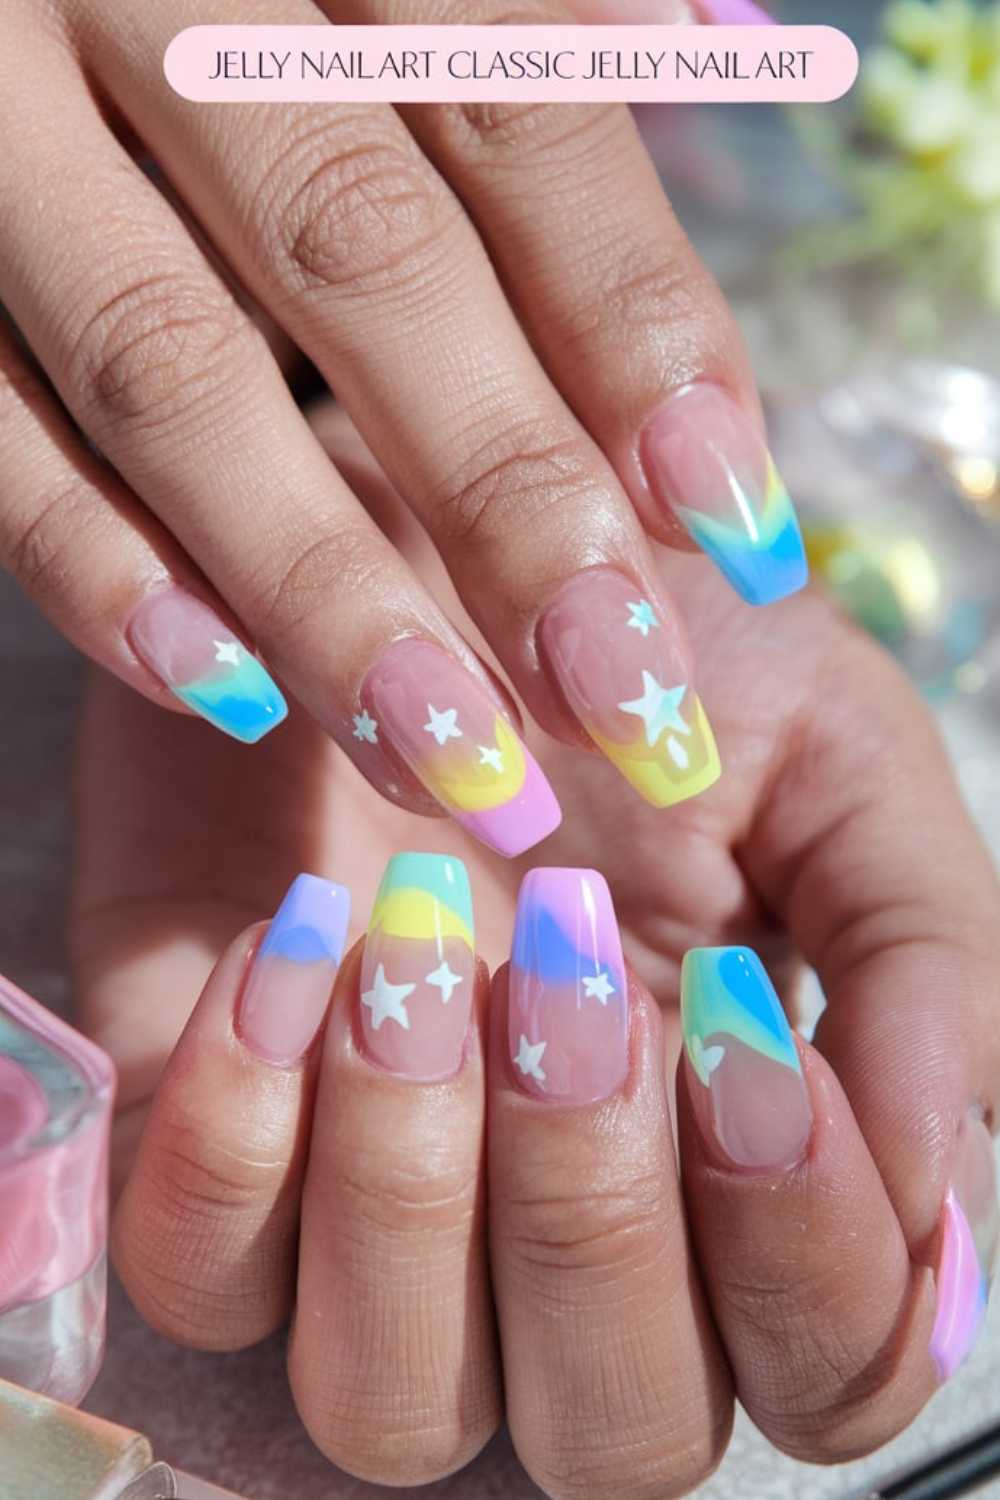
This design focuses on a clean, translucent base that highlights the signature jelly shine. The clear, glossy finish creates an effortlessly chic look that is both modern and timeless.
Step-by-step
- Begin with clean, prepped nails and apply a clear base coat.
- Apply two thin coats of a translucent jelly polish.
- Allow each coat to dry completely.
- Seal with a high-gloss top coat for extra shine.

Picture this: Imagine your nails glowing with a pristine, translucent finish that reflects light in a mesmerizing way. The glossy jelly effect gives your nails a smooth, mirror-like appearance. Every nail looks flawless, making a statement with its subtle yet striking shine.
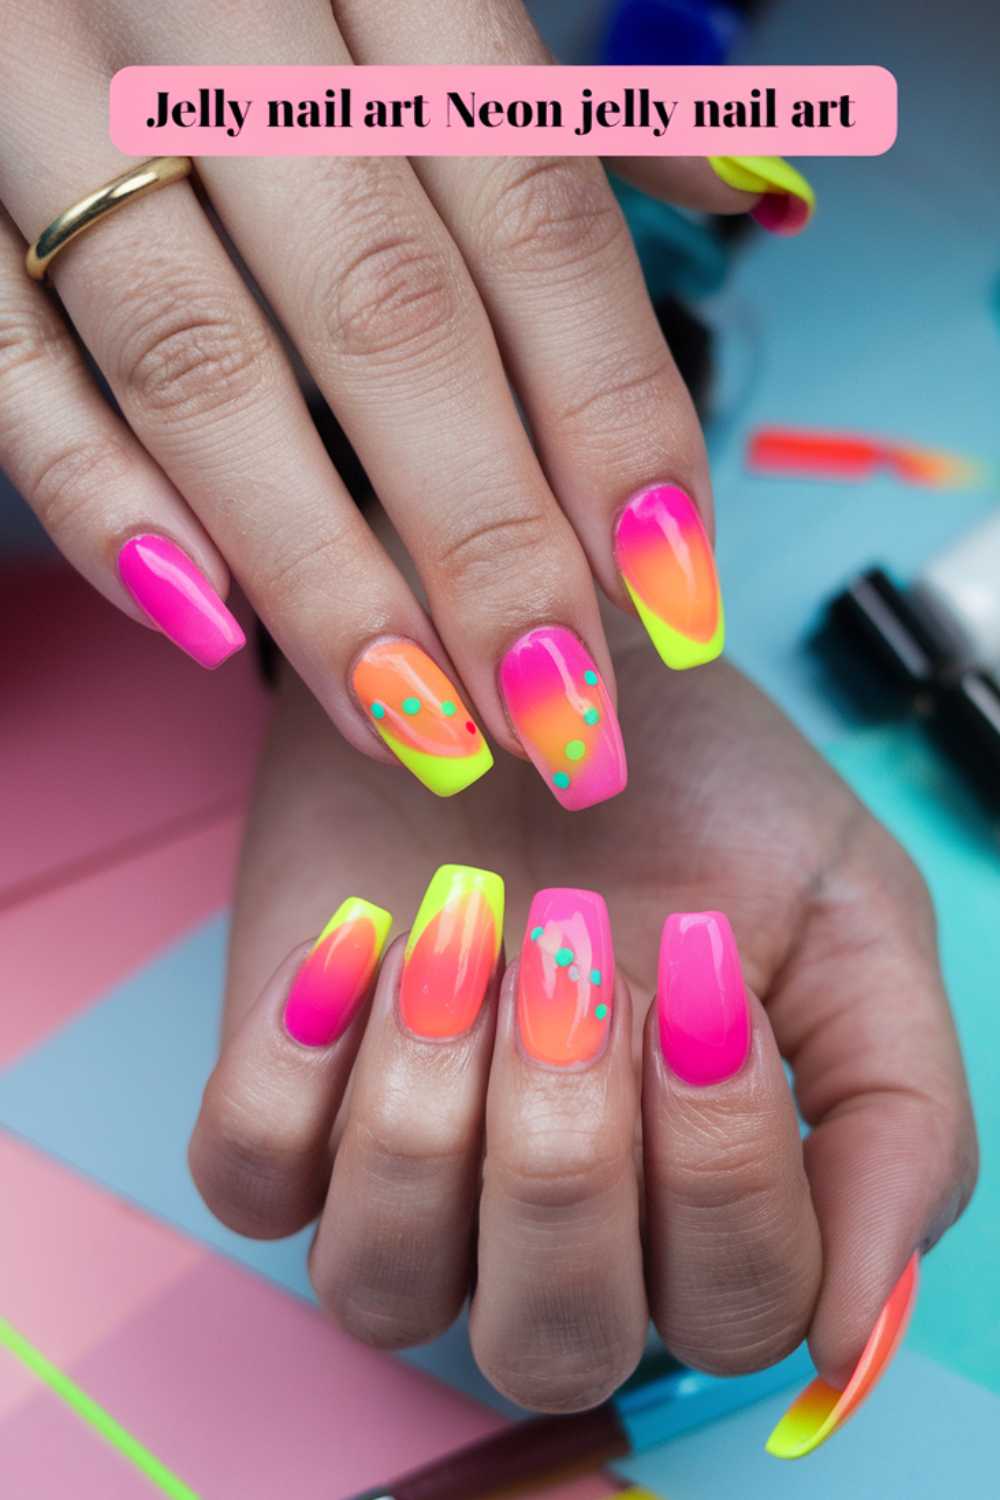
2. Neon Jelly Nail Art
This design adds a bold pop of neon to the classic jelly look, creating an electrifying effect. The vibrant neon hues provide a striking contrast against the glossy base, making your nails truly stand out.
Step-by-step
- Apply a clear base coat to your nails.
- Paint your nails with a neon jelly polish in your chosen color.
- Allow the polish to dry completely.
- Finish with a clear high-gloss top coat for an extra shiny finish.
Picture this: Envision your nails glowing with vibrant neon colors that radiate energy and modernity. The bright, electrifying hues catch the light and command attention. Each nail bursts with dynamic color, making your manicure a bold statement of style.
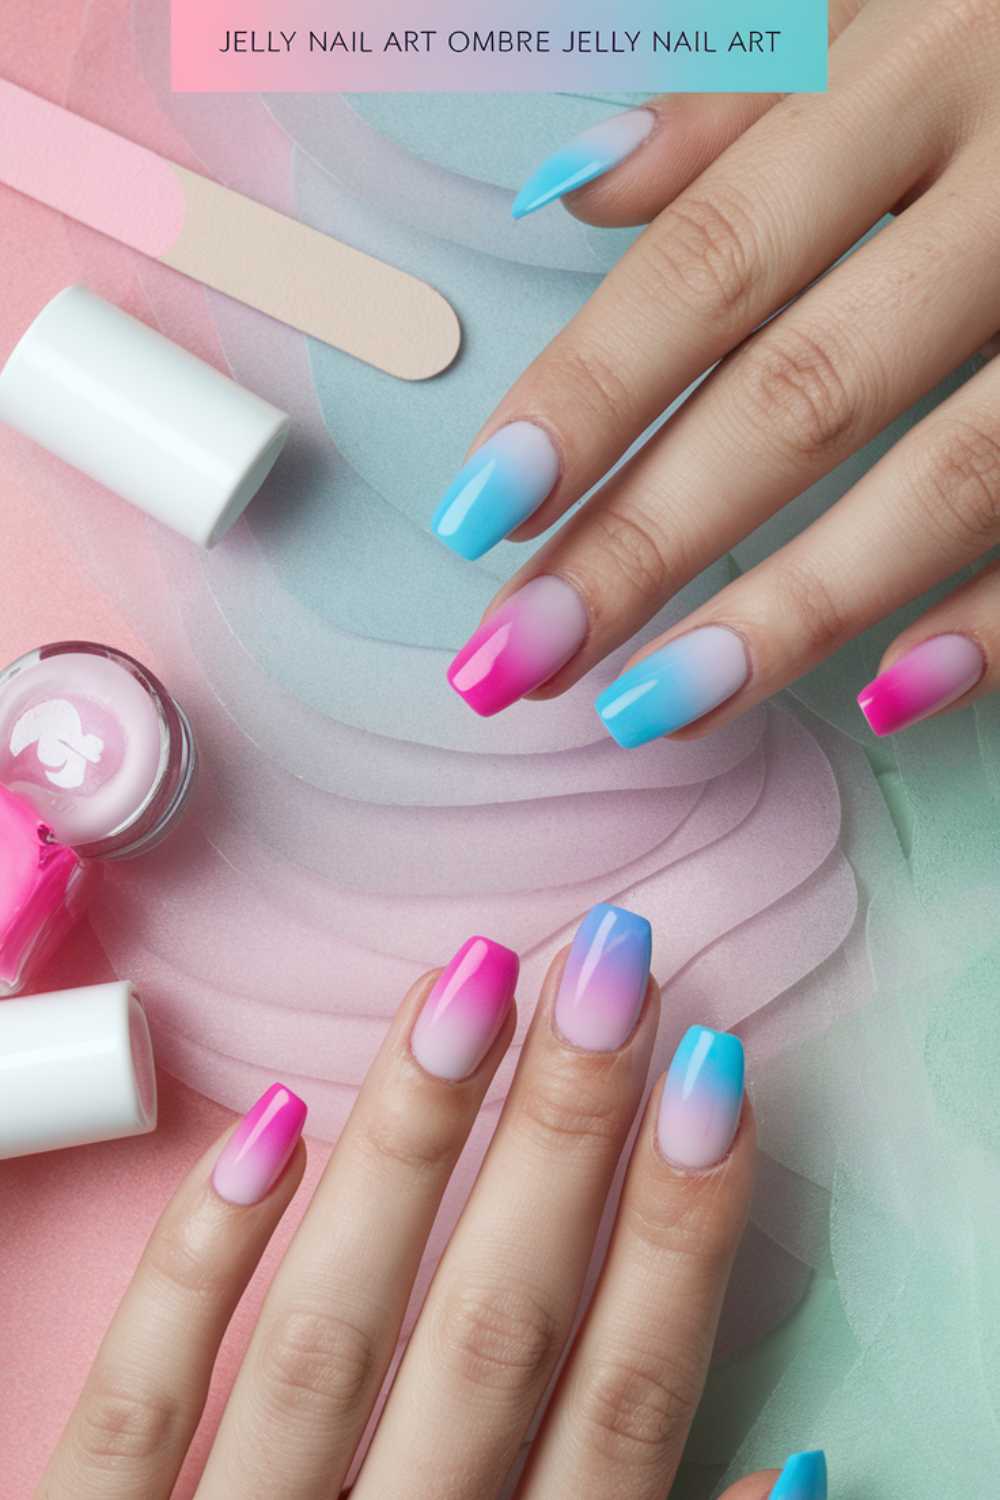
3. Ombre Jelly Nail Art
This design uses a smooth gradient transition that blends two or more colors with a jelly finish. The ombre effect adds depth and dimension, creating a mesmerizing visual flow across your nails.
Step-by-step
- Start with a clear base coat on all nails.
- Apply the first jelly polish color at the base and the second color at the tip.
- Blend the colors using a sponge technique.
- Seal with a clear top coat for a seamless ombre effect.
Picture this: Imagine your nails transitioning beautifully from one vibrant shade to another, creating a soft yet striking gradient. The glossy jelly finish enhances the blend of colors, adding a luminous quality. Every nail appears as a mini canvas of smooth transitions and artistic flair.
4. Jelly Nail Art with Glitter Accents
This design incorporates sparkling glitter accents over a translucent jelly base for a touch of glamour. The glitter adds texture and extra shine, elevating the overall look with a festive vibe.
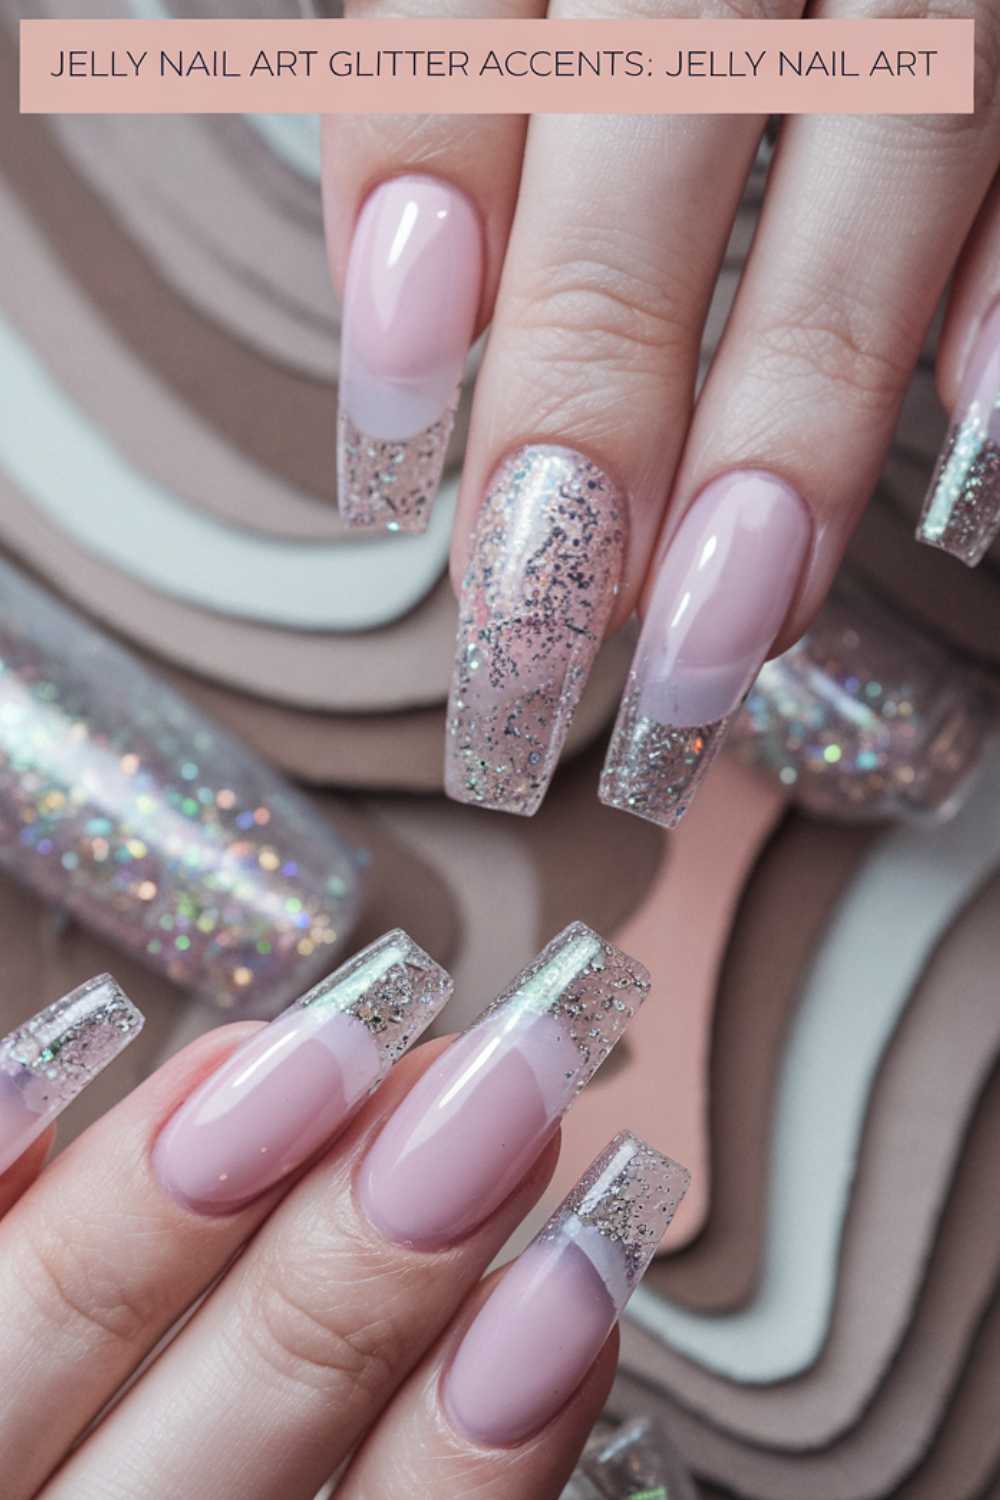
Step-by-step
- Begin with a clear base coat.
- Apply a jelly polish in your preferred color.
- While the polish is still tacky, sprinkle a fine layer of glitter on selected nails.
- Seal with a clear top coat to secure the glitter.
Picture this: Envision your nails shimmering with a gentle layer of glitter that dances across a glossy jelly base. The subtle sparkle adds an extra dimension of elegance and celebration. Each nail catches the light, creating a radiant, festive finish perfect for any occasion.
5. Jelly Nail Art with Matte Finish
This design offers a modern twist by combining a glossy jelly base with a matte top coat. The contrasting finishes create an unexpected texture that is both edgy and stylish.
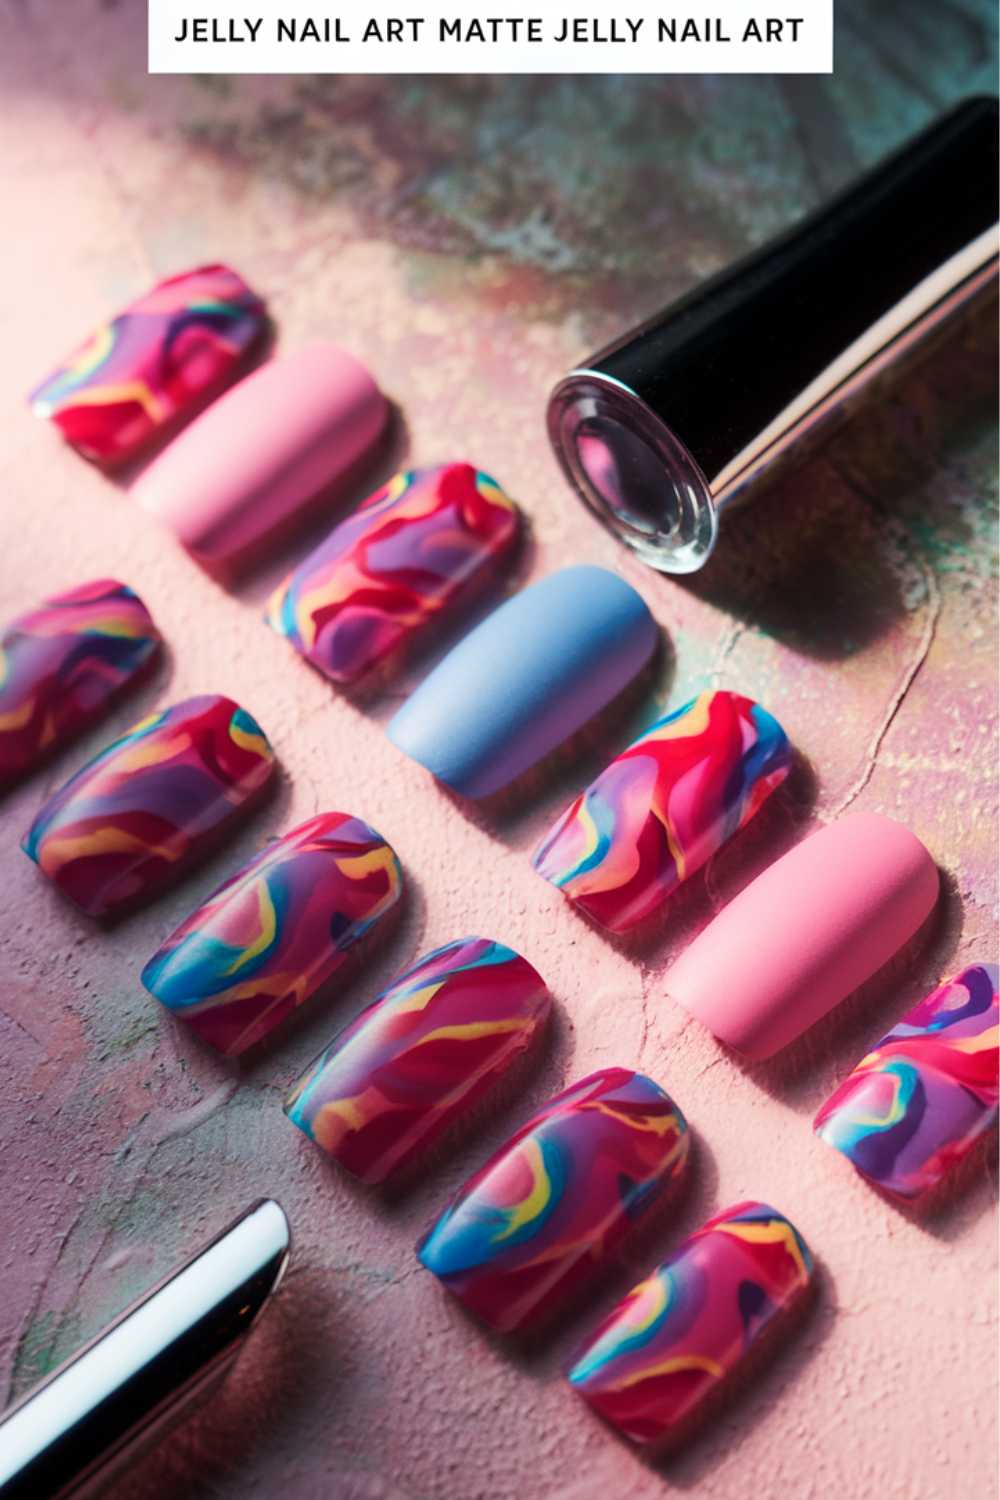
Step-by-step
- Apply a clear base coat to your nails.
- Coat your nails with a translucent jelly polish.
- Once dry, apply a matte top coat over the jelly base.
- Allow to dry completely for a unique finish.
Picture this: Imagine your nails displaying an intriguing contrast between the glossy, vibrant jelly base and the sleek, modern matte finish. The textural interplay creates visual interest and a distinctive style. Every nail becomes a bold statement of contemporary elegance with a playful edge.
6. Color Block Jelly Nail Art
This design uses contrasting blocks of color to create a bold, graphic effect on your nails. The clean lines and vibrant hues blend seamlessly with the jelly finish for an eye-catching result.
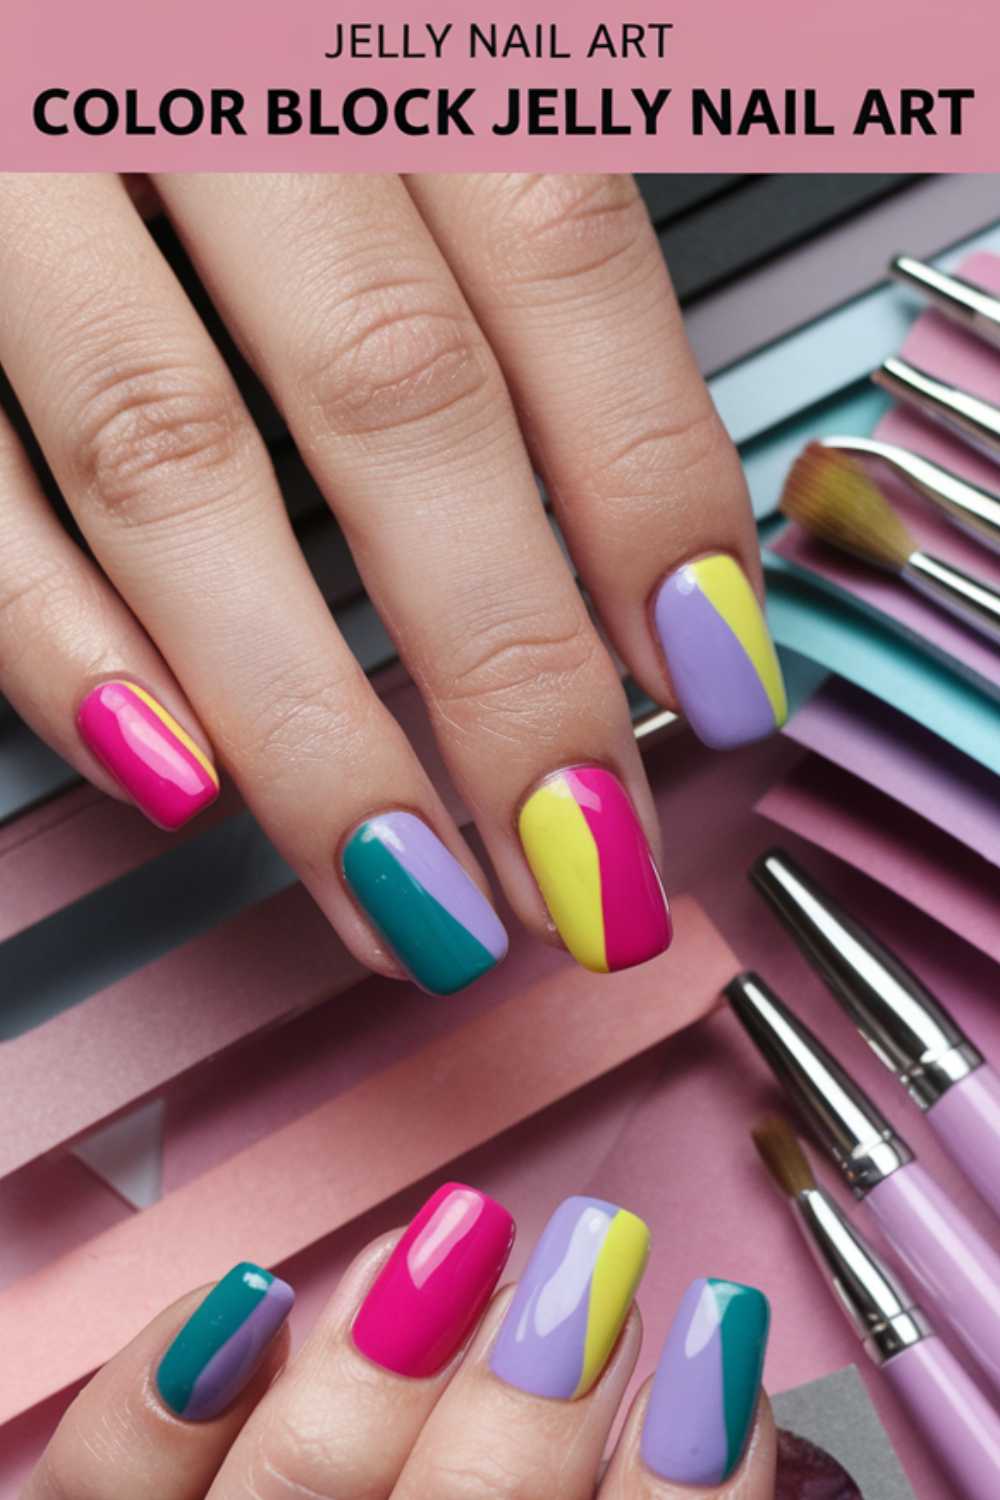
Step-by-step
- Start with a clear base coat.
- Divide your nails into sections using nail tape.
- Paint each section with different jelly polish colors.
- Remove the tape carefully and apply a clear top coat.
Picture this: Envision your nails as a striking collage of vivid color blocks that pop against a glossy jelly background. The precise divisions and bright hues create an energetic, modern look. Each nail stands out with its dynamic interplay of color and clean design, reflecting bold creativity.
7. Jelly Nail Art with Chrome Effects
This design incorporates a chrome effect over a jelly base to add a futuristic touch to your manicure. The reflective, mirror-like finish creates a high-impact, ultra-modern look that is both bold and refined.
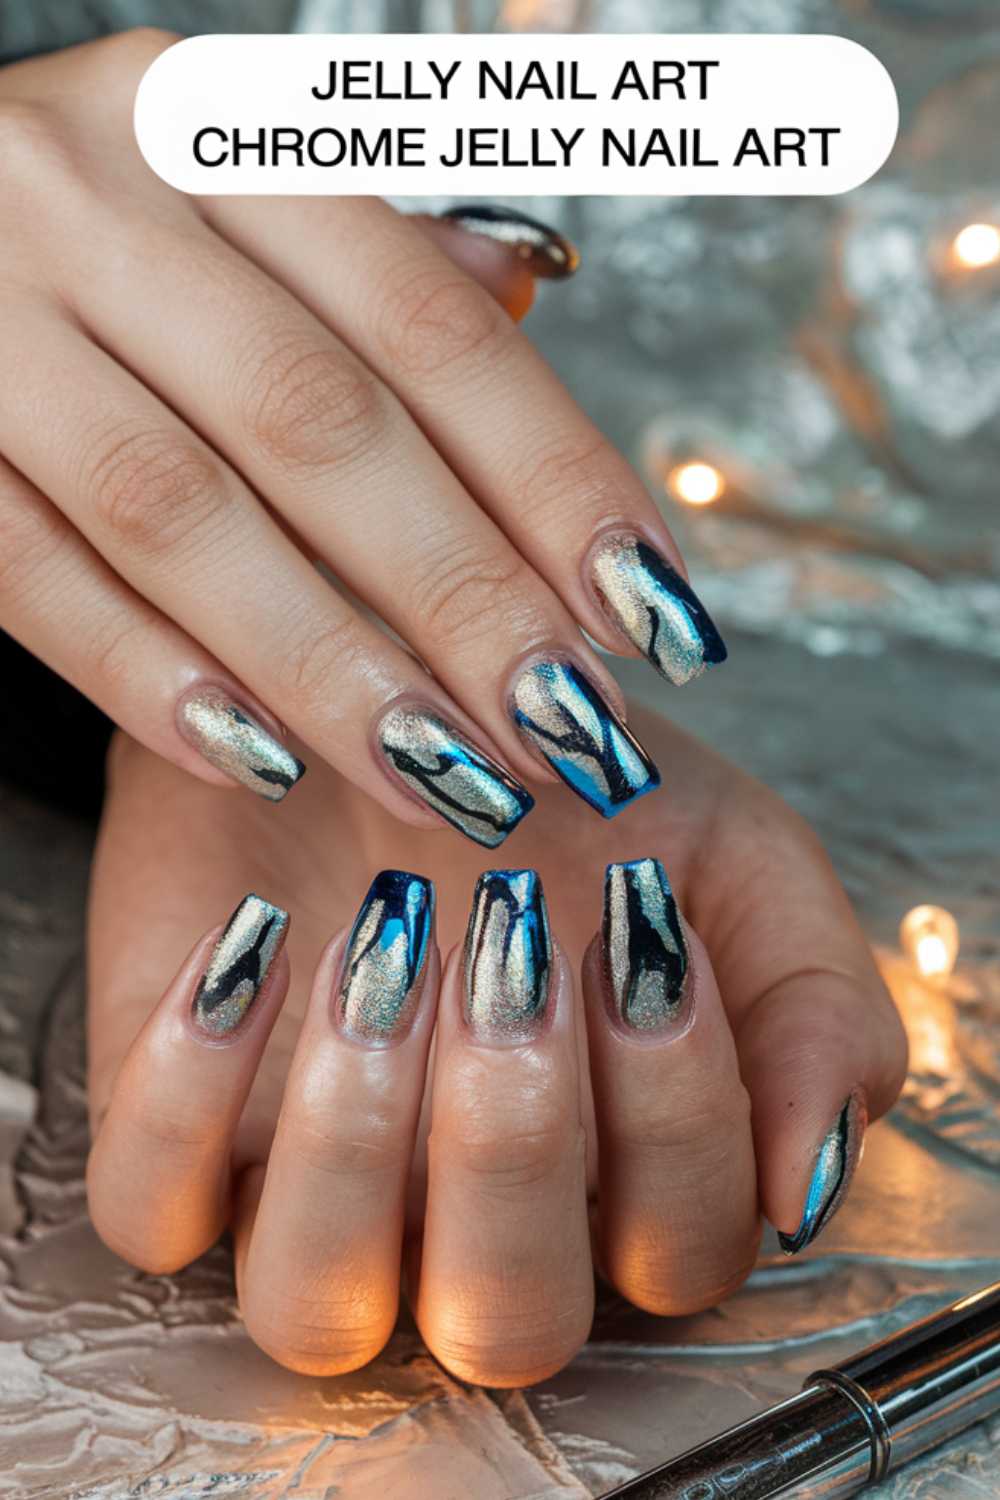
Step-by-step
- Apply a clear base coat to your nails.
- Paint your nails with a translucent jelly polish.
- Once dry, use a chrome powder or chrome polish to create a reflective effect.
- Seal with a clear top coat for extra shine.
Picture this: Imagine your nails transforming into futuristic mirrors with a dazzling chrome overlay on a glossy jelly background. The reflective finish catches every light ray, creating a stunning, high-tech appeal. Every nail exudes an ultra-modern vibe that is both captivating and edgy.
8. Jelly Nail Art with Abstract Designs
This design infuses abstract, freeform patterns over a jelly base for a truly artistic look. The spontaneous strokes and color splashes add a creative and dynamic touch that is perfect for expressing your individuality.
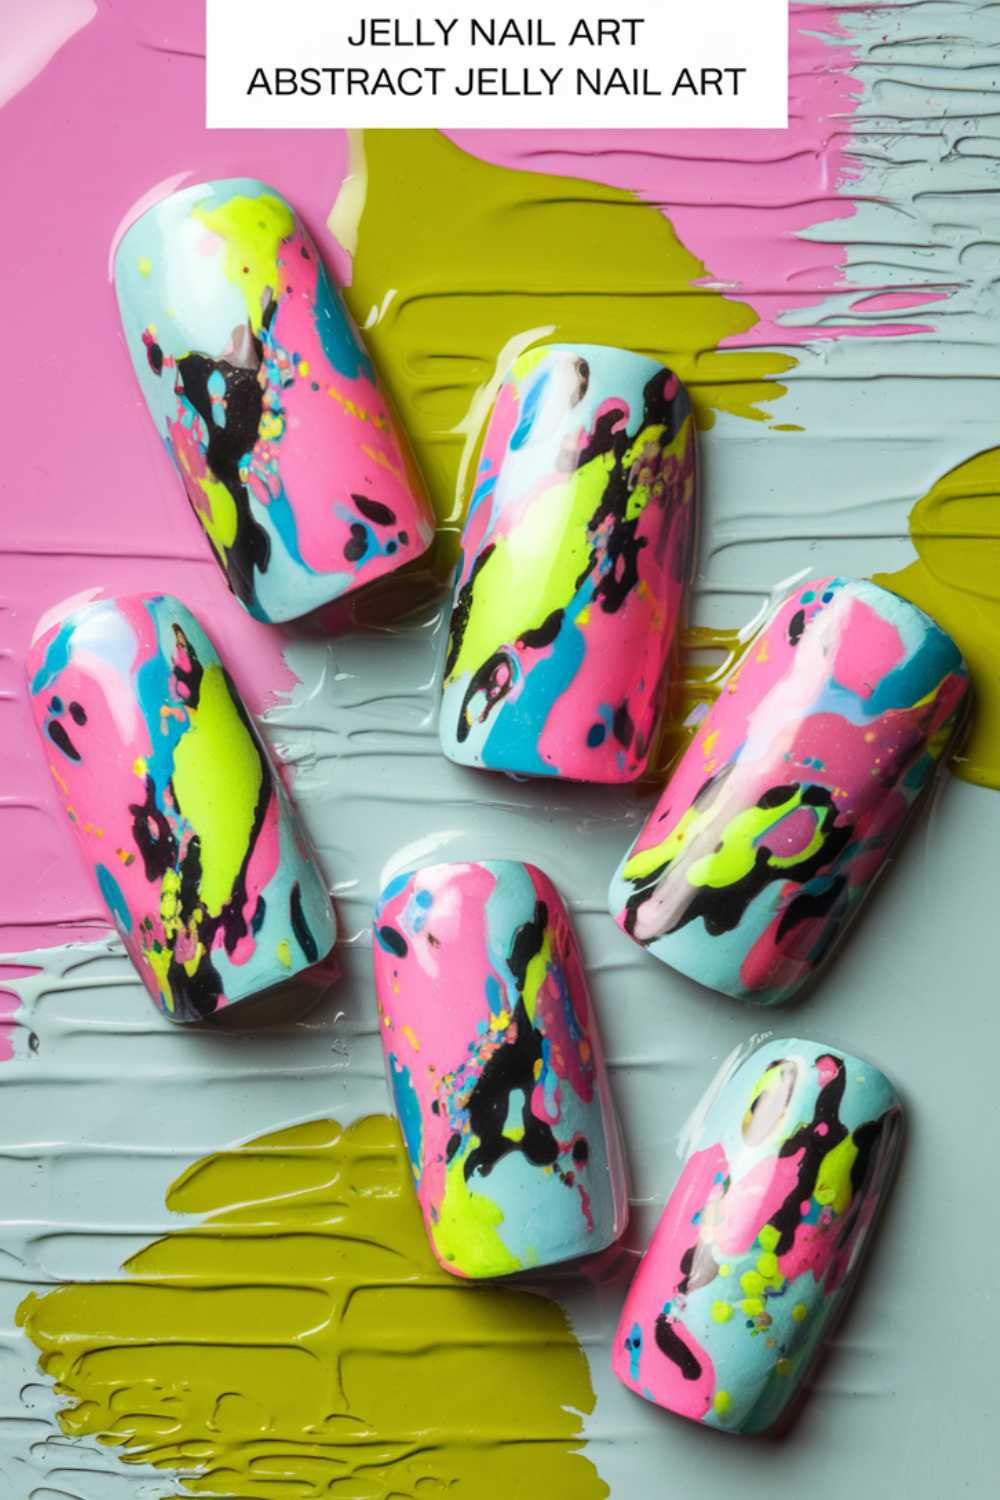
Step-by-step
- Begin with a clear base coat on your nails.
- Apply a jelly polish as the base color.
- Use a fine brush to create abstract strokes and splashes of contrasting jelly colors.
- Finish with a clear top coat to blend the layers.
Picture this: Visualize your nails as vibrant canvases where abstract patterns and splashes of color come together on a glossy jelly base. The freeform designs add a sense of artistic freedom and energy. Each nail becomes a unique masterpiece, reflecting your creative spirit and bold style.
9. Jelly Nail Art with Cat Eye Effects
This design combines the innovative look of jelly nail art with a captivating cat eye effect. The reflective properties create a mesmerizing, shifting color that adds depth and intrigue to your nails.
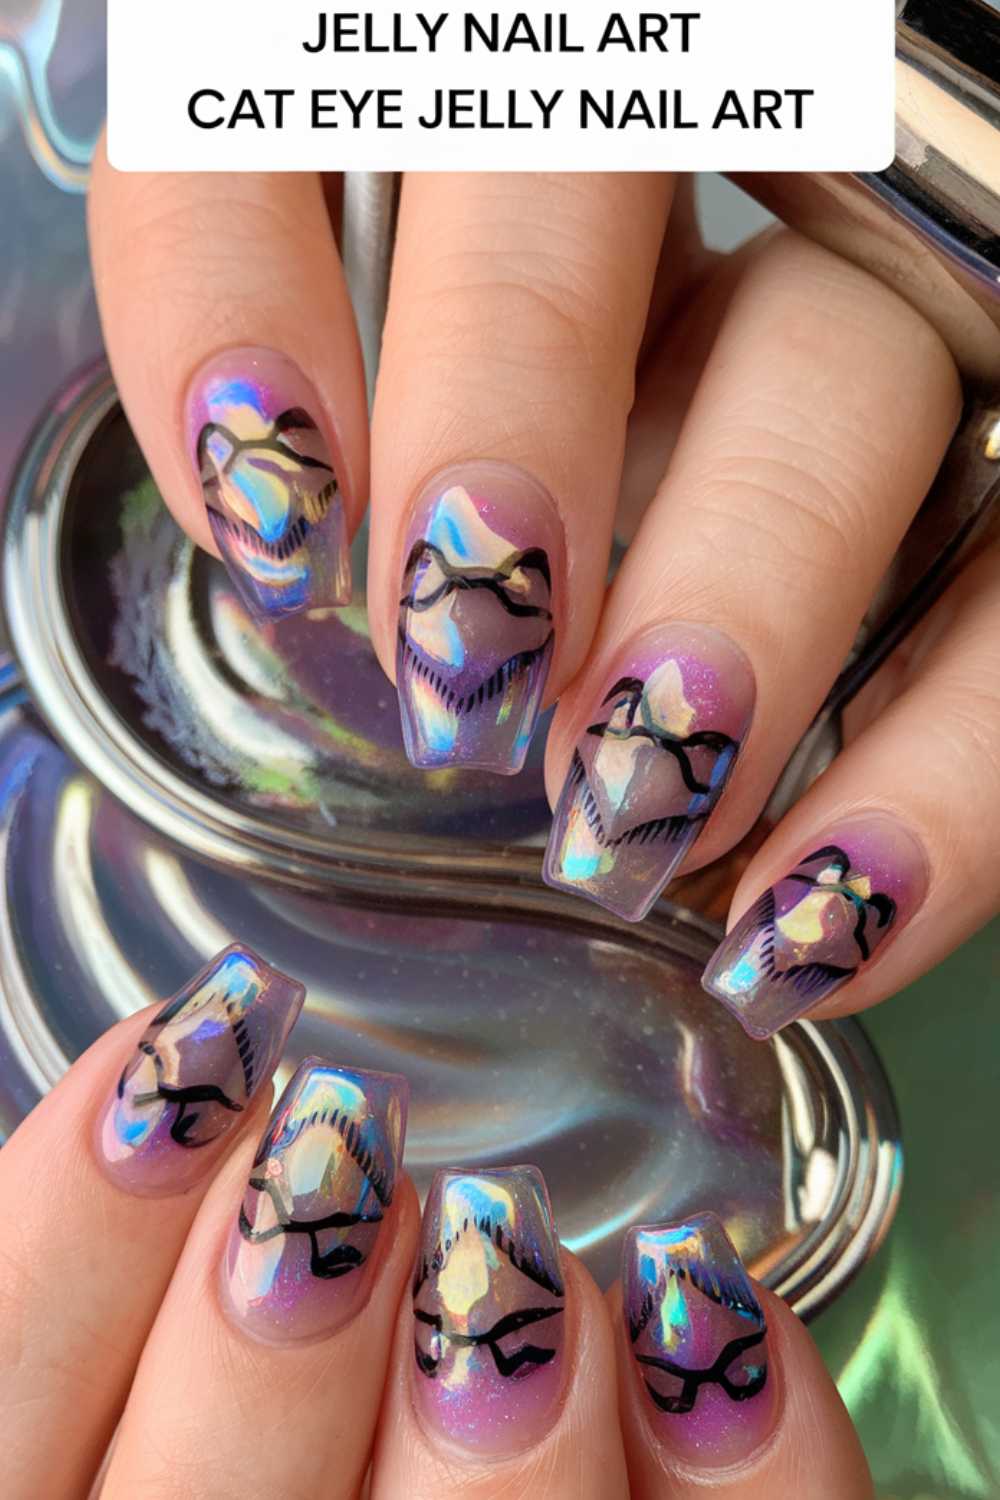
Step-by-step
- Start with a clear base coat to protect your nails.
- Apply a jelly polish designed to produce a cat eye effect.
- Use a magnet (if applicable) to enhance the cat eye effect while the polish is still wet.
- Seal with a clear top coat to lock in the design.
Picture this: Imagine your nails exhibiting a stunning cat eye effect where the colors shift and change with the light. The glossy jelly finish adds a mysterious and dynamic element to each nail. Every nail becomes a captivating display of innovative style and mesmerizing allure.
10. Jelly Nail Art with Minimalist Dots
This design offers a playful twist on the jelly nail trend with a minimalist dot pattern that adds subtle texture and charm. The simple yet effective design is perfect for those who appreciate understated artistry.
Step-by-step
- Apply a clear base coat to your nails.
- Coat your nails evenly with a translucent jelly polish.
- Use a dotting tool to create small, evenly spaced dots across each nail.
- Seal with a clear top coat for a flawless finish.
Picture this: Picture your nails adorned with delicate, evenly spaced dots that punctuate a glossy jelly background. The minimalist design adds a touch of playful sophistication and texture. Each nail exudes refined charm and subtle artistry, creating an effortlessly chic look.
11. Jelly Nail Art with Water Marble Effect
This design blends the fluidity of a water marble effect with the glossy finish of jelly nail art. The swirling patterns create a dynamic and visually striking look that is both modern and artistic.
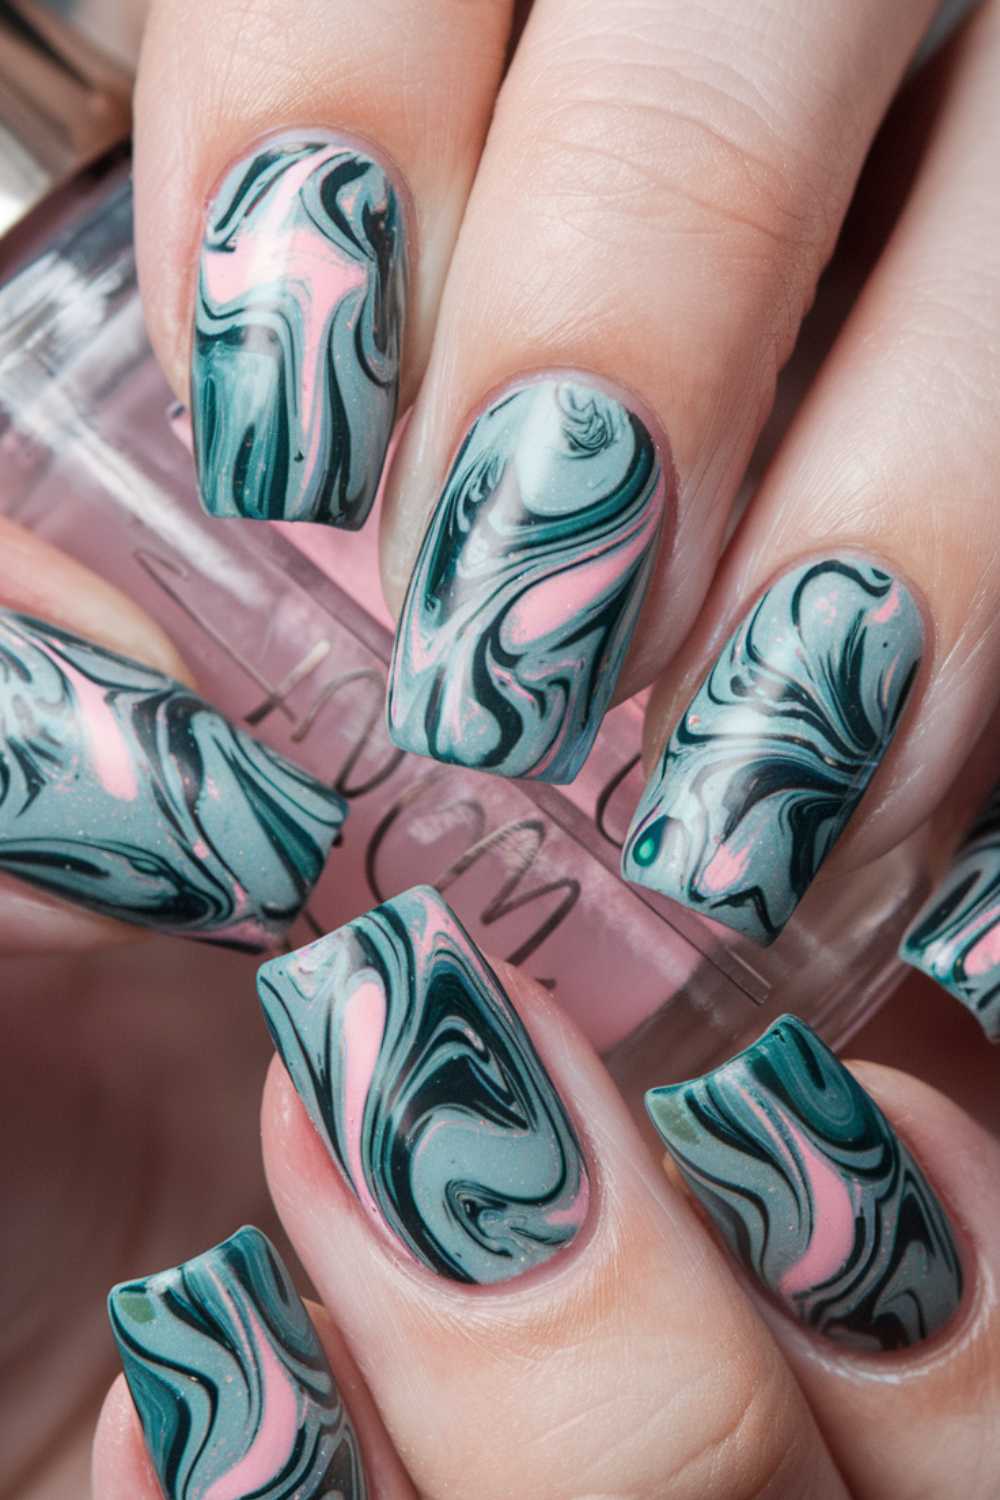
Step-by-step
- Start with a clear base coat on your nails.
- Apply a coat of jelly polish and while it’s still wet, use a water drop technique to create swirling patterns.
- Allow the design to settle and dry completely.
- Seal with a clear top coat for an even, glossy finish.
Picture this: Envision your nails as swirling works of art where fluid water marble patterns mix with a reflective jelly finish. The dynamic motion of the design adds energy and creativity to your manicure. Every nail appears as a captivating blend of modern art and bold style, exuding a sense of innovative elegance.
12. Abstract Jelly Nail Art with Geometric Accents
This design fuses abstract freeform patterns with sharp geometric accents to create a striking and unconventional look. The blend of bold shapes and smooth jelly textures adds a contemporary edge to your nails.
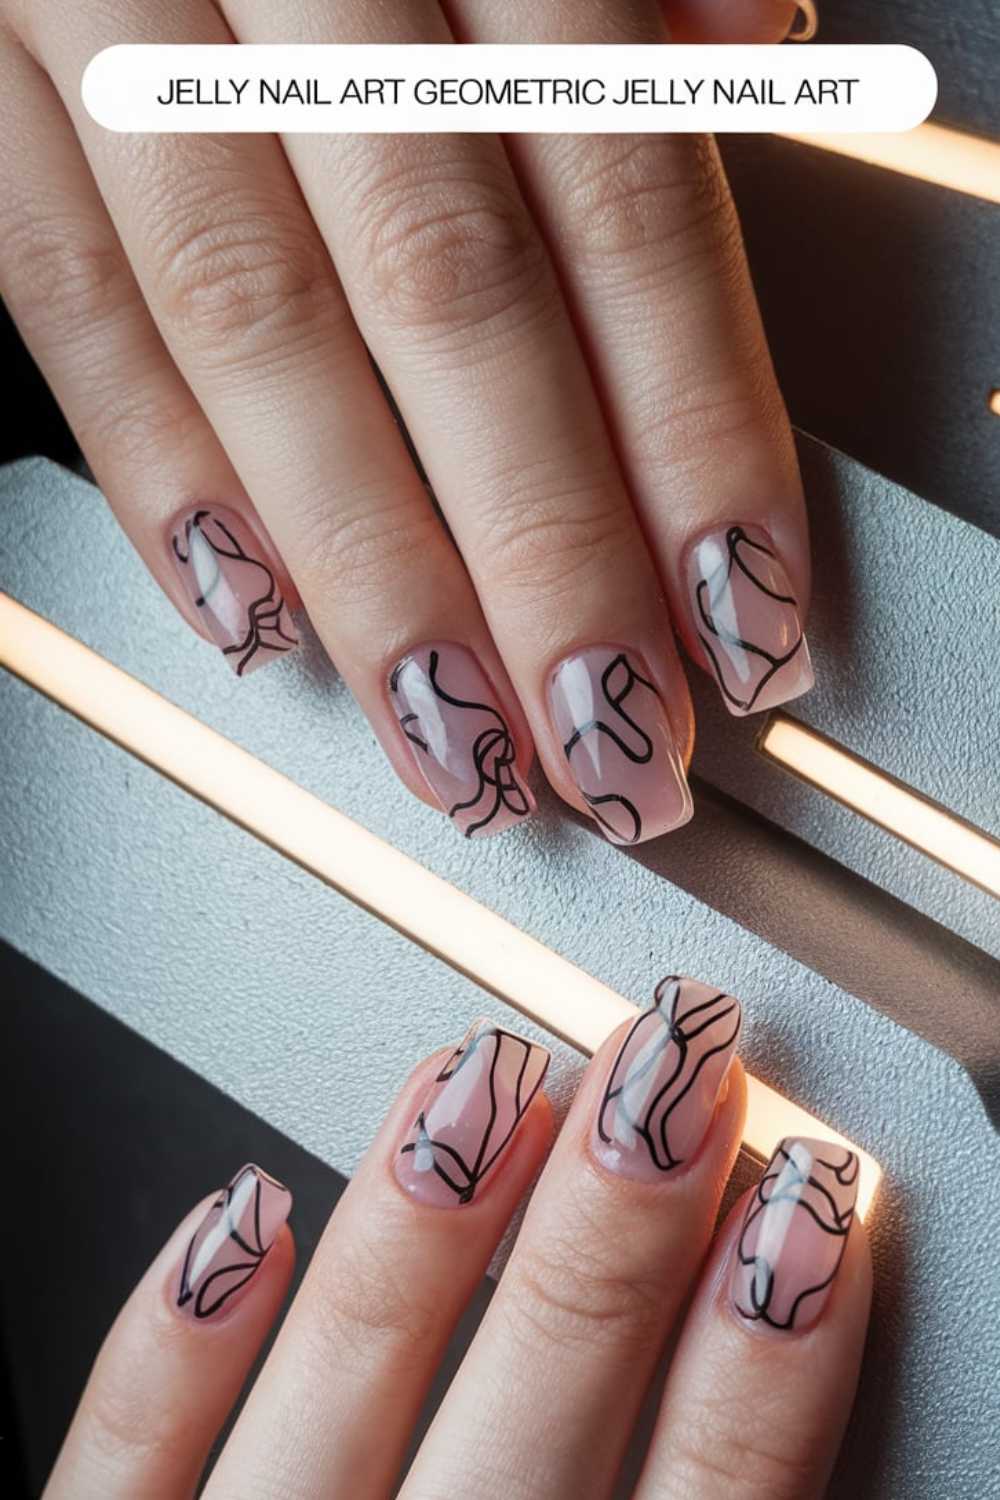
Step-by-step
- Apply a clear base coat to prepare your nails.
- Paint your nails with a translucent jelly polish as the base.
- Using nail tape and a fine brush, create geometric patterns over the jelly base.
- Remove the tape carefully and finish with a clear top coat to merge the layers seamlessly.
Picture this: Imagine your nails transforming into unique canvases where abstract fluidity meets precise geometric lines on a glossy jelly background. The contrasting elements create a bold, dynamic visual effect that stands out with artistic flair. Every nail becomes a celebration of creative innovation and modern style.
Enjoy these 10 inspiring cat eye nail art trends that blend bold style with innovative techniques. Follow these detailed step-by-step guides to transform your nails into stunning expressions of modern artistry and creative passion.
Other Articles

10 Minimalist Ghost Nail Art Ideas
10 Inspiring Cat Eye Nail Art Trends for a Bold Look


