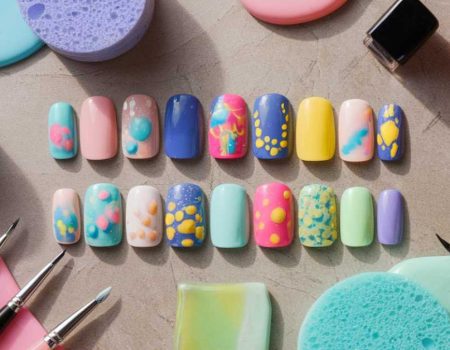
10 Sweet Honey Bee Nail Art Inspirations for a Charming Look

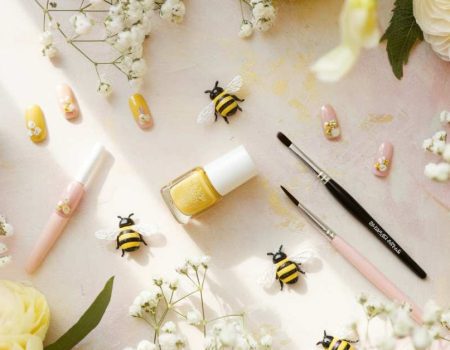
Welcome to a burst of creative inspiration where each nail becomes a canvas buzzing with life and color. In this post, we explore ten delightful honey bee nail art ideas designed to spark your creativity and leave you feeling playful and confident. Whether you adore bumble bee nail art or fancy cute bee nail art designs, these step-by-step guides will help you achieve a look that’s as sweet as honey. Get ready to transform your nails into miniature works of art that celebrate the charm of spring, sunshine, and nature’s vibrant palette.
1. Radiant Honey Bee Nail Art Design
This design features a soft pastel background with intricate honey bee motifs that pop with vibrant detail. It’s a perfect blend of elegance and fun, ideal for those who appreciate delicate yet bold accents.

Step-by-step
- Start with a clear base coat to protect your natural nails.
- Apply a light pastel shade as your background and let it dry completely.
- Using a fine brush, sketch out small honey bee outlines on each nail.
- Fill in the details with black and gold polish, adding tiny dots for eyes.
- Finish with a top coat to seal your design and enhance its shine.
Picture this: Imagine your nails shimmering with a soft pastel glow, highlighted by the delicate traces of buzzing honey bees. Each nail radiates a mix of bold strokes and subtle details, capturing the magic of nature. The final look is playful yet refined, perfect for brightening up any day.
2. Bold Bumble Bee Nail Art Creation
Inspired by the vibrant energy of bumble bees, this design mixes contrasting colors with striking details for a dramatic look. It’s ideal for those who love to make a statement with their nail art.

Step-by-step
- Begin with a white base to provide a clean canvas.
- Paint alternating stripes of black and yellow across your nails.
- Once dry, add small bee icons using a steady hand and contrasting colors.
- Use a dotting tool to create tiny eyes and antennas for each bee detail.
- Seal the design with a glossy top coat for extra shine.
Picture this: Envision nails that boldly showcase the vibrant spirit of bumble bee nail art. The crisp white background contrasts perfectly with the energetic stripes and intricate bee details. Your nails will exude a confident, playful vibe that turns heads wherever you go.
3. Minimalist Honey Bee Nail Art Elegance
For lovers of subtlety, this minimalist approach focuses on clean lines and a simple honey bee accent that delivers maximum charm. It’s a nod to the beauty of simplicity in nail art.

Step-by-step
- Start with a neutral base polish to keep the look understated.
- With a fine brush, paint a single honey bee icon on one accent nail.
- Add delicate dots and lines to enhance the bee’s features without overwhelming the design.
- Repeat the process on one or two nails to maintain balance.
- Complete the look with a protective top coat.
Picture this: Visualize a sophisticated yet playful set of nails, where each design whispers elegance. The solitary honey bee accent shines brightly against a serene neutral background. This refined style offers a chic and modern twist that captures the essence of spring and nature.
4. Playful Honeycomb Bee Nail Art Design
Integrate the geometric beauty of honeycomb patterns with the charm of honey bees for a uniquely captivating nail design. This idea combines symmetry and nature in a fun, unexpected way.

Step-by-step
- Apply a clear or light-colored base coat for a fresh start.
- Draw delicate honeycomb patterns on your nails using a fine-tip brush.
- Place small honey bee illustrations within selected cells of the honeycomb.
- Use contrasting colors to highlight the bee details against the patterned background.
- Finish with a high-gloss top coat to enhance the design’s vibrancy.
Picture this: Imagine your nails turning into tiny windows into a buzzing, organized world. The geometric precision of the honeycomb is playfully interrupted by the spontaneous charm of honey bees. The final result is both intricate and lively, offering an enchanting glimpse into nature’s art.
5. Vibrant Yellow Bee Nail Art Delight
Celebrate the sunny side of life with a design that emphasizes bright yellow hues and bold bee elements. This look is all about radiating positive energy through eye-catching colors.

Step-by-step
- Begin with a bright yellow base coat to create a sunny foundation.
- Use black polish to add bold stripes or patterns reminiscent of bee wings.
- With a steady hand, paint small bee shapes on each nail.
- Accent with a touch of white or gold for added sparkle.
- Seal the design with a durable top coat for longevity.

Picture this: Picture your nails glowing like rays of sunshine, each adorned with charming bee motifs. The bright yellow background creates a cheerful vibe, while the striking bee elements add a touch of playful sophistication. This design is an instant mood booster, exuding warmth and creative flair.
6. Intricate Honey Bee and Daisy Nail Art Fusion
Mix the sweet charm of honey bees with the delicate beauty of daisies for a design that feels fresh and enchanting. It’s a perfect way to merge two iconic symbols of nature into one seamless look.

Step-by-step
- Start with a light blue base to evoke a clear, sunny sky.
- Paint small daisies across your nails using white and yellow accents.
- Add tiny honey bee details fluttering near the flowers.
- Use fine lines to create wings and subtle shading for a three-dimensional effect.
- Apply a top coat to protect and intensify the colors.

Picture this: Envision your nails as a miniature garden in full bloom. The gentle blue background sets a serene stage, while delicate daisies and buzzing honey bees add a touch of whimsy and grace. Every nail becomes a little celebration of nature’s artistry, filled with life and charm.
7. Chic Honey Bee Nail Art with Gold Accents
Elevate your nail game with a chic design that combines classic honey bee motifs with luxurious gold accents. This style exudes a sense of sophistication with a playful twist.

Step-by-step
- Begin with a neutral or soft pastel base to keep the design elegant.
- Use black polish to create a few bold honey bee outlines on each nail.
- Accent the wings or body with striking gold lines for added glamour.
- Delicately fill in small details to bring the bee to life.
- Seal the masterpiece with a shiny top coat for a long-lasting finish.

Picture this: Imagine your nails exuding a glamorous vibe, where every detail sparkles with gold. The sophisticated honey bee accents add a touch of elegance, creating a refined yet playful look. This design transforms each nail into a statement piece, perfect for any occasion that calls for a little extra flair.
8. Whimsical Honey Bee Nail Art with Pastel Swirls
Infuse your nails with a whimsical, dreamlike quality by combining pastel swirls with adorable honey bee designs. This style is fun, creative, and full of soft, inspiring hues.

Step-by-step
- Start by applying a pastel base coat to set a dreamy tone.
- Create soft, swirling patterns using a contrasting pastel shade.
- Once the swirls are dry, add tiny honey bee details strategically along the curves.
- Enhance the bees with delicate dots and lines for a lifelike touch.
- Top off the design with a glossy finish to lock in the colors and details.

Picture this: Picture your nails transformed into a canvas of pastel dreams, with gentle swirls interwoven with tiny, playful honey bees. The soft, flowing patterns evoke a sense of calm and creativity, while the bee accents bring a lively spark. This design is a delightful blend of whimsy and artistry that will leave you feeling inspired.
9. Modern Honey Bee Nail Art with Geometric Flair

This modern design marries the intricacies of geometric shapes with the organic charm of honey bees. It’s a cutting-edge yet approachable look that’s perfect for anyone eager to experiment with style.

Step-by-step
- Begin with a clean base coat and a monochrome background for a modern vibe.
- Use tape or stencils to create sharp, geometric patterns on your nails.
- Add minimalist honey bee icons within or adjacent to the shapes.
- Carefully fill in details using contrasting colors to make the design pop.
- Seal everything with a high-gloss top coat for durability and shine.

Picture this: Imagine your nails as a fusion of modern design and natural beauty. The geometric elements create a sleek, contemporary backdrop while the delicate bee details add a touch of playful artistry. This bold yet refined style is sure to capture attention and spark conversation.
10. Dreamy Honey Bee Nail Art with Floral Embellishments
Combine the allure of floral patterns with the captivating presence of honey bees for a truly dreamy nail design. This look is all about celebrating nature’s charm with intricate details and soft hues.

Step-by-step
- Start with a pale, dreamy base color to evoke a sense of calm and beauty.
- Paint delicate floral patterns across your nails using complementary pastel shades.
- Introduce small honey bee accents fluttering among the blossoms.
- Enhance the design with fine lines to detail the bee and flower features.
- Finish with a top coat to ensure your design stays fresh and vibrant.

Picture this: Envision your nails as a peaceful garden where every detail tells a story. The soft floral patterns gently frame tiny, lively honey bees, creating a harmonious balance of elegance and energy. Each nail becomes a work of art, evoking feelings of joy, serenity, and natural beauty.
These ten sweet honey bee nail art inspirations are your gateway to transforming your nails into charming masterpieces. Each design is crafted to infuse your style with playful creativity and the natural beauty of buzzing bees. Enjoy experimenting with these ideas, and let your nails shine with a touch of nature’s magic.
