
Spring is bursting with color and creativity, and there’s no better time than now to experiment with some fresh nail art designs that capture the joyful spirit of Easter. Whether you’re into pastel hues, playful motifs, or elegant details, these ideas are crafted to help you achieve a fun and festive look. Dive into these step-by-step guides and discover how easy it is to create stunning Easter nail art that celebrates the season in style.
1. Pastel Bunny Nails
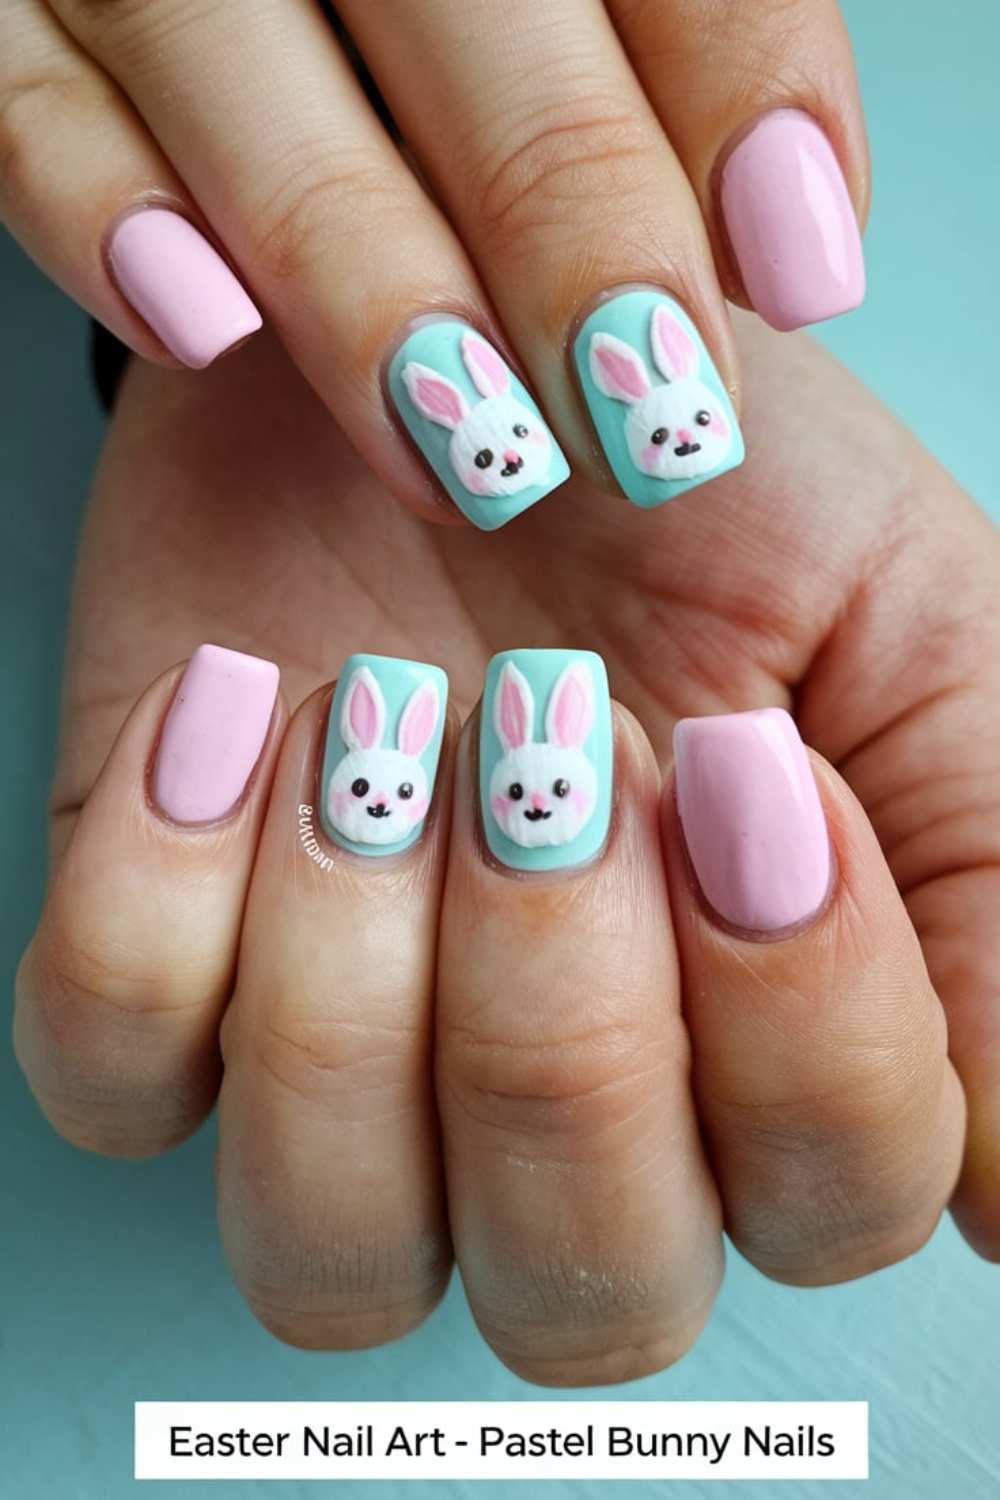
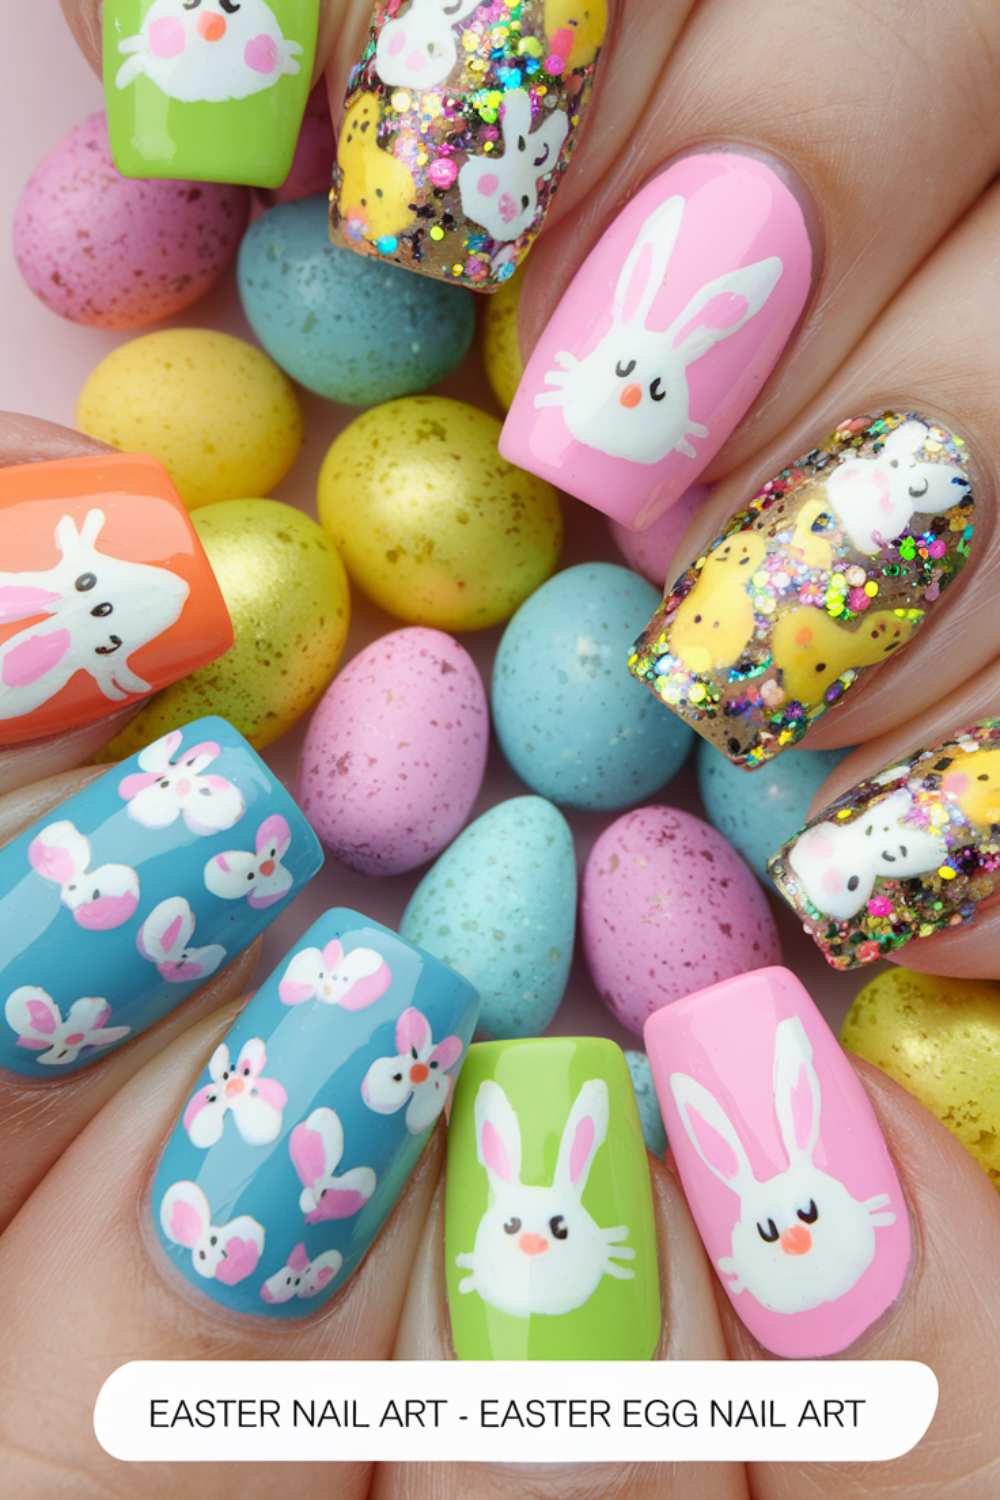
Get ready to hop into spring with this adorable pastel bunny design. The soft hues and cute bunny details make this nail art a delightful treat for your fingertips.
Step-by-step
Begin by applying a light pastel base coat on all your nails. Allow it to dry completely before drawing cute bunny outlines using a fine nail art brush. Next, add soft blush accents to the bunny’s ears and a small dot for the nose.
- Base coat in pastel pink or lavender.
- Draw bunny shapes with white or cream polish.
- Add blush details to complete the look.
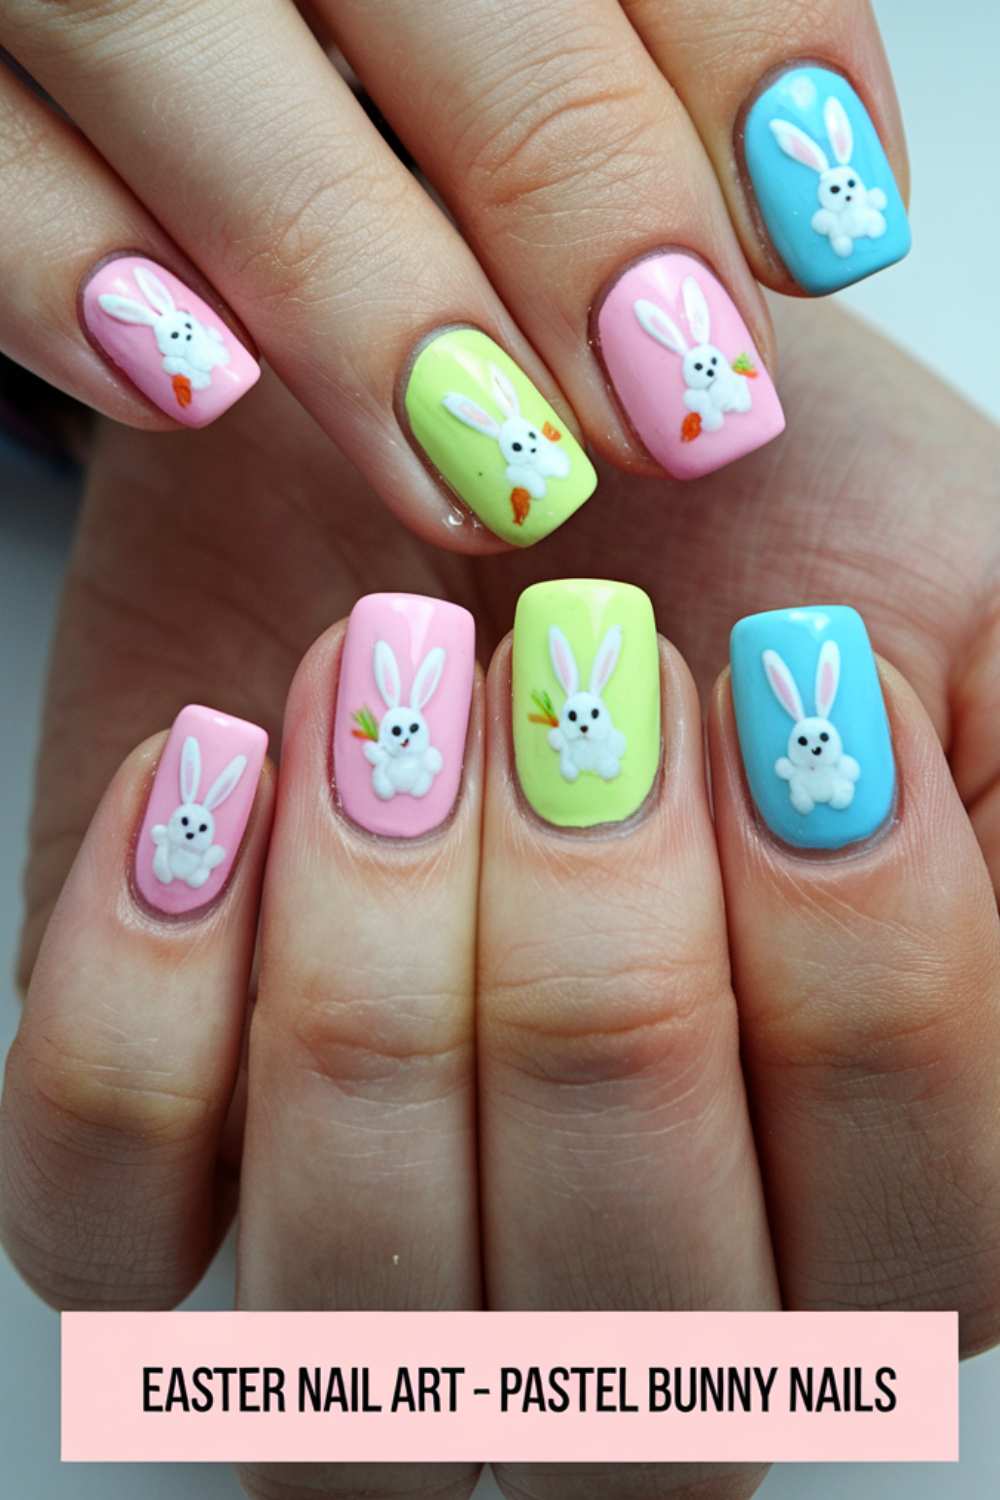
Picture this: Imagine your nails transformed into tiny canvases where a sweet bunny playfully graces each fingertip. The pastel colors blend effortlessly, evoking the gentle warmth of a spring morning. Every glance at your hands will remind you of a cheerful, vibrant Easter celebration.
2. Easter Egg Accent Nails
Celebrate the season with a design inspired by the classic Easter egg. This look pairs a solid base with intricate patterns to bring out the fun of Easter.
Step-by-step
Start with a neutral base color on all nails to create a uniform look. Choose one accent nail to transform into an Easter egg masterpiece using a mix of vibrant hues and delicate patterns. Use a thin brush to add polka dots or swirls that mimic the decorated eggs of the season.
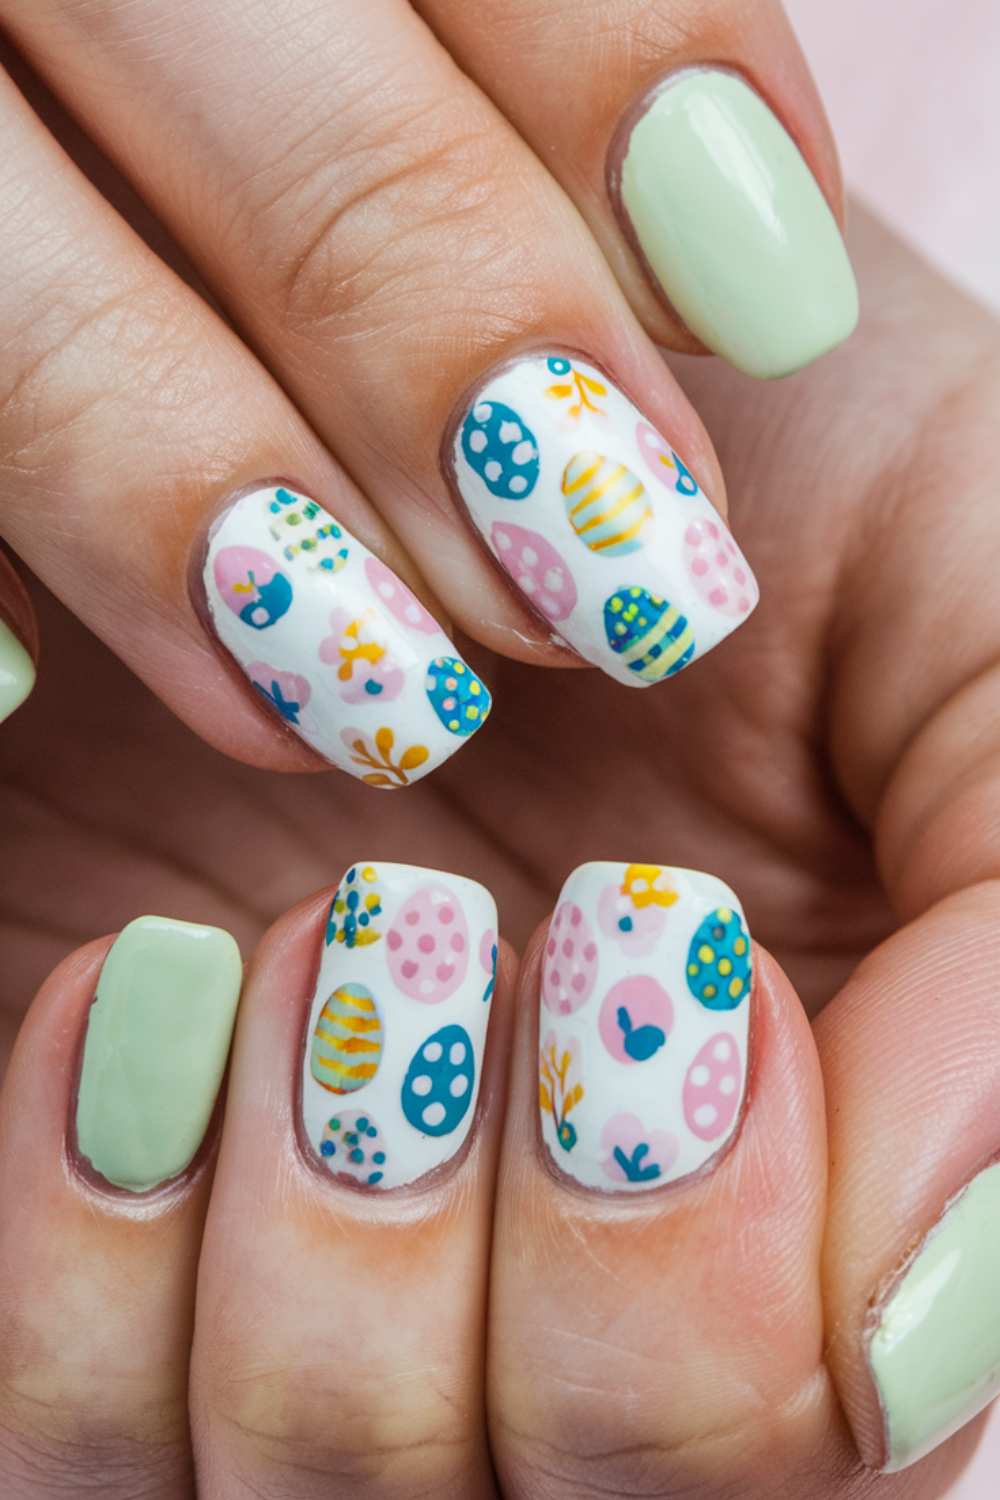
- Apply a neutral base color on all nails.
- Select one nail as the accent nail.
- Use multiple colors to paint intricate patterns resembling Easter eggs.
Picture this: Visualize a single accent nail standing out like a work of art, adorned with playful patterns that mimic a basket of beautifully decorated Easter eggs. The contrast of the subtle base and the vibrant details makes each nail a conversation starter. It’s a creative nod to tradition with a modern twist.
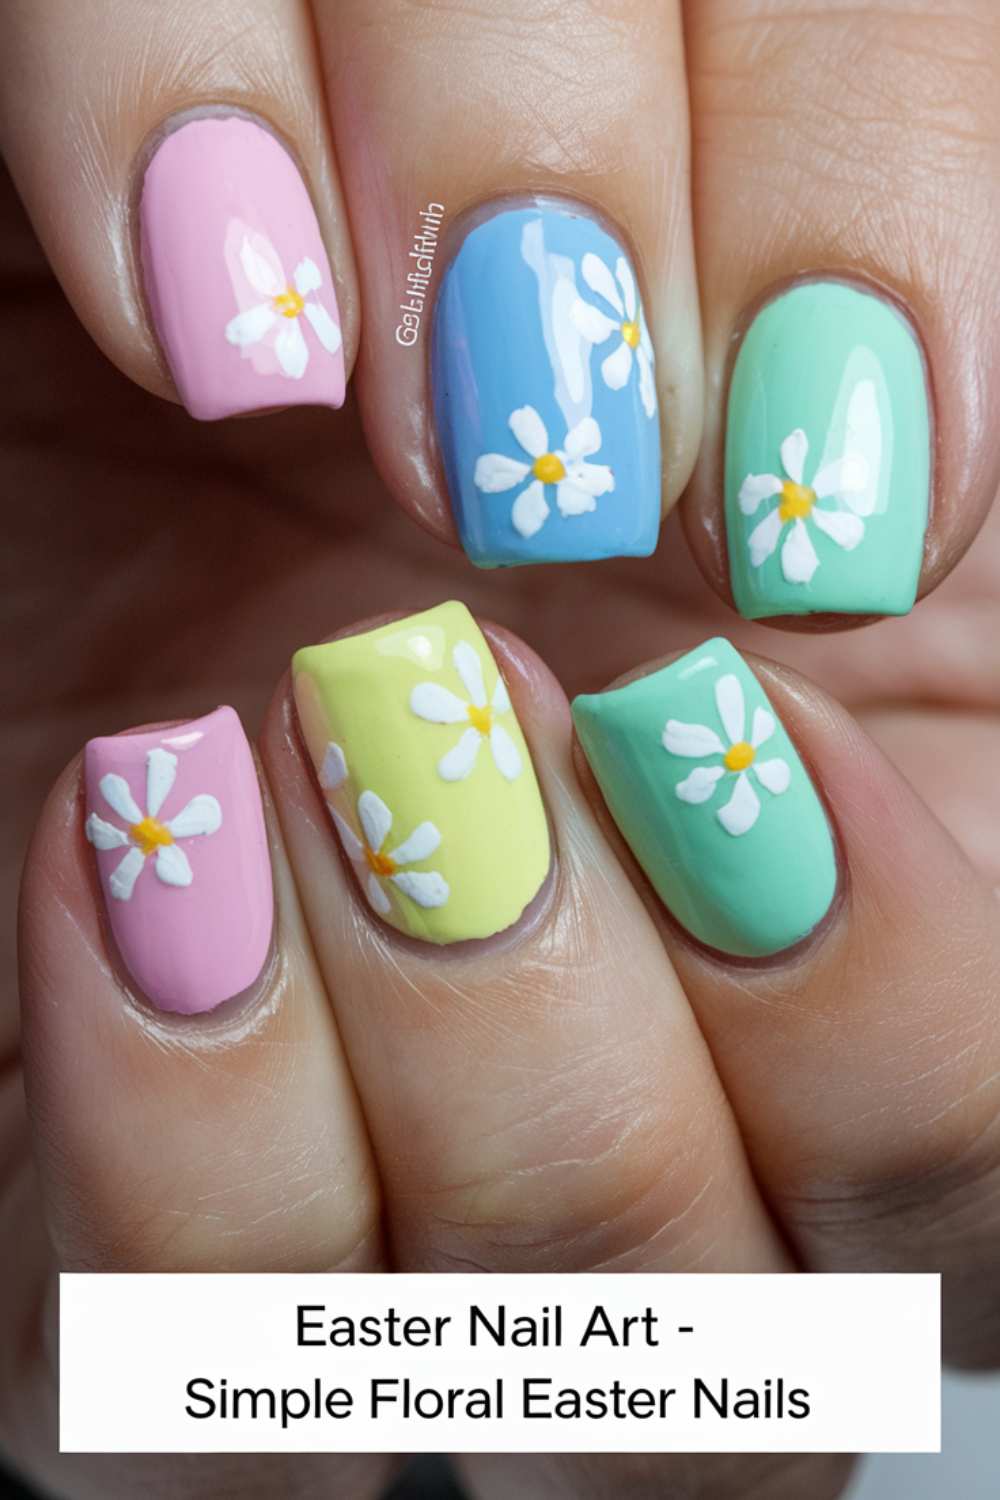
3. Simple Floral Easter Nails
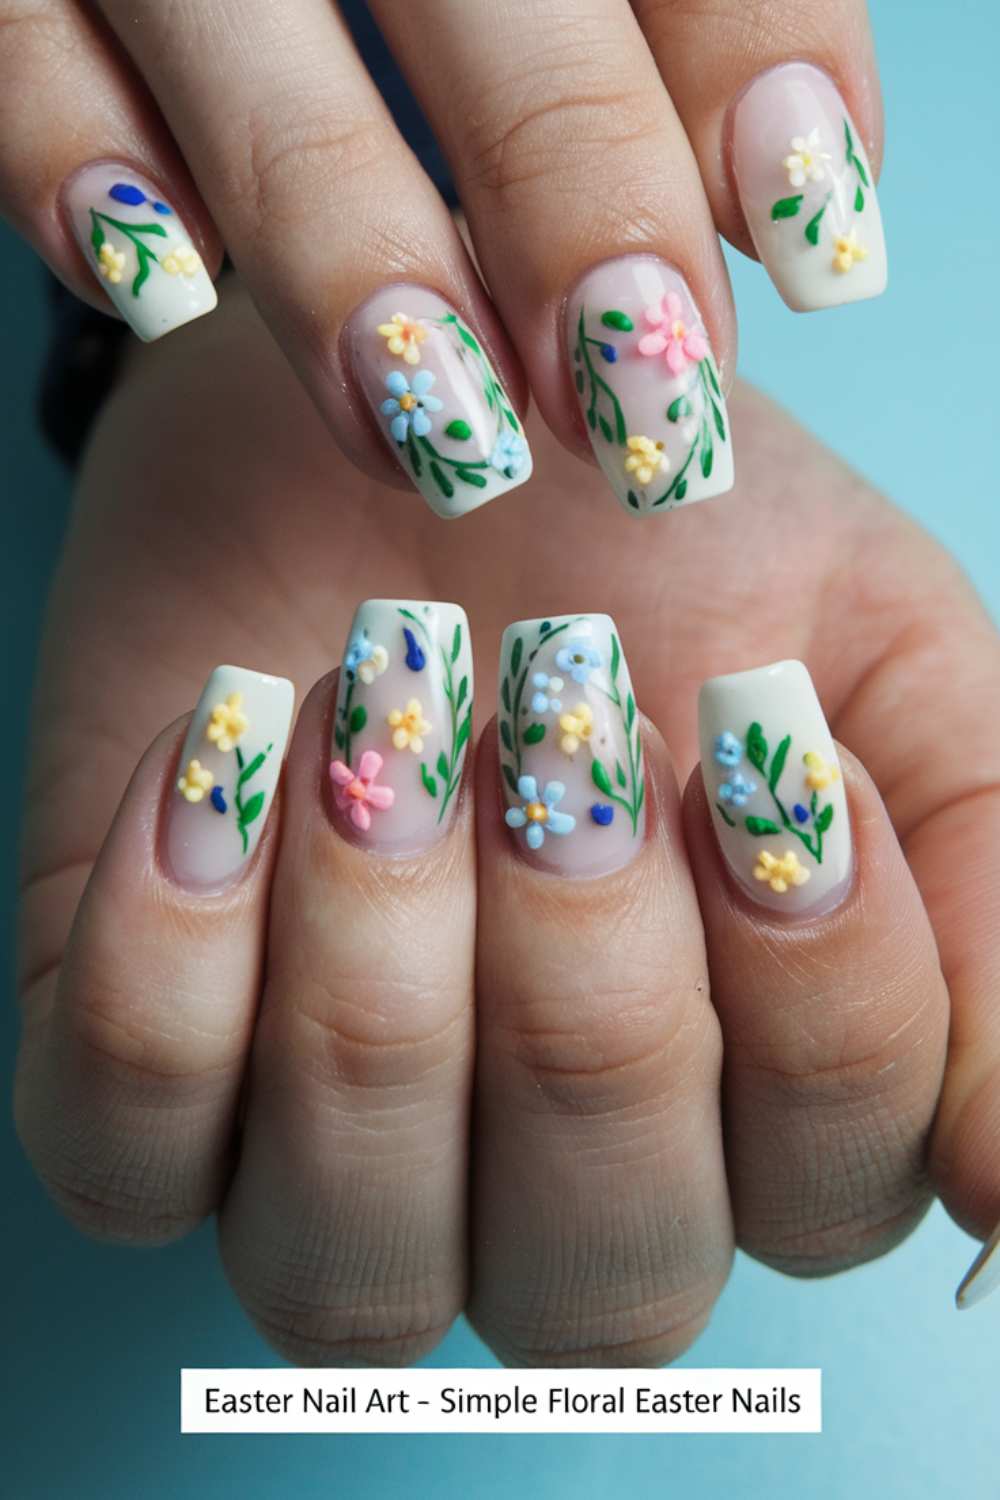
Floral designs add a touch of elegance to your Easter nail art. This look blends simplicity with a dash of nature’s beauty.
Step-by-step
Apply a soft, light base on your nails and let it dry thoroughly. Then, using a fine brush, create delicate floral patterns with a slightly darker shade to give your nails depth and charm. Highlight some petals with a touch of white to make them pop.
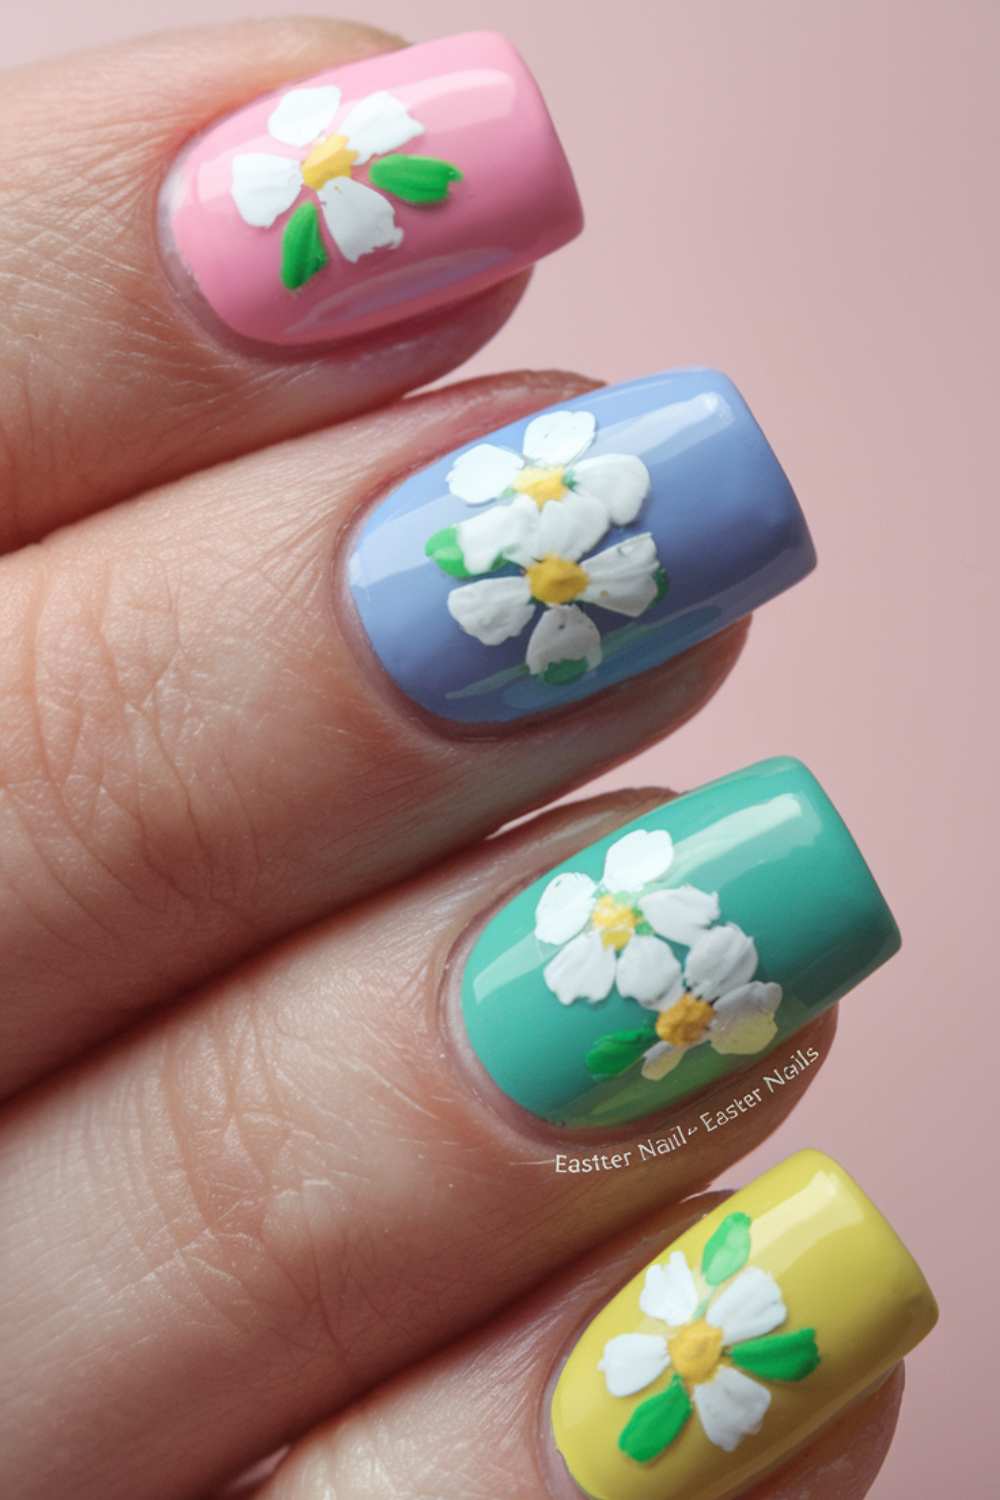
- Base coat in a light, neutral shade.
- Paint small, delicate flowers in a complementary color.
- Add highlights to petals for extra dimension.
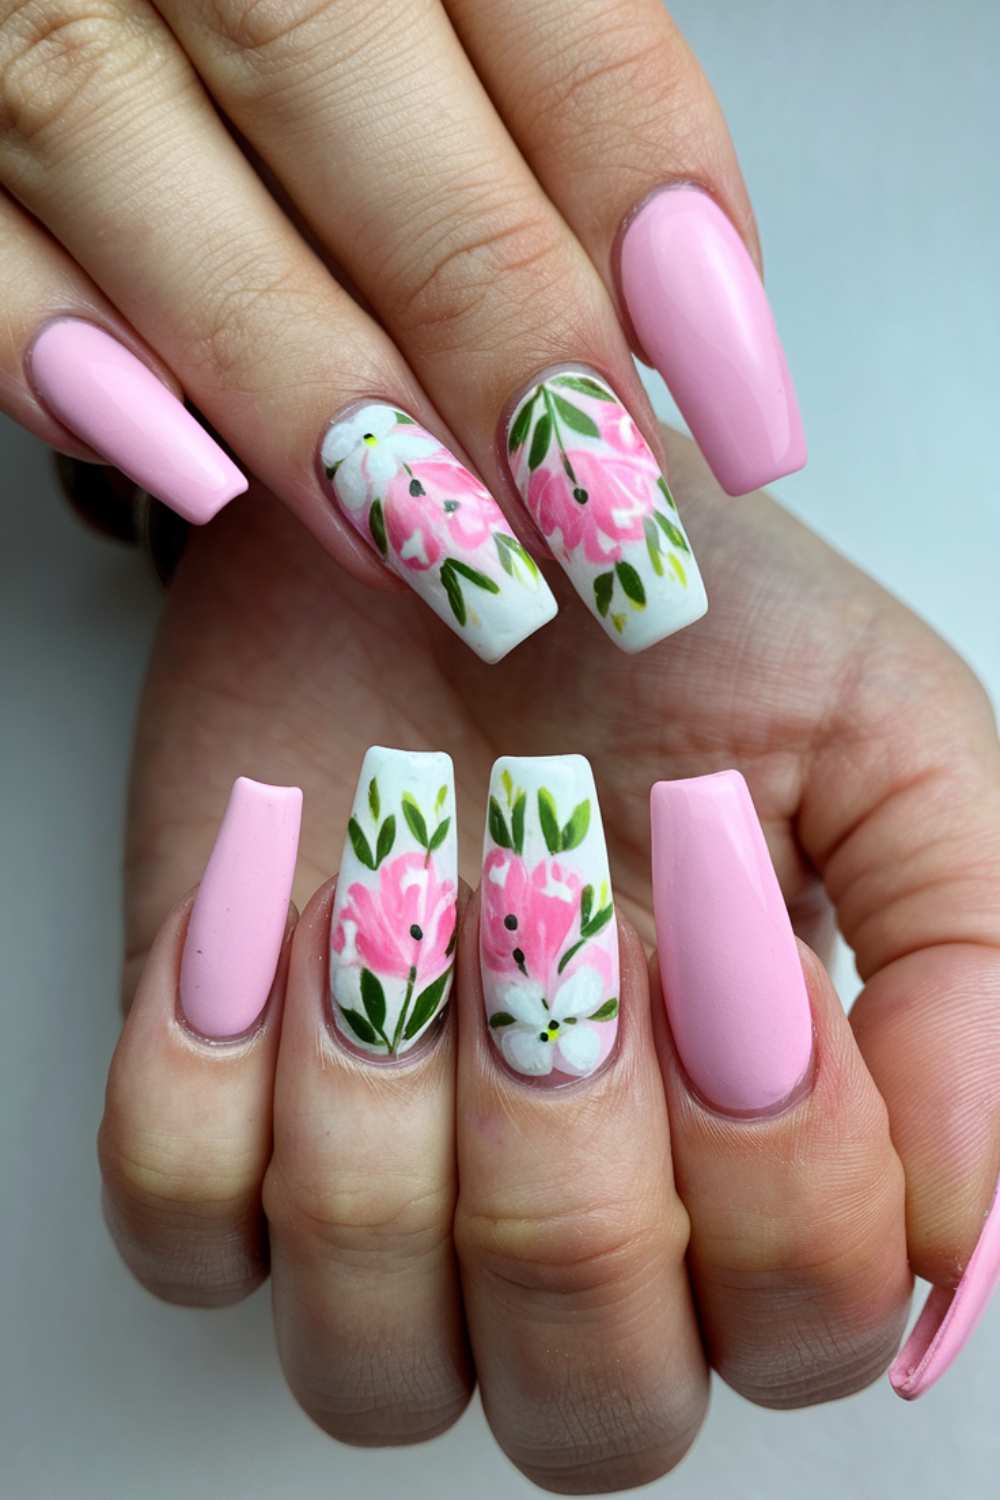
Picture this: Envision your nails blossoming with delicate floral details that evoke the freshness of spring. Each finger becomes a miniature garden, radiating subtle sophistication and grace. The overall look is both refined and inviting, perfect for celebrating Easter in style.
4. Easter Egg Nail Art
Inspired by the colorful tradition of Easter eggs, this design uses bold colors and dynamic patterns to create a lively nail art look.
Step-by-step
Begin with a bright base coat to set the stage for a festive design. Use contrasting colors to paint abstract egg shapes and patterns on each nail. Finish with a glossy top coat to seal in your artwork and add shine.
- Apply a vibrant base coat on all nails.
- Paint abstract egg shapes using bold, contrasting colors.
- Seal with a glossy finish to enhance the look.
Picture this: Imagine your nails bursting with energy and color, as if each one is a tiny Easter egg ready for display. The dynamic shapes and vivid hues capture the spirit of the holiday perfectly. Every detail shines, giving you an effortlessly festive vibe.
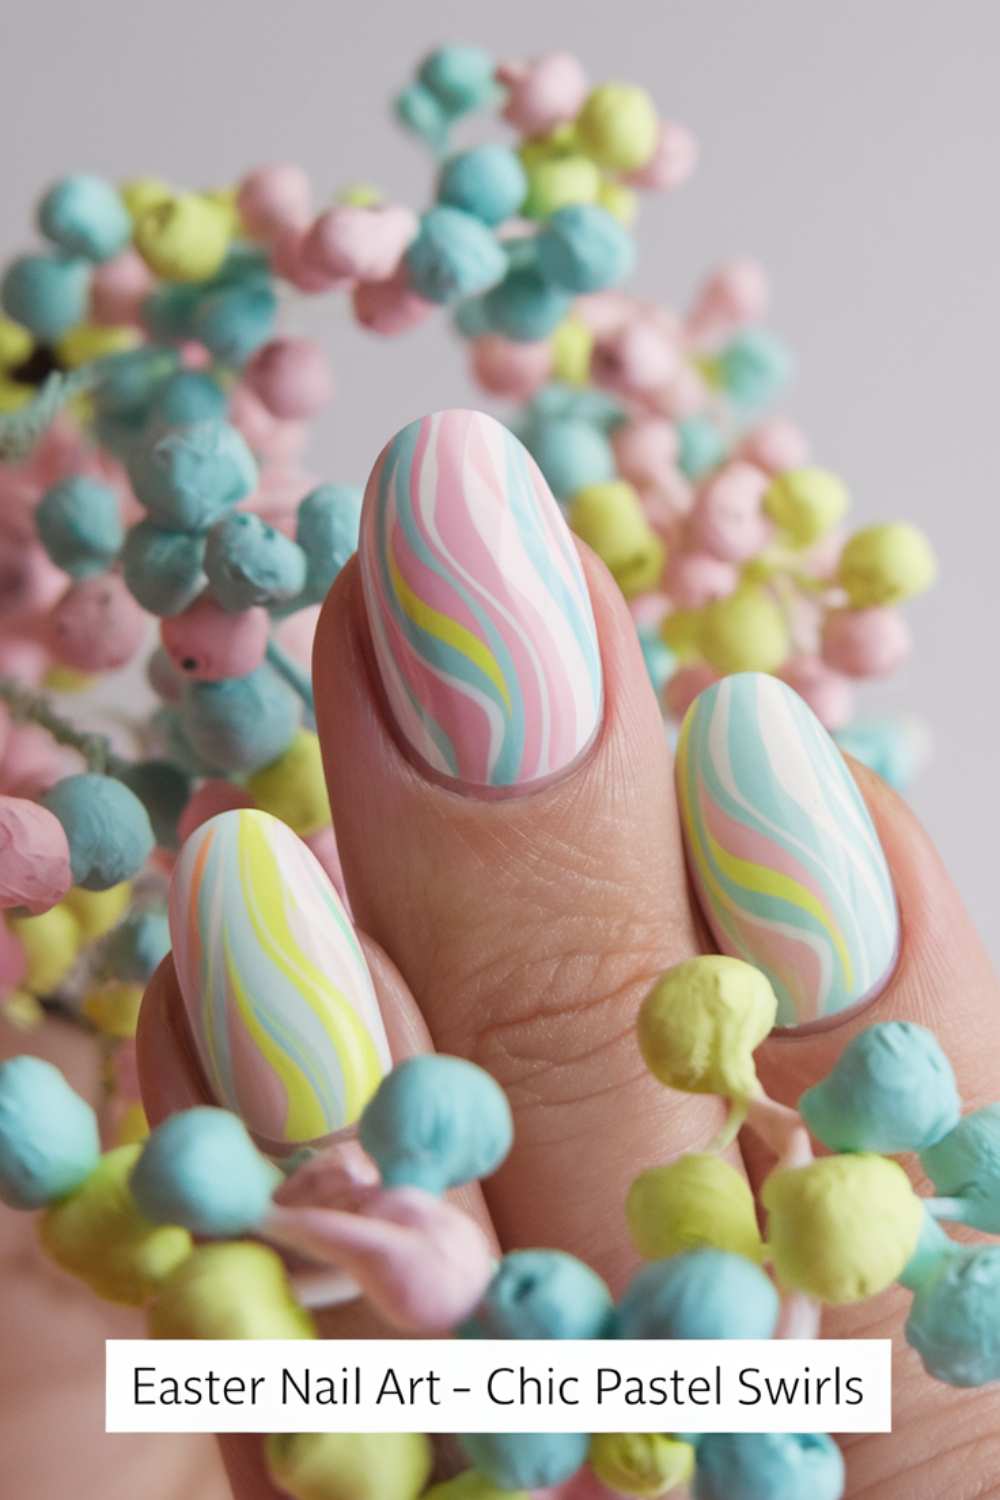
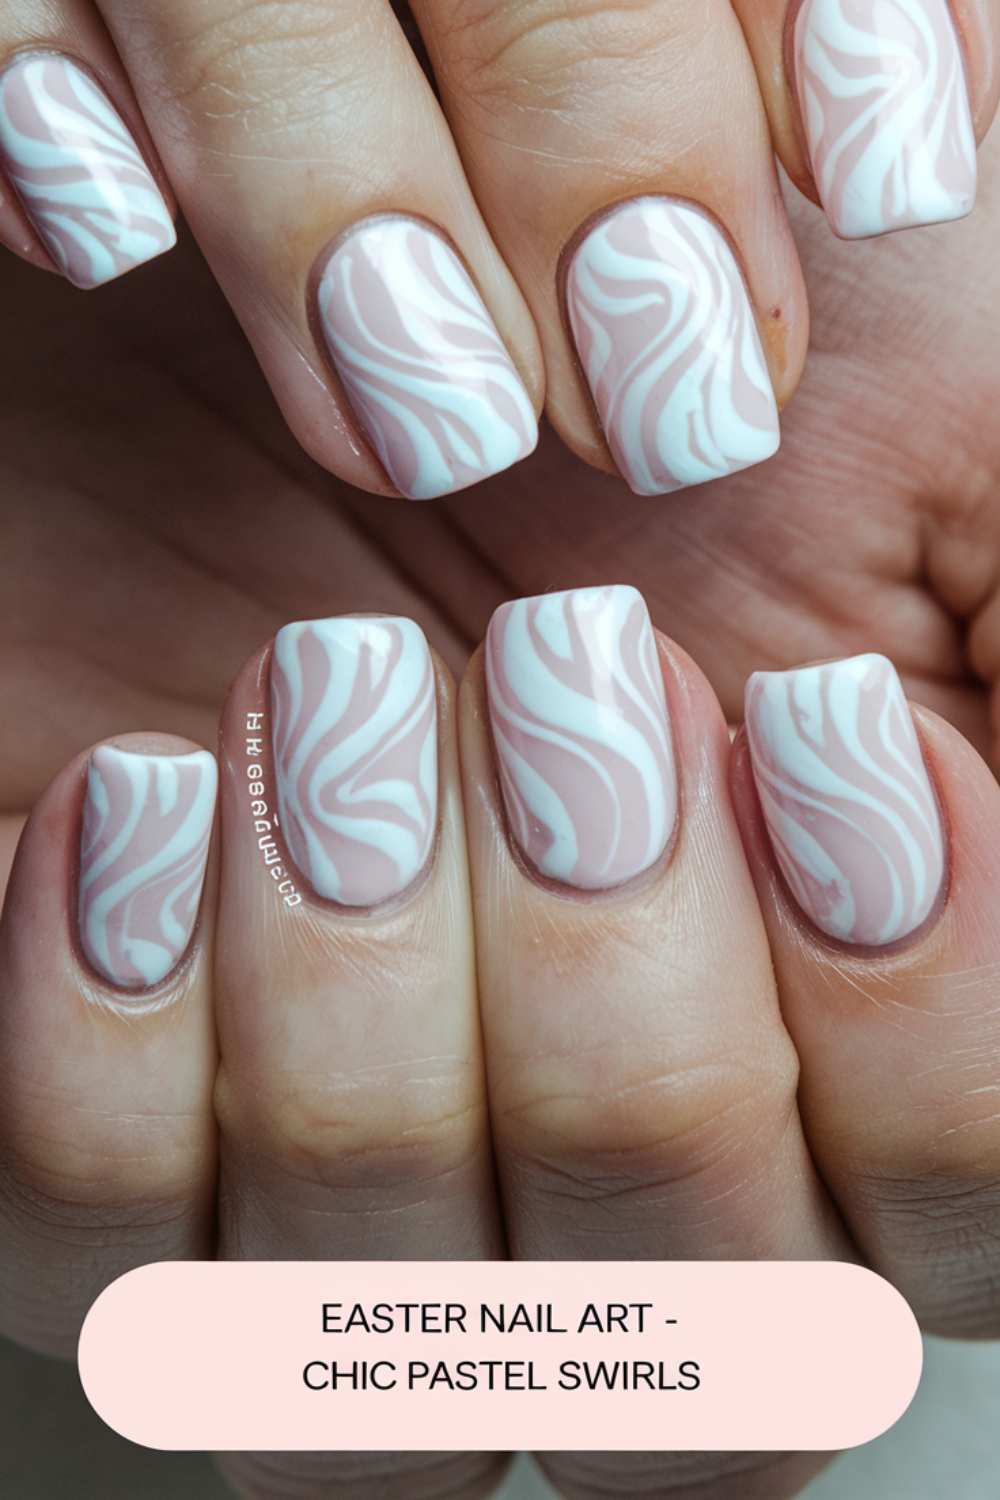
5. Chic Pastel Swirls Nail Art
Add a touch of elegance with a swirl design that combines soft pastel colors for a chic and modern look.
Step-by-step
Select a pastel base and allow it to dry completely. Using a thin brush, create gentle, flowing swirls on your nails with a slightly darker shade. Enhance the design by adding a few fine white lines to emphasize the movement and texture.
- Base coat in a pastel shade like mint or peach.
- Draw swirling patterns in a darker tone.
- Accentuate with thin white lines for a refined finish.
Picture this: Picture your nails adorned with delicate swirls that evoke the serene rhythm of spring breezes. The gentle curves and soft contrasts exude sophistication while keeping the overall feel light and airy. This design is a perfect blend of simplicity and artistic flair.
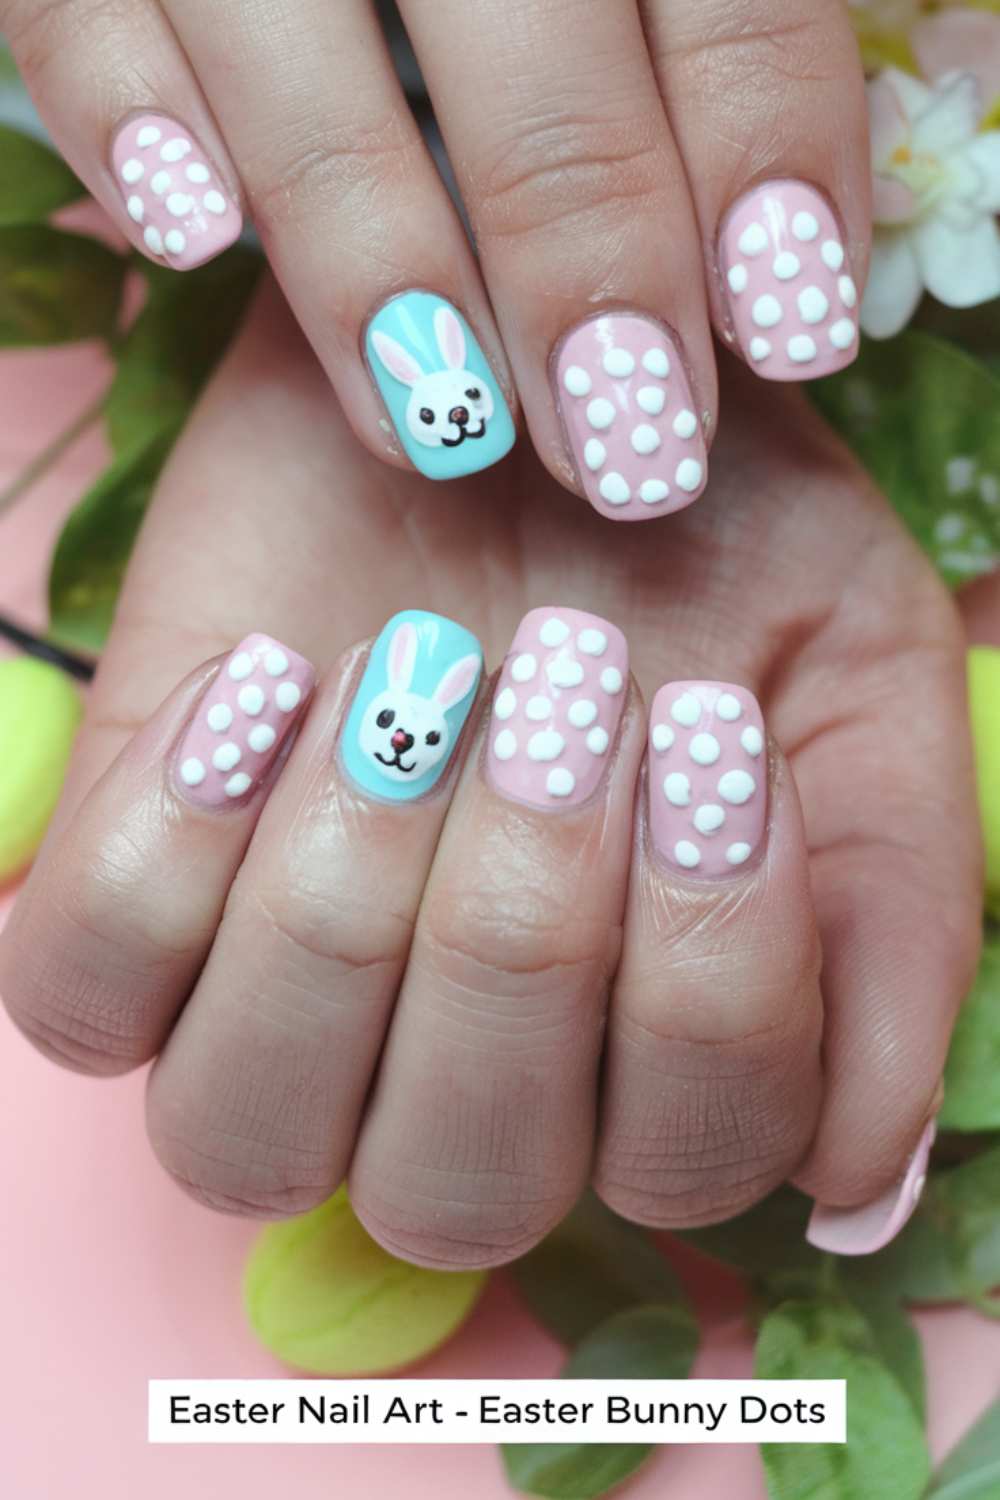
6. Easter Bunny Dots Nail Art
Bring a playful twist to your nails by incorporating cute bunny motifs using simple dot techniques. This design is fun and remarkably easy to achieve.
Step-by-step
Apply a clean, neutral base and let your nails dry. With a dotting tool or the end of a brush, create a series of dots on one nail to form the shape of a bunny’s face. Add details like ears and a nose with a contrasting color.
- Start with a neutral base coat.
- Use a dotting tool to create the bunny’s face.
- Draw ears and add small details to complete the look.
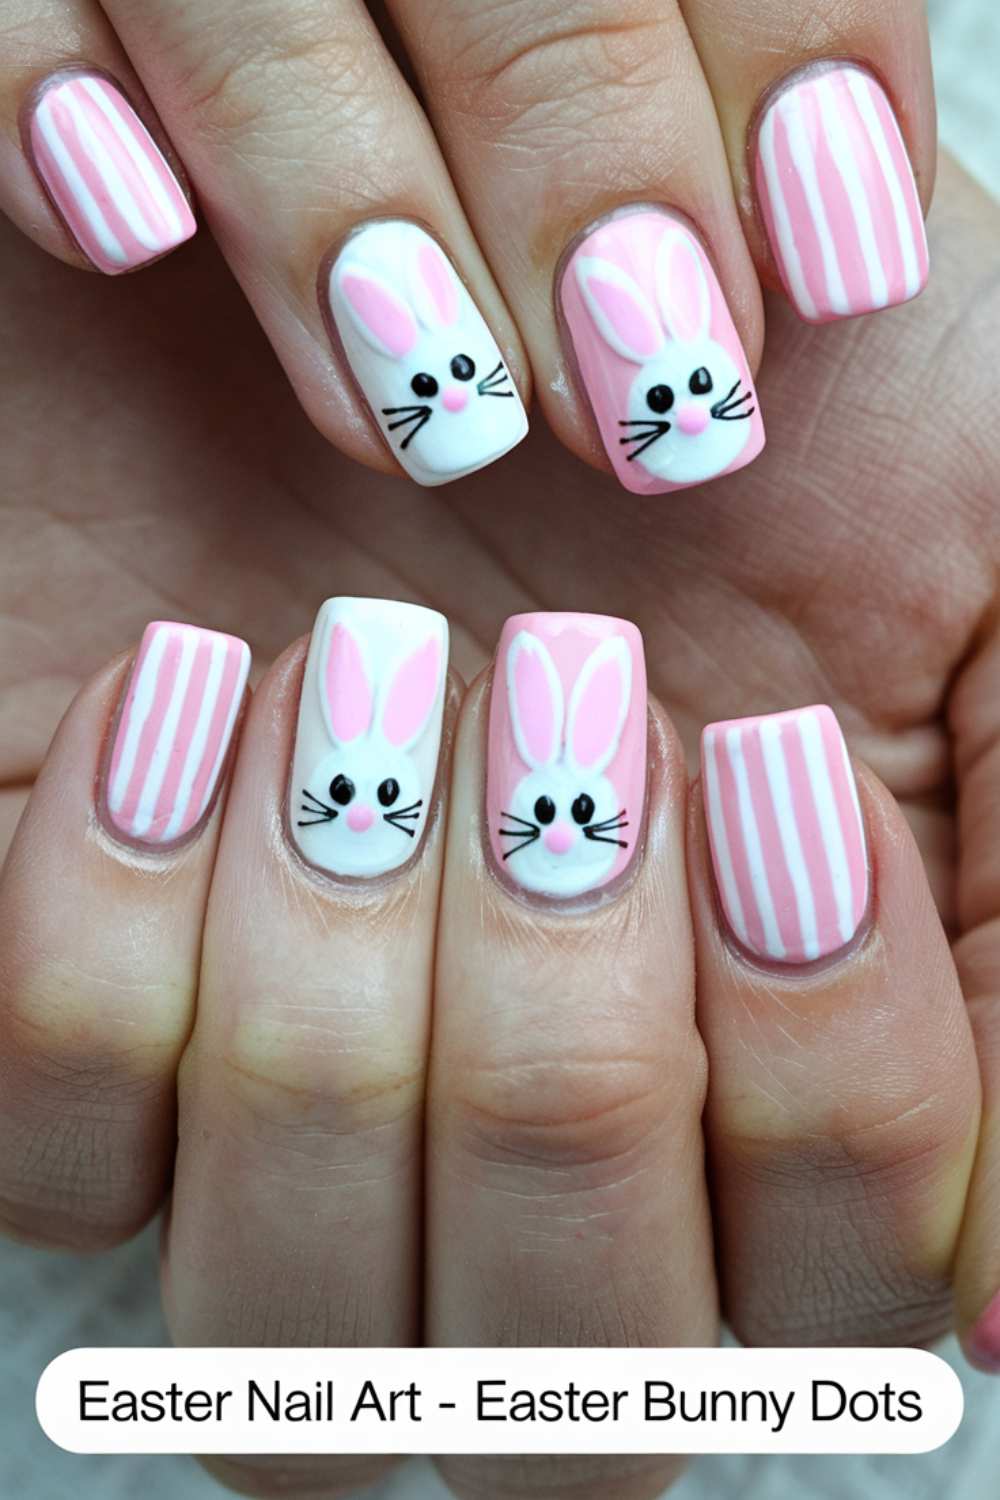
Picture this: Imagine the joy of spotting a cute bunny face on your nails, crafted with simple dots that make a big impact. The playful design captures the essence of Easter fun and creativity. Every glance at your nails will bring a smile to your face.
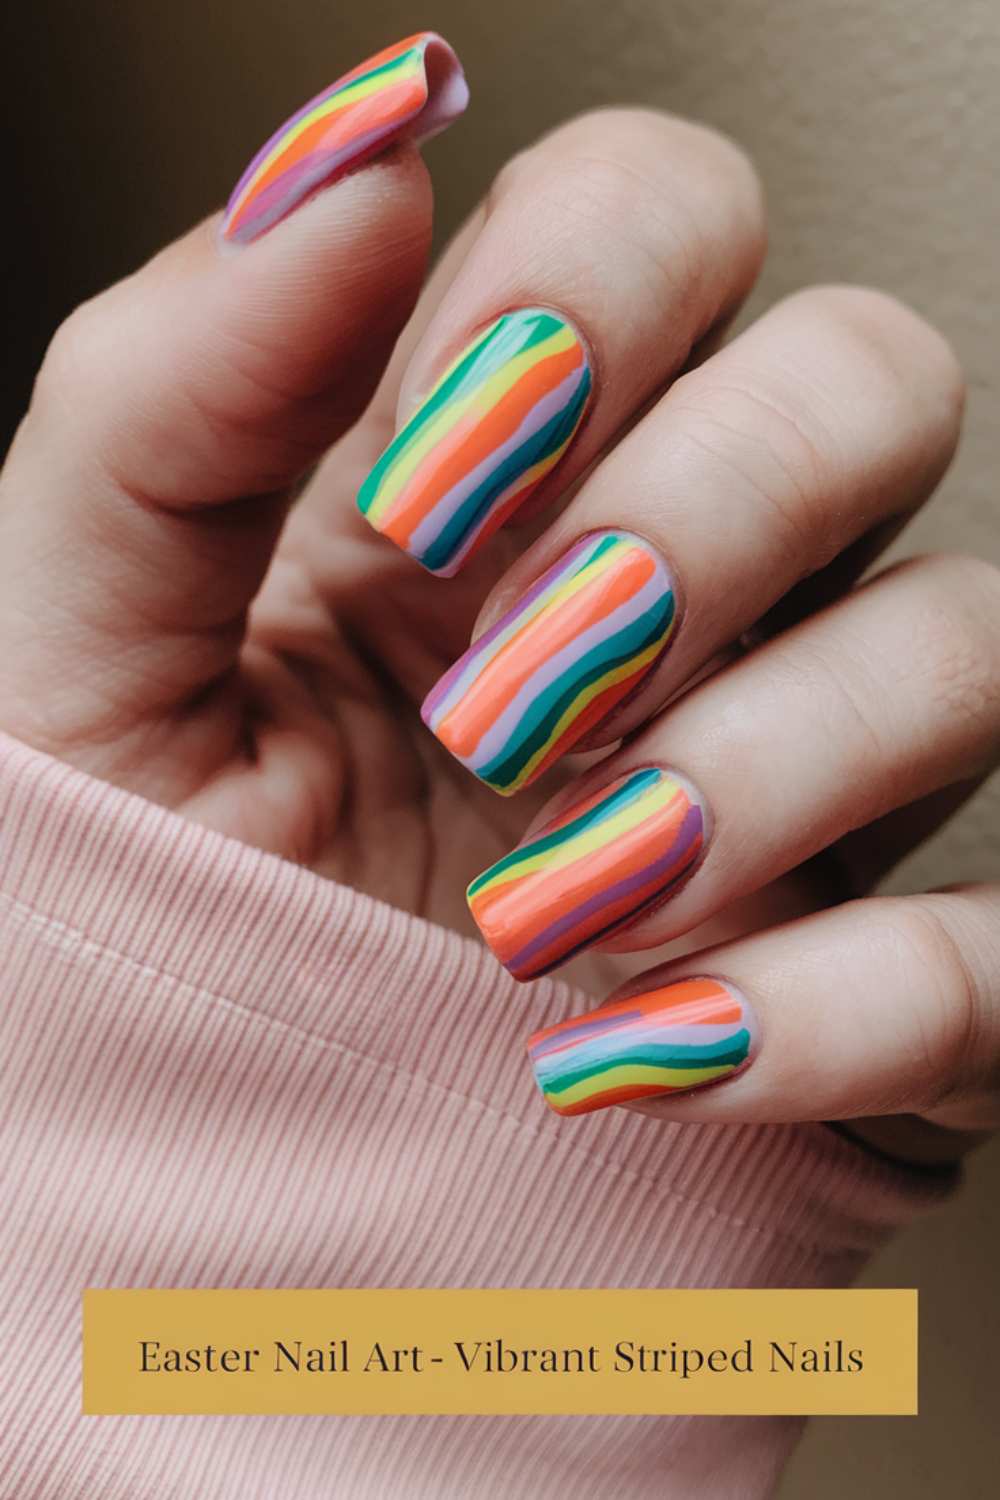
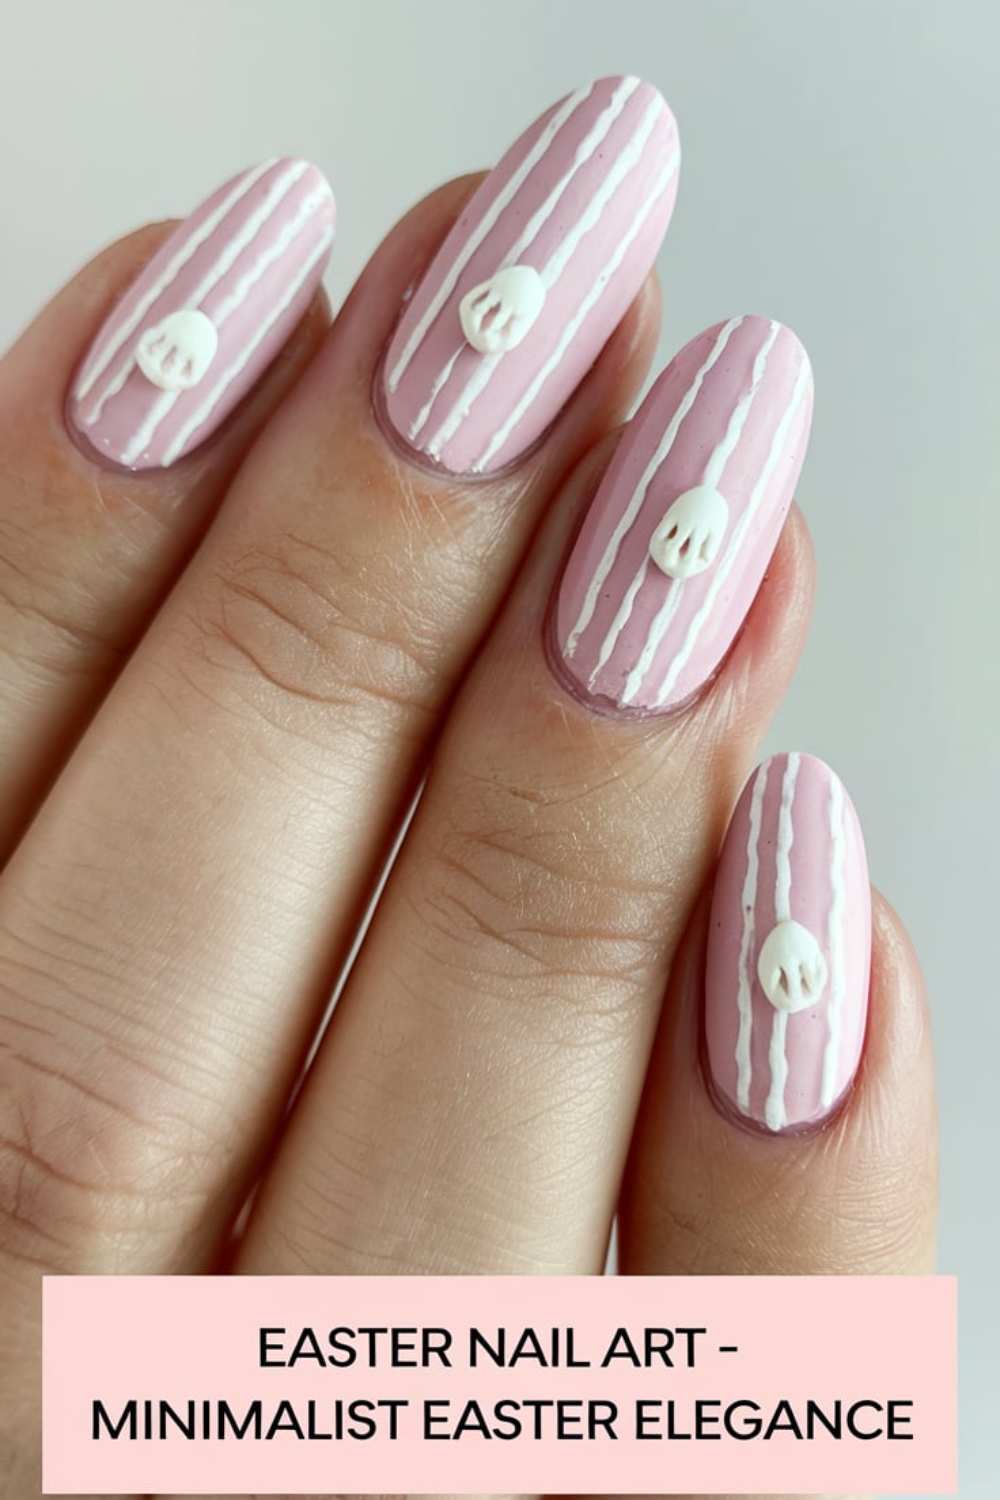
7. Vibrant Striped Nails
Embrace boldness with stripes that offer a modern twist on Easter nail art. This design is both energetic and visually striking.
Step-by-step
Begin by painting a vibrant base color on your nails. Once dry, use tape or a fine brush to add clean, horizontal stripes in a contrasting color. Remove the tape carefully (if used) to reveal crisp lines that define the design.
- Apply a bright base coat on all nails.
- Use a contrasting shade to paint horizontal stripes.
- Ensure each stripe is clean and even for a polished look.
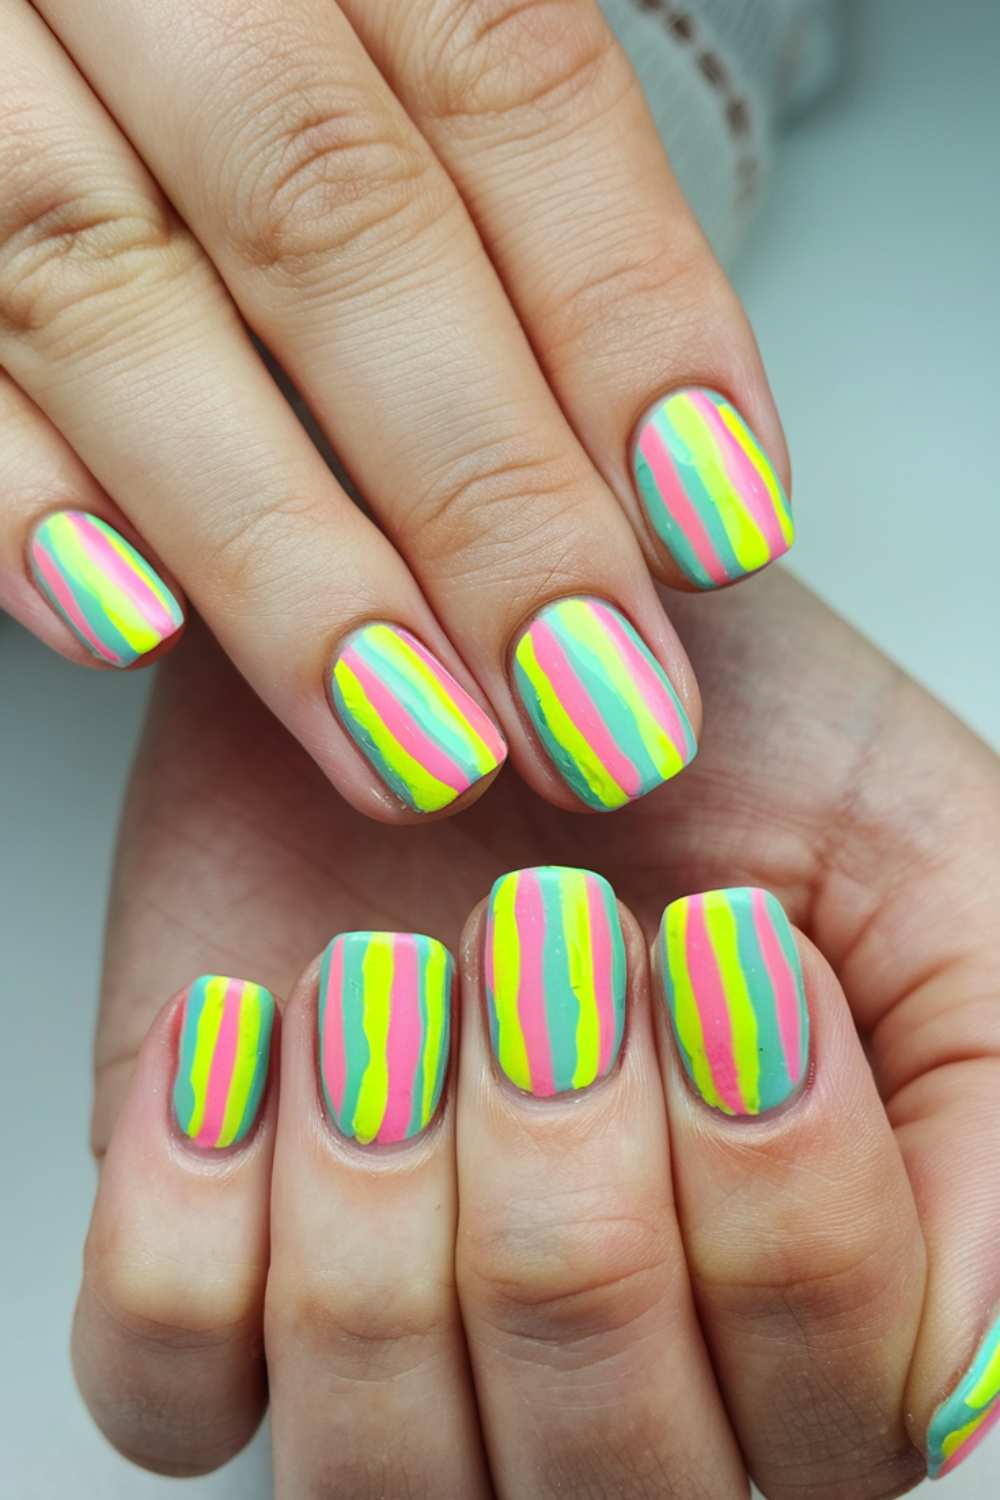
Picture this: Visualize a burst of color on your nails, with stripes that seem to dance with energy and life. The contrast between the base and stripes creates a dynamic visual effect that’s both modern and festive. This design is sure to turn heads and add a spark of joy to your day.
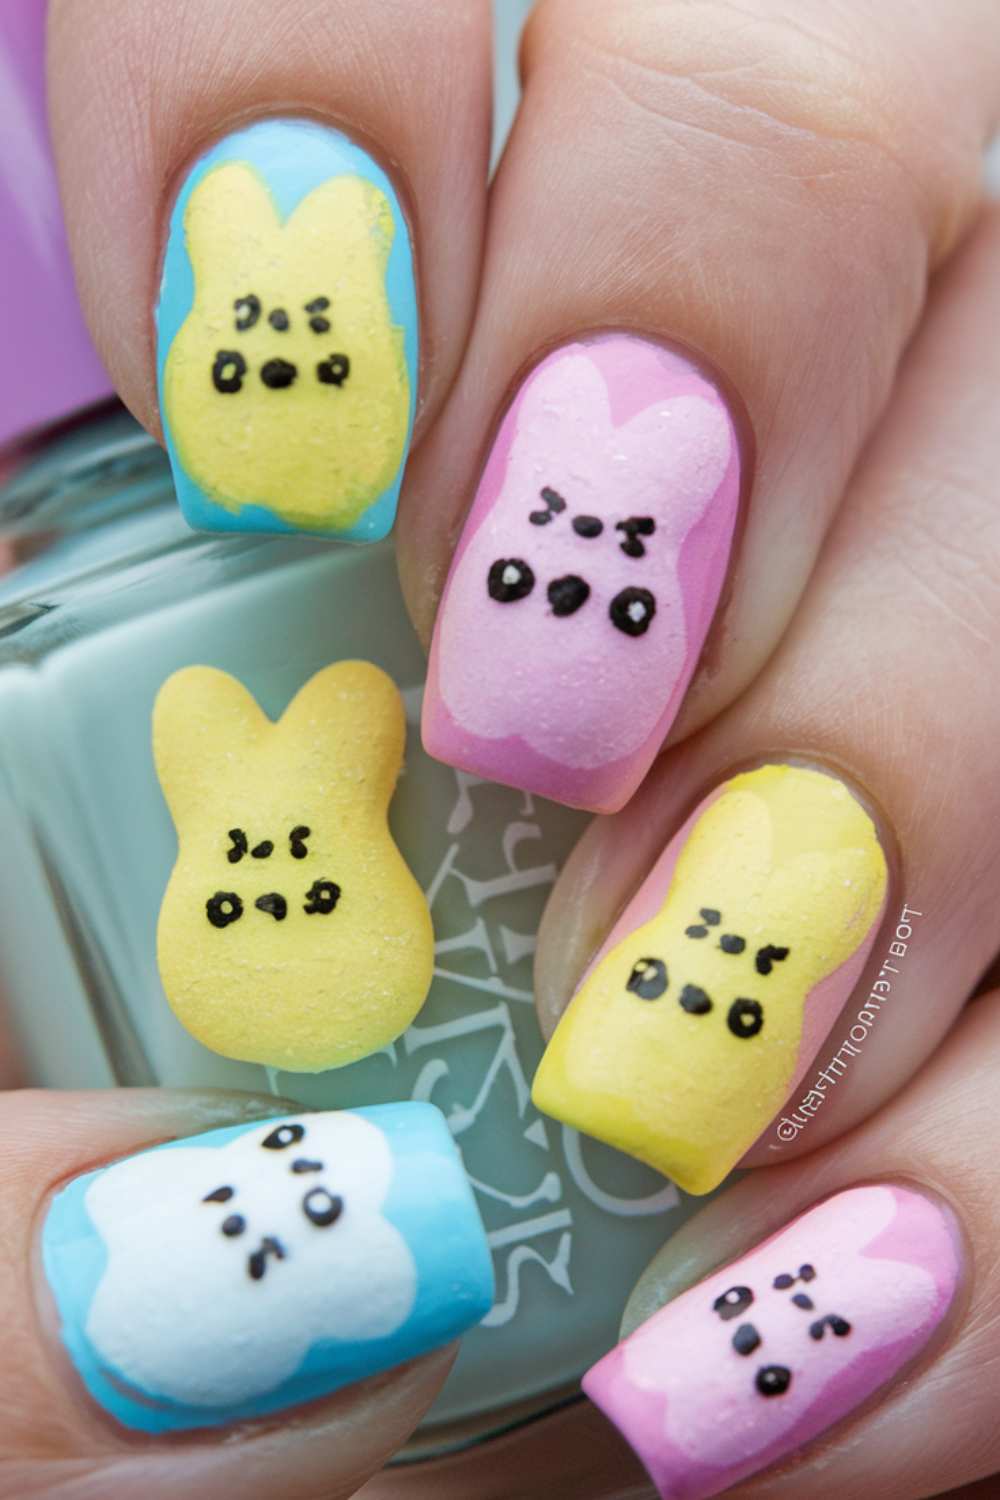
8. Easter Peep Delight Nail Art
Inspired by the popular Easter peeps, this design uses soft pastel colors and subtle details to create a sweet, playful look.
Step-by-step
Start with a pale, neutral base and let it dry. Then, using a fine brush, paint small peep-inspired shapes and add subtle features like eyes and smiles using a darker shade. Let your creativity flow by adding tiny accents to highlight the design.
- Apply a pale base coat.
- Paint peep-inspired shapes on one or two nails.
- Add features and accents for extra detail.
Picture this: Imagine your nails featuring adorable, peep-inspired designs that evoke the sweetness of a spring day. The soft pastel hues blend together to create a charming and playful look. Each nail is a tiny work of art, radiating fun and a touch of nostalgia.
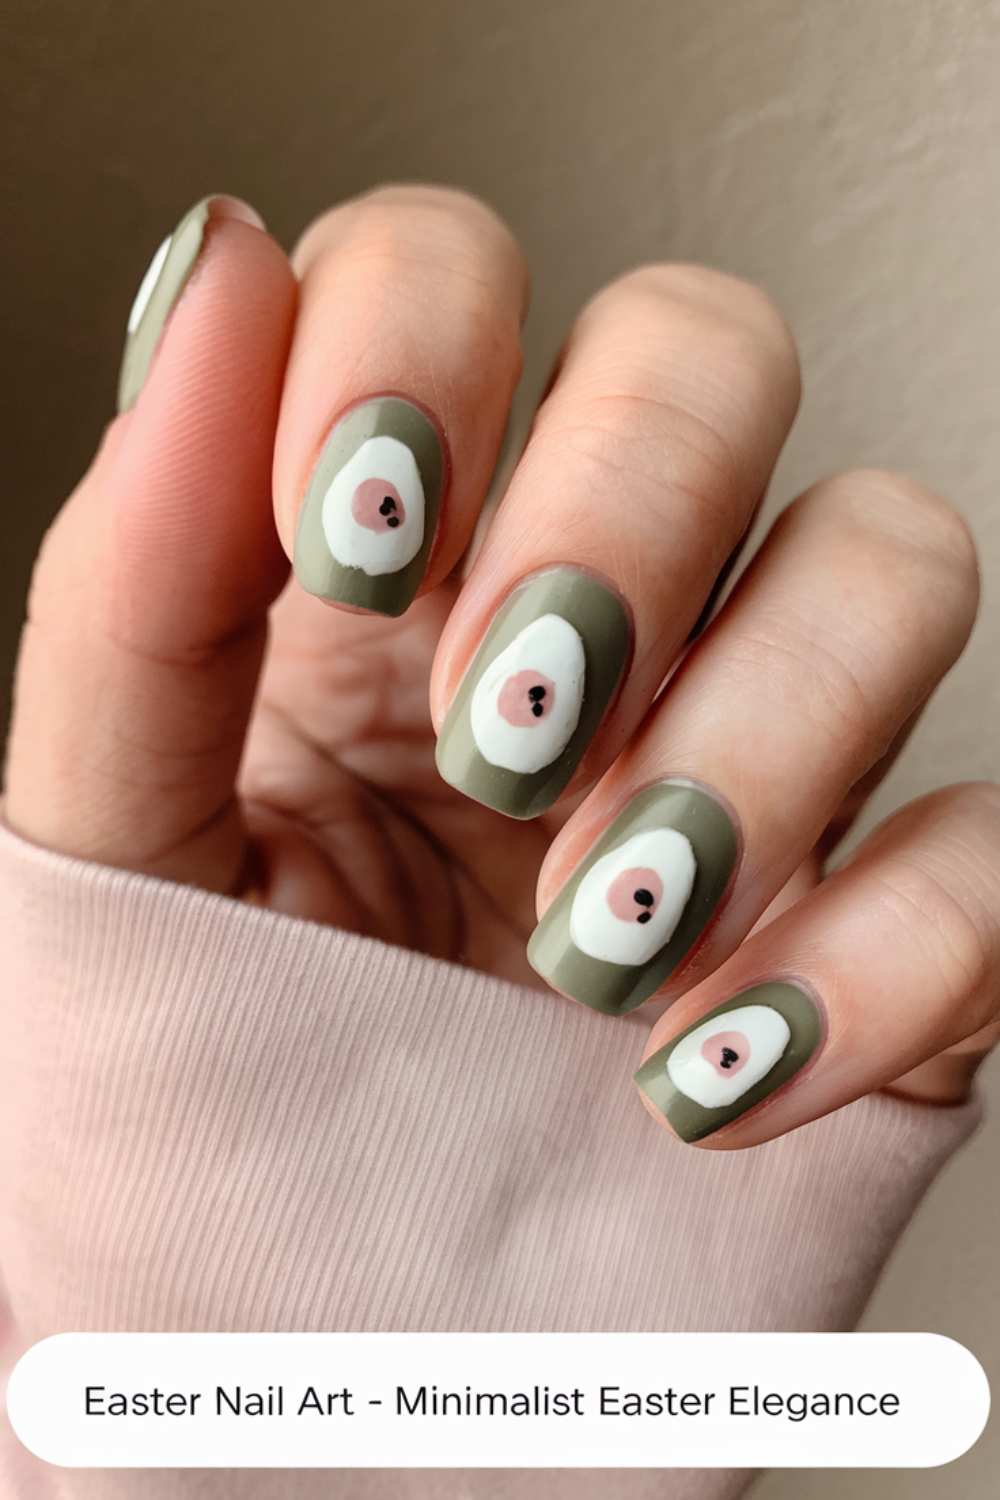
9. Minimalist Easter Elegance Nail Art
Sometimes less is more, and this minimalist design is a perfect example. It’s simple yet sophisticated, ideal for those who appreciate understated beauty.
Step-by-step
Choose a neutral base coat for all your nails and allow it to dry. On one nail per hand, create a simple, elegant design with a thin line or dot using a metallic or contrasting shade. Keep the design clean and crisp.
- Apply a neutral base coat on all nails.
- Decorate one nail per hand with a minimalist design.
- Use metallic polish for an elegant finish.
Picture this: Picture your nails showcasing a touch of elegance through subtle, minimalist details that speak volumes. The simplicity of the design adds a sophisticated charm without overwhelming your look. This understated style is perfect for a refined yet festive vibe.
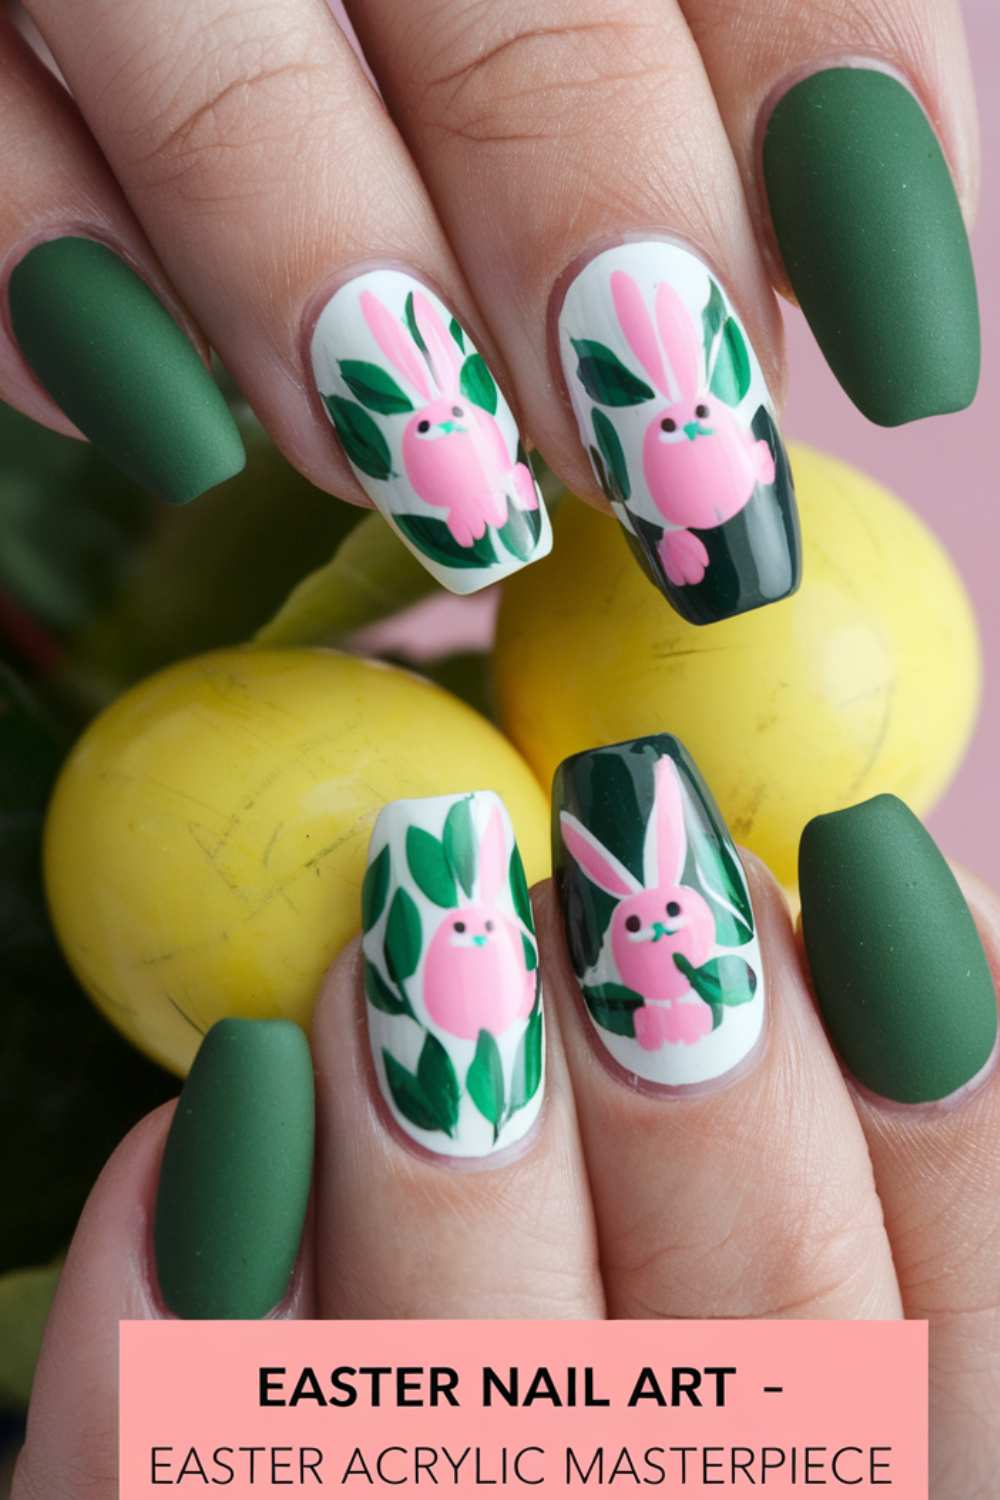
10. Easter Acrylic Masterpiece Nail Art
Elevate your nail game with acrylic designs that combine strength and beauty. This design is both trendy and long-lasting, perfect for busy days.
Step-by-step
Apply an acrylic overlay on your nails and choose a bold base color that stands out. Use nail art pens or brushes to add intricate details inspired by Easter themes, like eggs or bunnies. Seal the design with a protective top coat.
- Start with an acrylic overlay for durability.
- Paint intricate Easter motifs with nail art tools.
- Finish with a glossy top coat for protection.
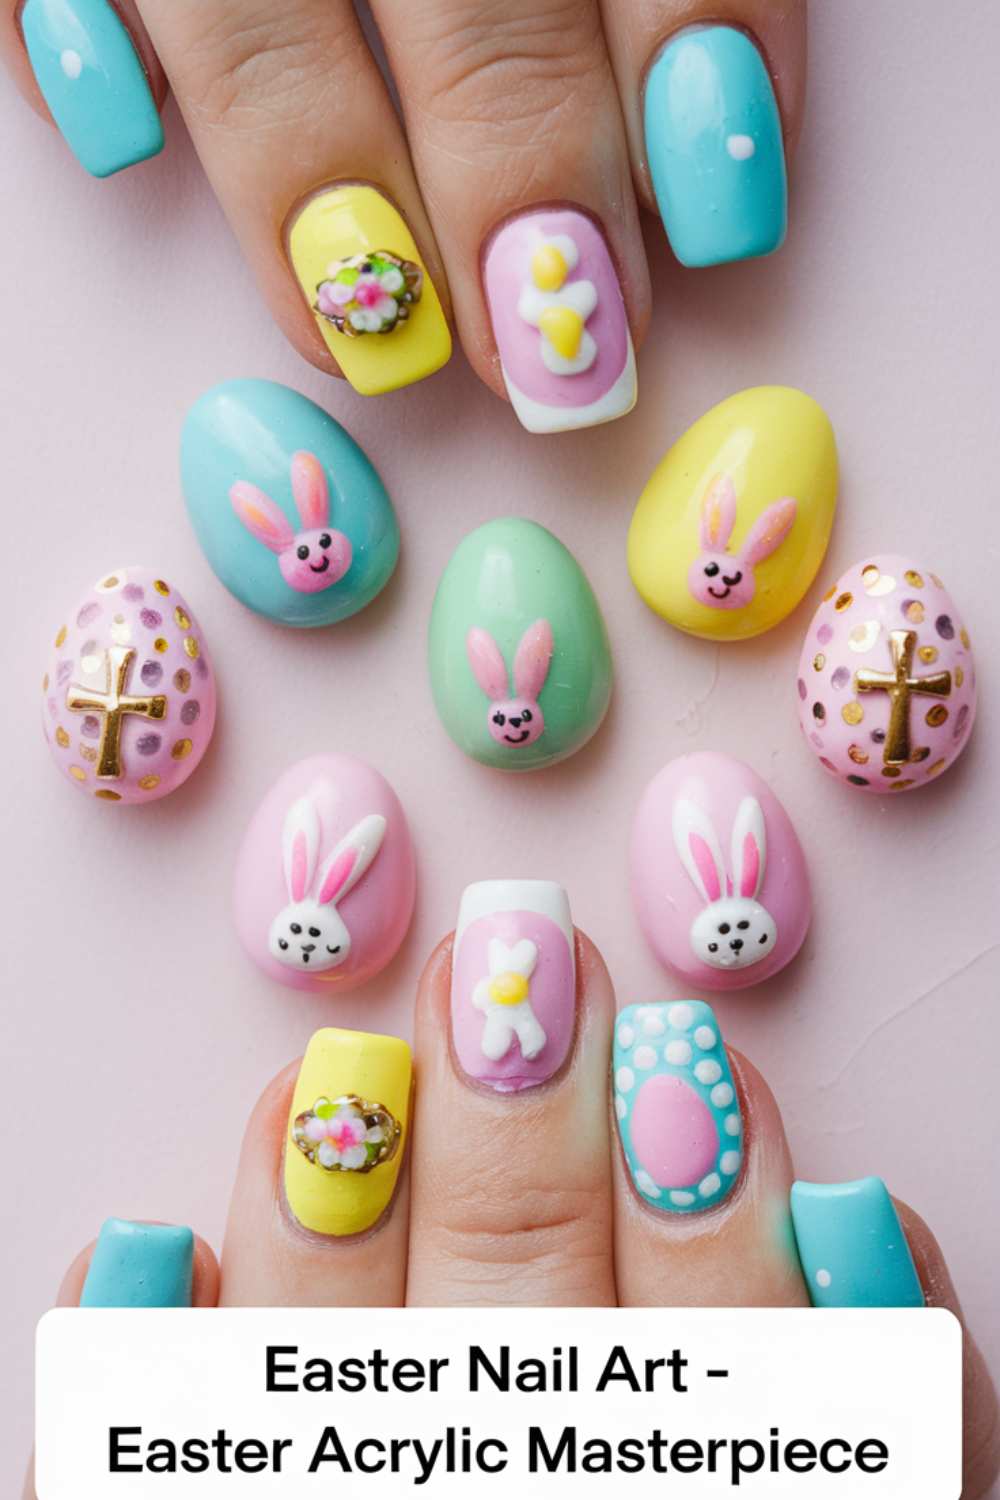
Picture this: Imagine a set of nails that not only look striking but also last through your busiest days. The acrylic finish gives your nails a robust yet artistic feel, making each detail pop with festive charm. Every glance at your hands will remind you of the creativity and strength of your style.
11. Easter Egg Gradient Nail Art
A gradient design inspired by Easter eggs brings a beautiful ombre effect to your nails. This design is both trendy and eye-catching.
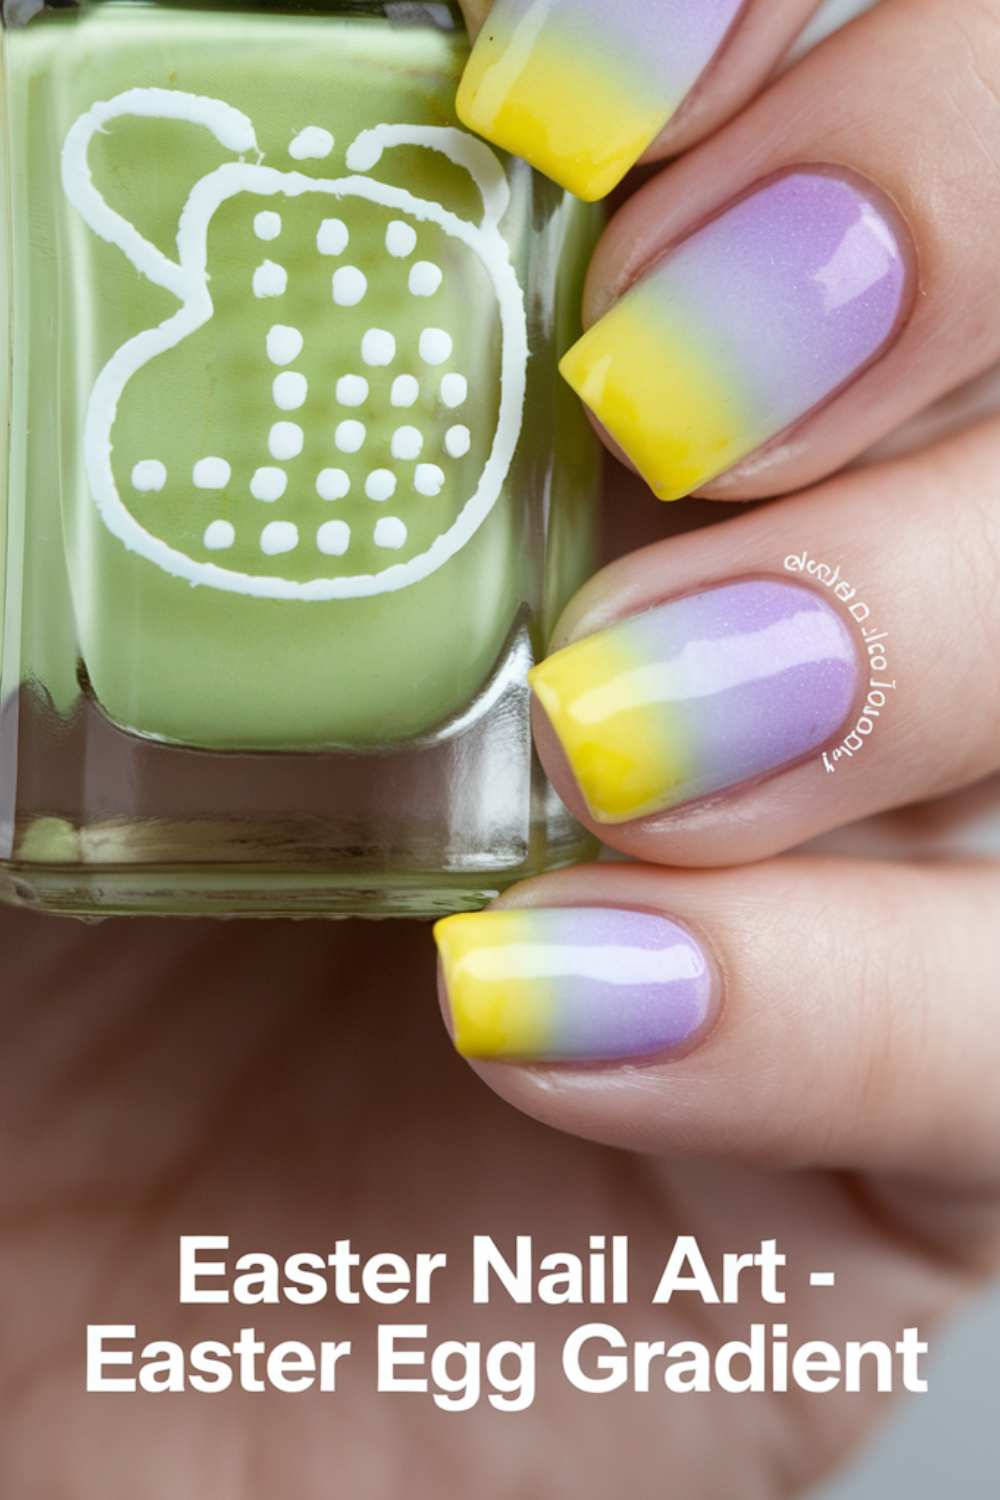
Step-by-step
Start by applying a base coat in a light pastel color. Gradually blend in another color from the tip of your nail to the base, creating a seamless gradient. Use a sponge to help achieve a smooth transition between hues.
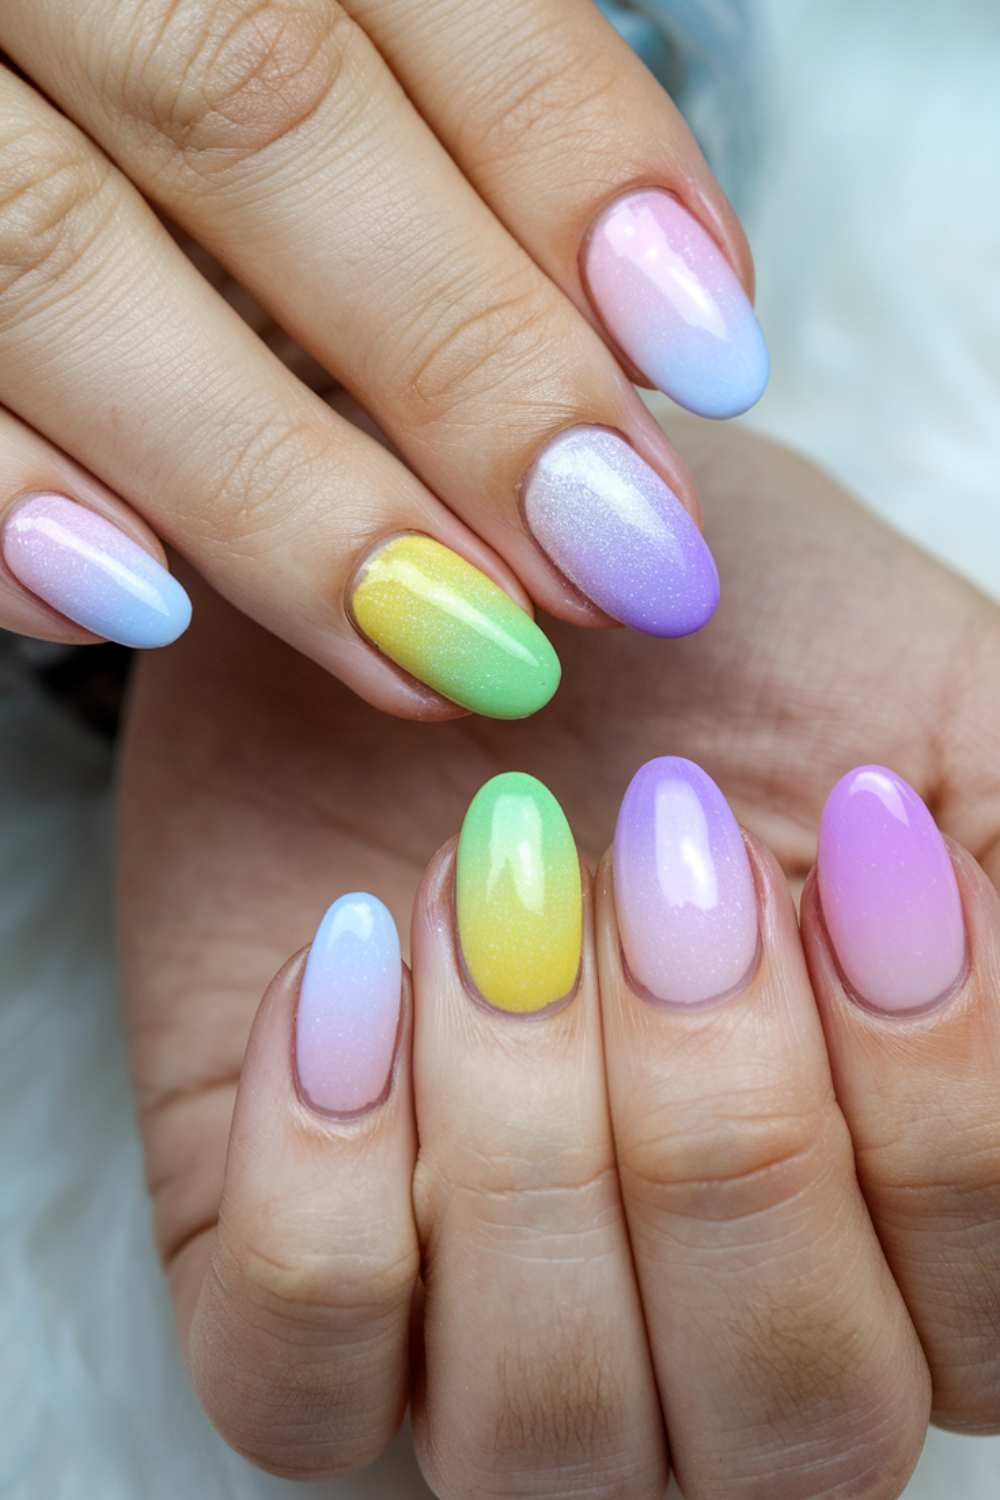
- Apply a pastel base coat on all nails.
- Create an ombre effect with a second shade using a sponge.
- Blend well for a smooth gradient.
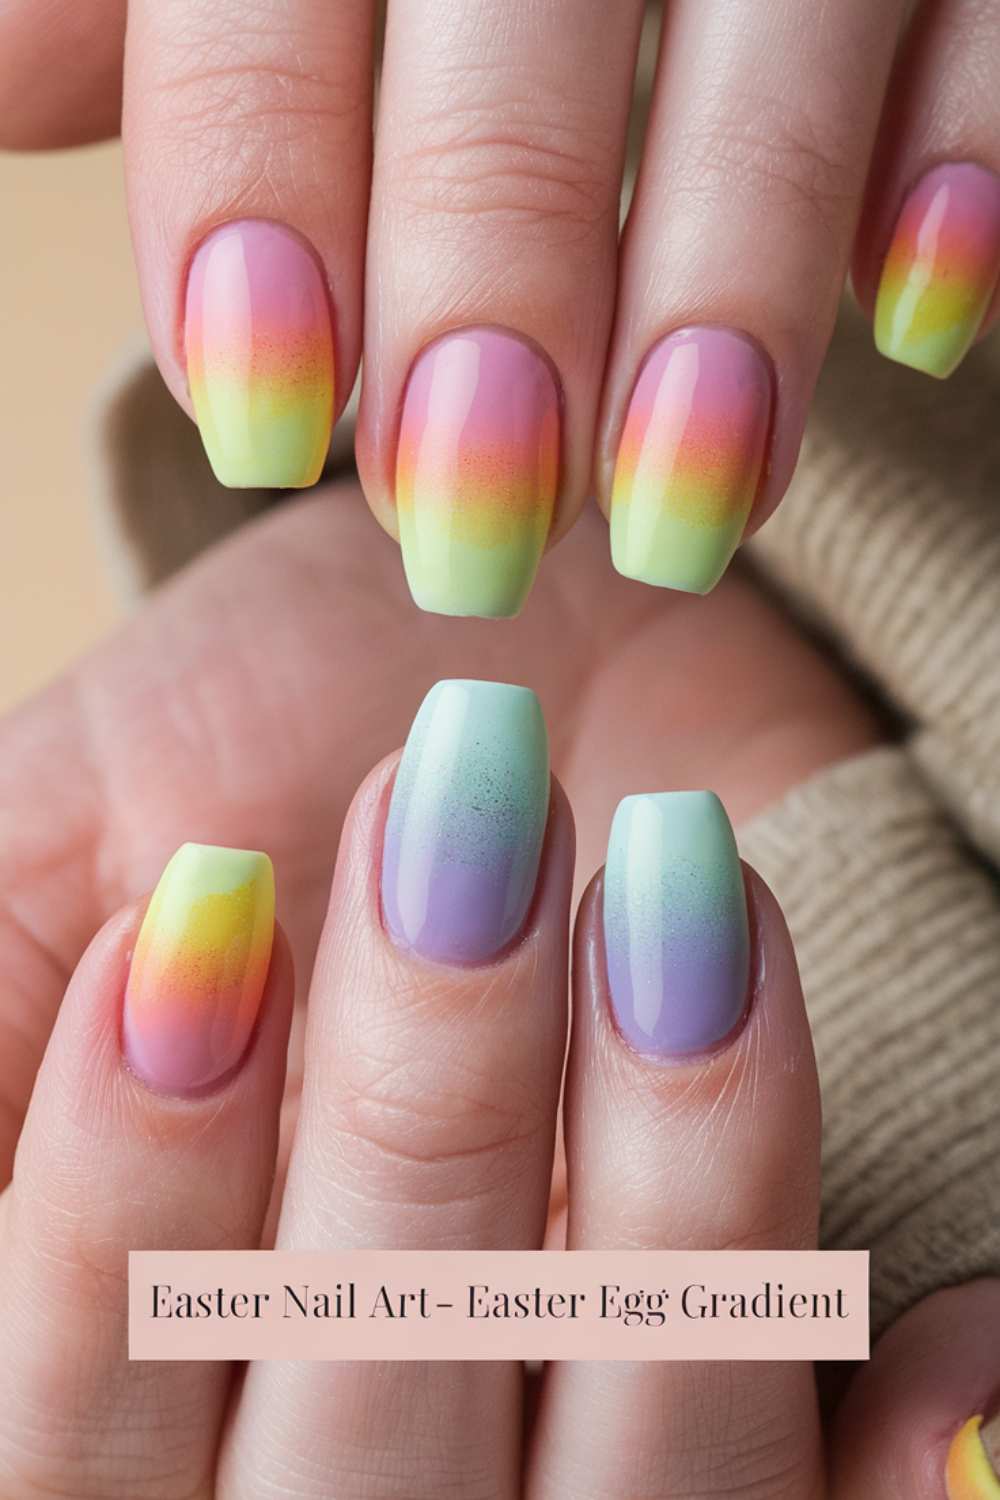
Picture this: Visualize a subtle yet striking gradient that mimics the delicate transition of colors on a beautifully decorated Easter egg. The ombre effect adds depth and dimension, transforming your nails into miniature works of art. The seamless blend of colors exudes an effortless elegance that feels both fresh and modern.
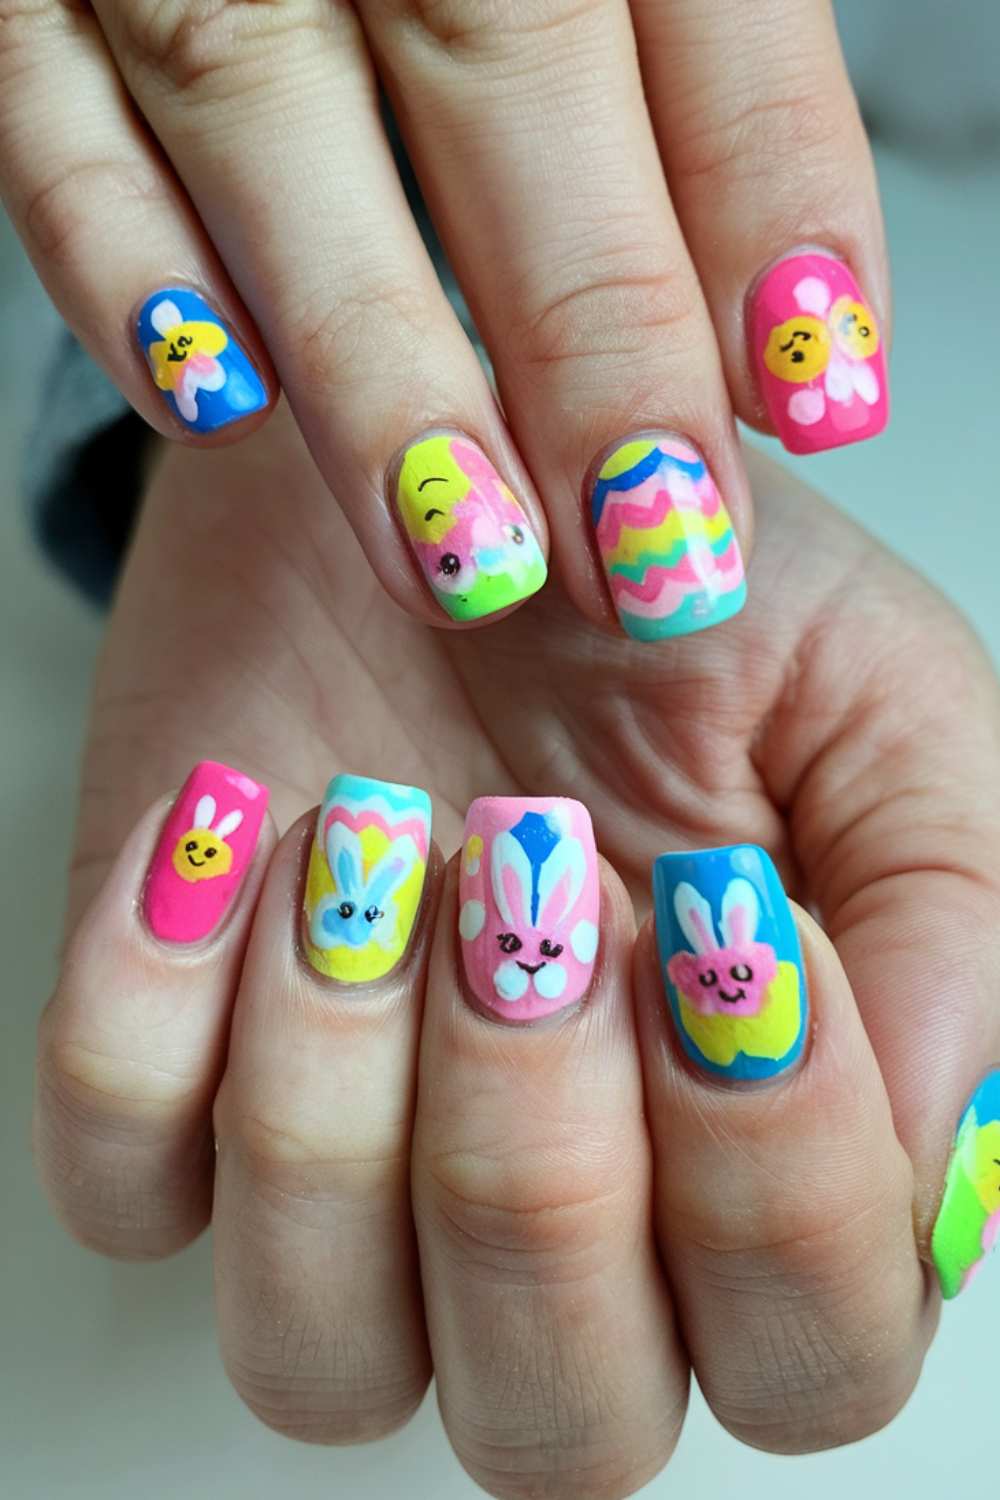
12. Bold Easter Doodles
Let your creativity shine with bold doodle designs that capture the playful spirit of Easter. This style is fun, quirky, and totally unique.
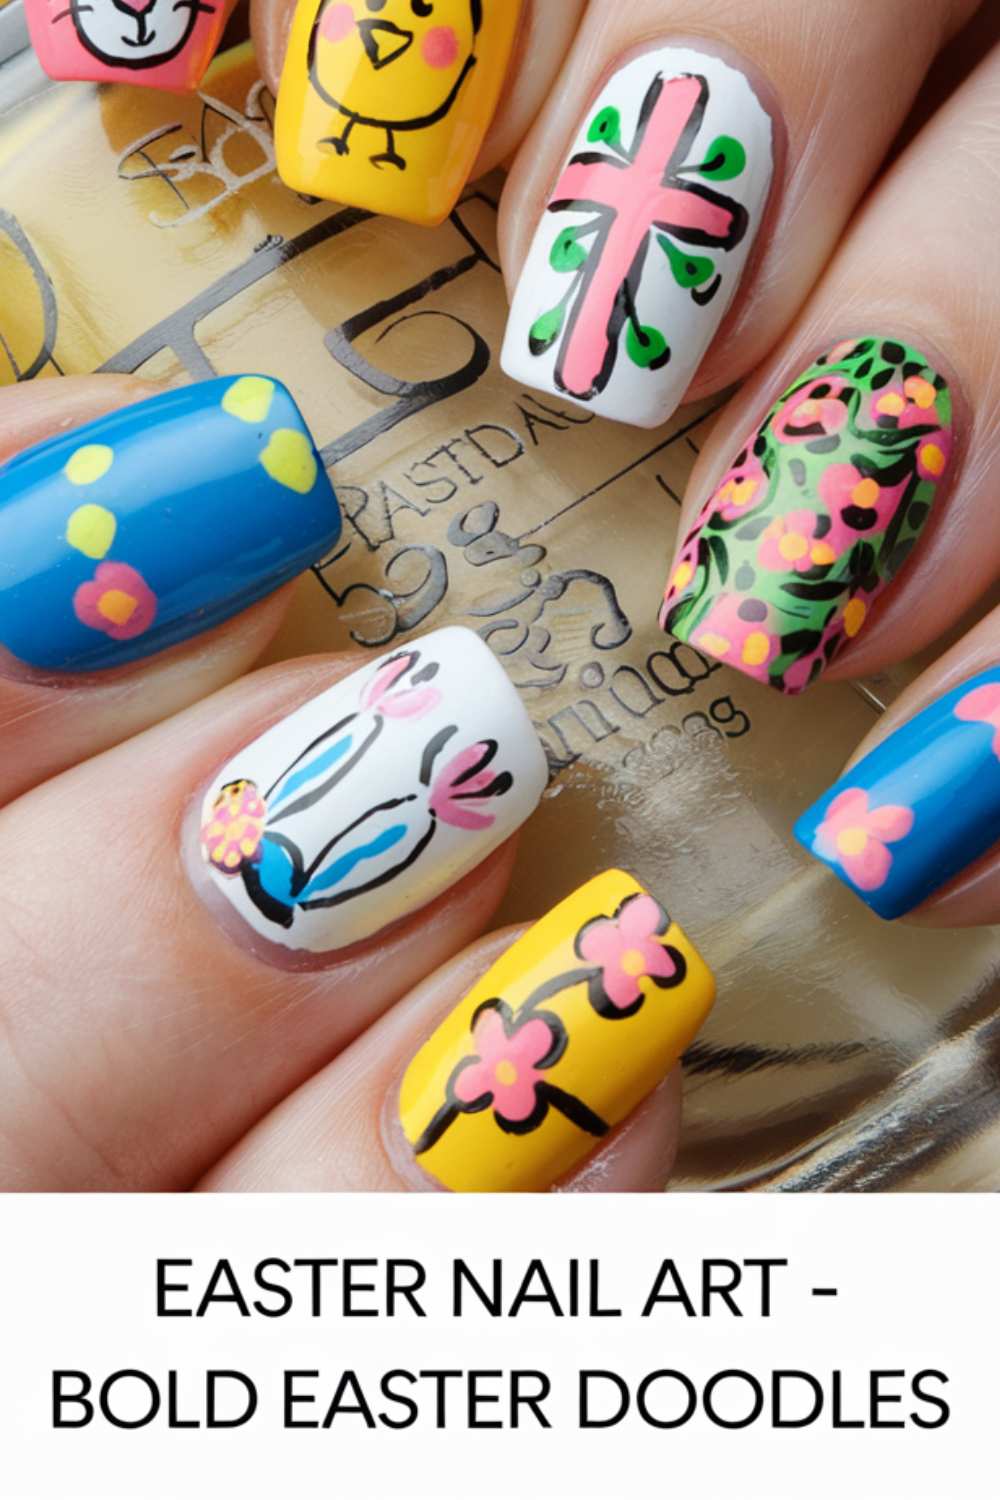
Step-by-step
Apply a bright, solid base coat on your nails. Once dry, use a fine brush to doodle whimsical shapes such as eggs, flowers, or even tiny bunnies in contrasting colors. Let your doodles vary in size and shape for an organic, hand-drawn look.
- Start with a bright base coat on all nails.
- Doodle playful shapes with a contrasting color.
- Vary the designs to keep it fun and unique.
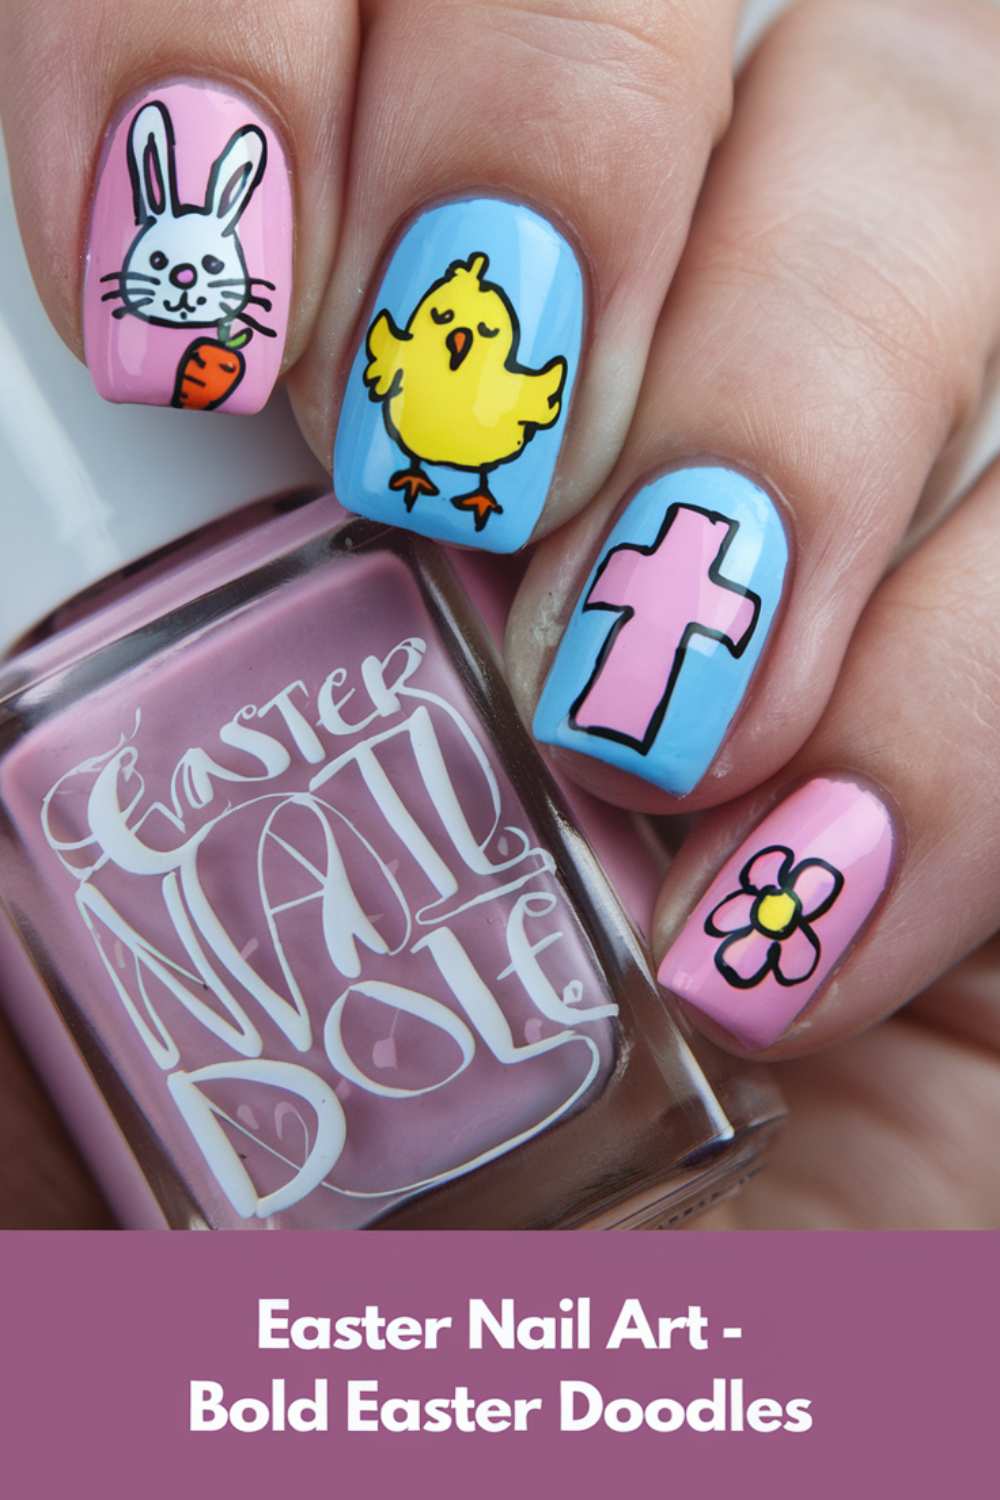
Picture this: Imagine each nail as a canvas for your spontaneous, playful doodles that radiate fun and creativity. The bold lines and quirky shapes make your nails a lively expression of the Easter spirit. Every detail feels personal and inventive, capturing the heart of the season.
13. Elegant Lace Easter Nails
For those who adore a touch of vintage charm, lace-inspired nail art adds a refined twist to your Easter look. This design blends classic elegance with modern style.
Step-by-step
Begin with a soft, neutral base coat and let it dry completely. With a very fine brush, recreate delicate lace patterns on one or two accent nails using a contrasting color. Carefully detail the design to mimic intricate lacework.
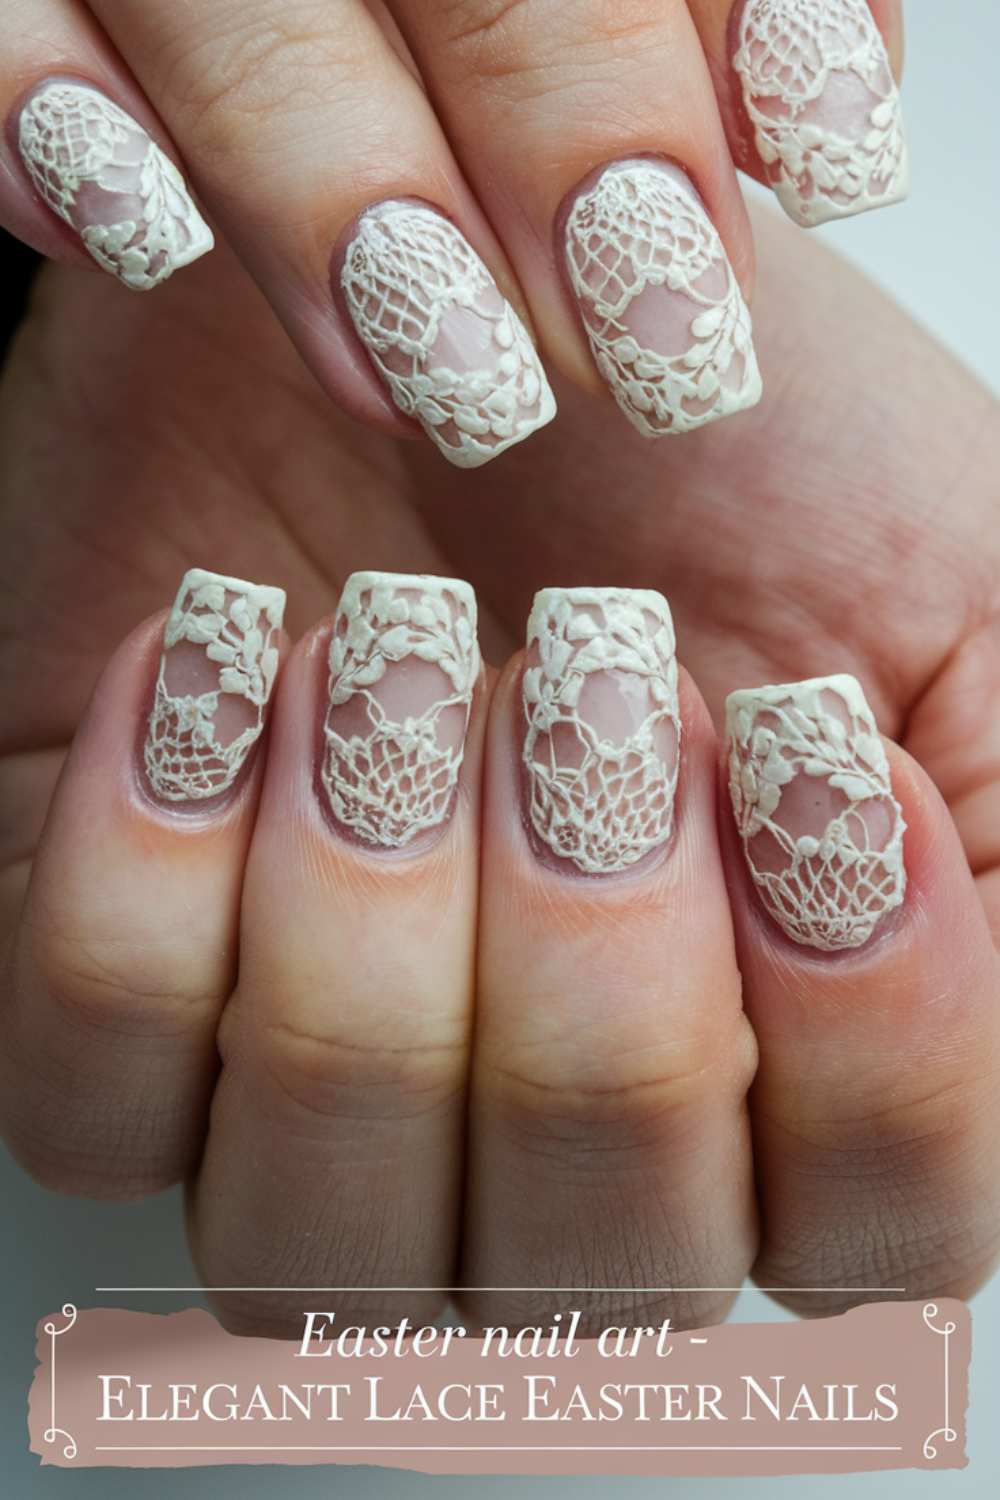
- Apply a neutral base coat on all nails.
- Use a fine brush to draw intricate lace patterns.
- Enhance the details with a subtle contrasting color.
Picture this: Picture your nails transforming into miniature pieces of art, with delicate lace patterns that evoke a sense of timeless beauty. The intricate details add an air of sophistication, reminiscent of vintage elegance. The overall look is refined yet fresh, perfect for an Easter celebration with a classic twist.
14. Fun Easter Shapes Nail Art
Mix and match geometric shapes with soft Easter colors to create a playful, modern design. This approach is all about creativity and bold expression.
Step-by-step
Apply a soft pastel base on all nails. Use tape or stencils to mark off geometric sections and fill them with contrasting Easter hues. Experiment with different shapes like triangles, squares, or circles for a dynamic effect.

- Start with a pastel base coat on all nails.
- Use tape or stencils to create geometric patterns.
- Fill each section with contrasting colors.
Picture this: Imagine a playful burst of geometric shapes that transform your nails into a vibrant mosaic. The mix of soft pastels and bold contrasts gives your nails a modern yet festive twist. Every design element pops, creating an eye-catching and energetic look perfect for spring.
15. Shimmering Easter Sparkle Nail Art
Add a touch of glam to your Easter nail art with a shimmering, sparkly design that’s both elegant and fun. This look is perfect for adding a hint of luxury to your festive style.
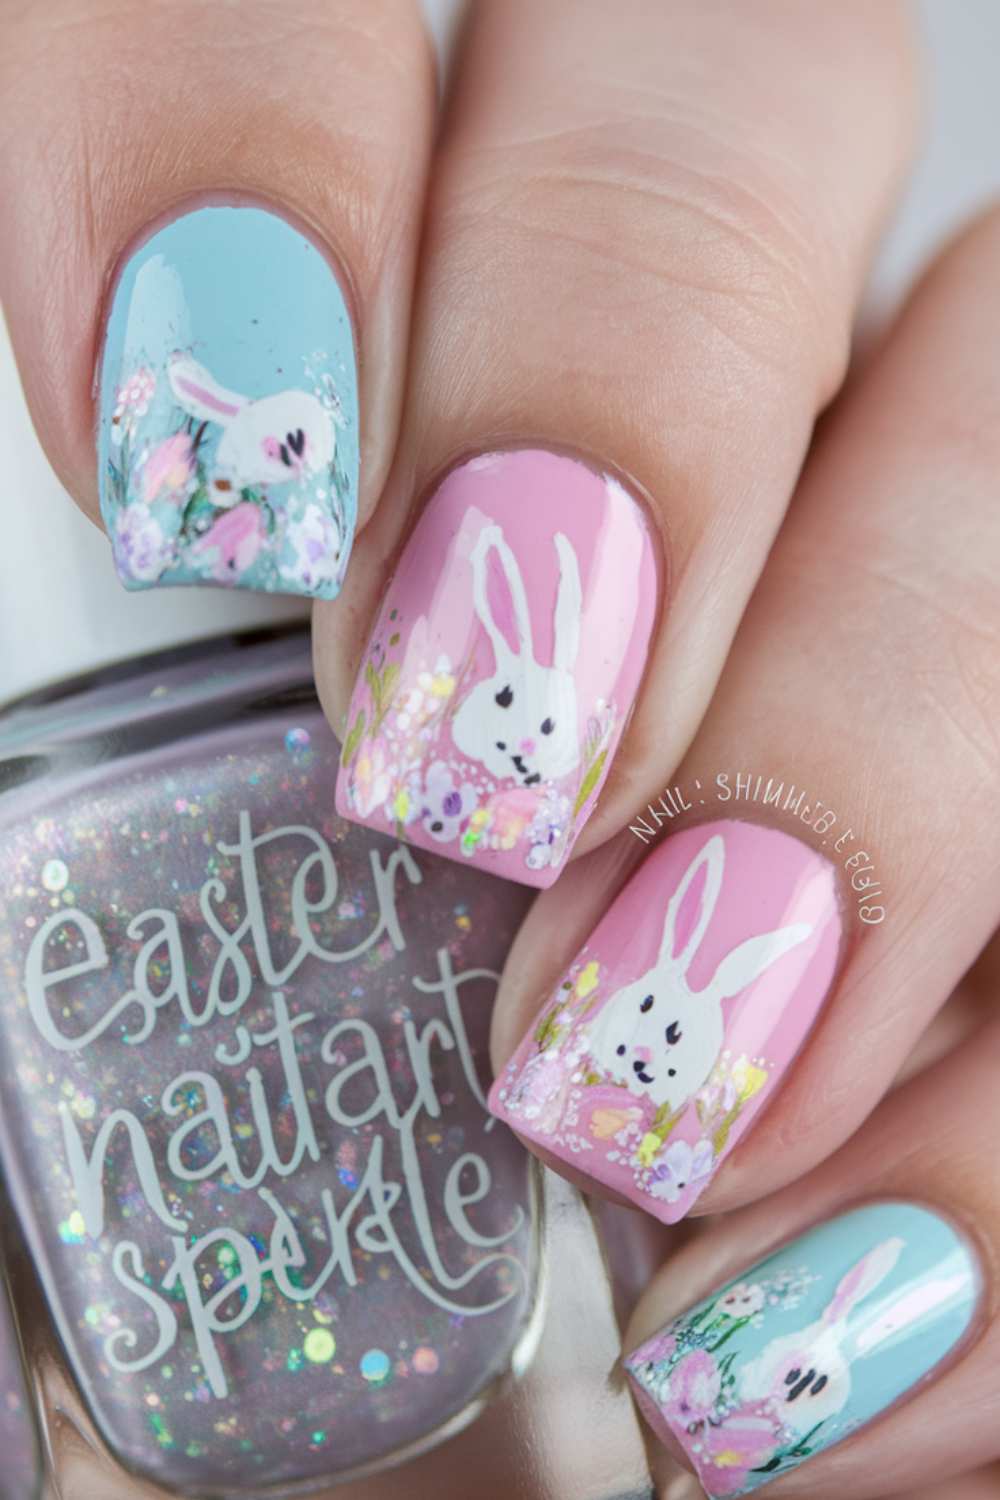
Step-by-step
Apply a base coat in a subtle pastel shade and let it dry. Once dry, add a layer of glitter polish or apply loose glitter strategically on one or two accent nails. Finish with a top coat to secure the sparkle and enhance shine.
- Apply a pastel base coat on all nails.
- Add glitter polish or loose glitter accents.
- Seal with a top coat to lock in the sparkle.
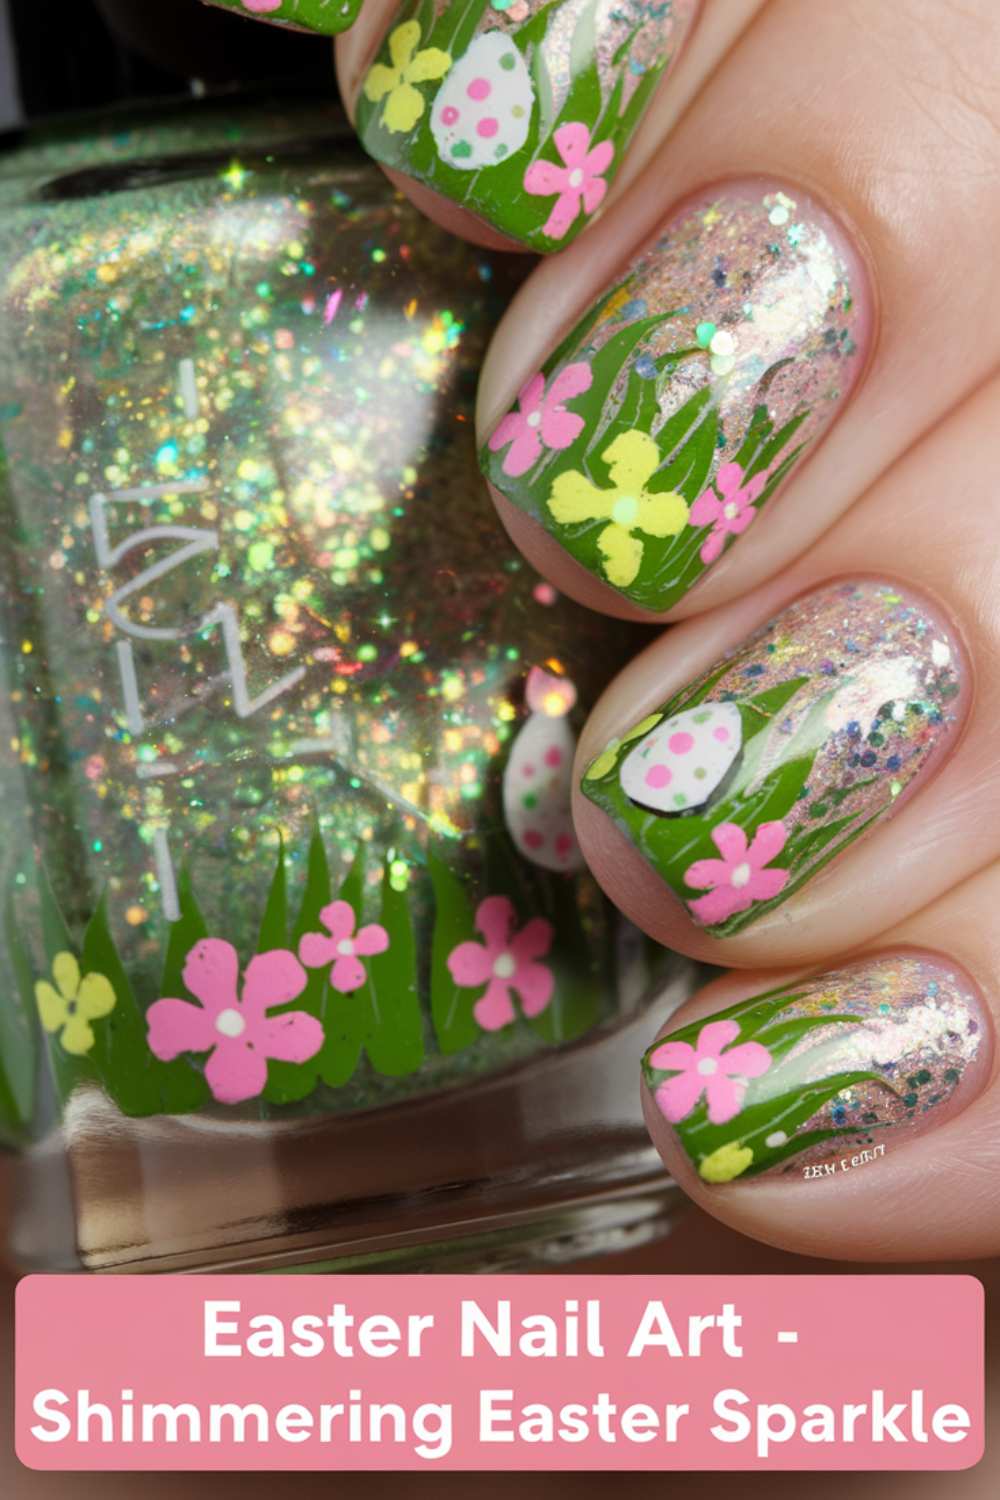
Picture this: Picture your nails catching the light with every movement, sparkling like tiny gems in the spring sun. The subtle glitter adds a hint of luxury without overpowering the playful Easter theme. Each nail glimmers with festive cheer, evoking the magic of a sparkling spring day.
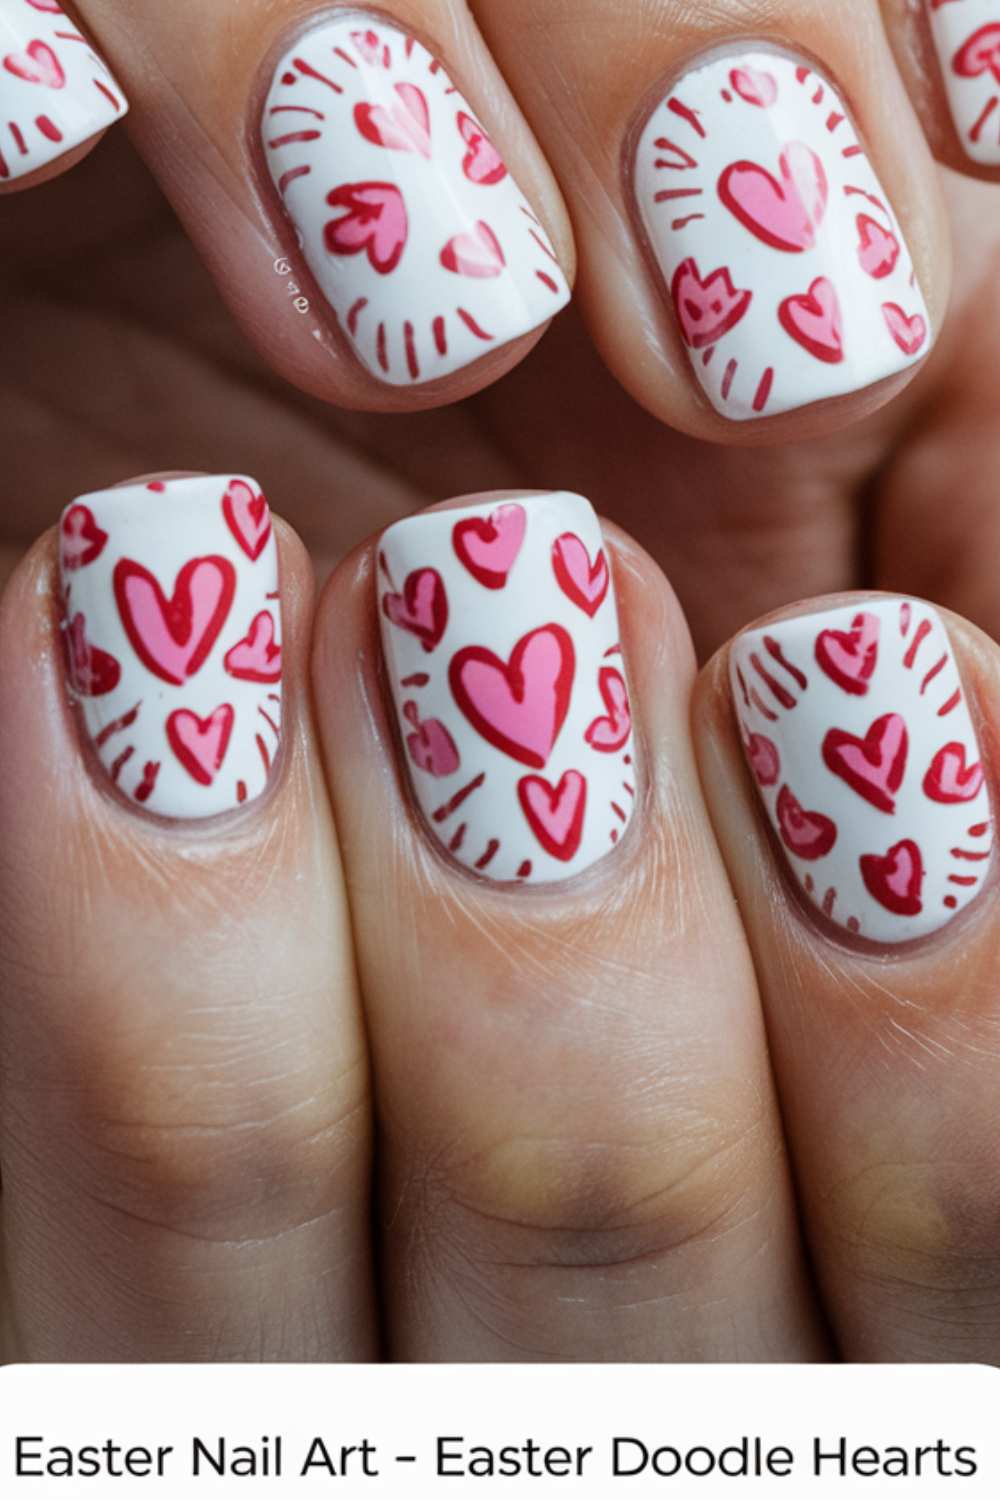
16. Easter Doodle Hearts
Celebrate love and joy with cute heart doodles that add a gentle touch to your Easter nail art. This design combines simplicity with heartwarming details.
Step-by-step
Start with a clean, neutral base and let it dry completely. Using a fine brush, doodle small hearts on one or two accent nails using a contrasting color. Add delicate lines or dots around the hearts for extra flair.
- Apply a neutral base coat on all nails.
- Doodle small hearts with a fine brush.
- Enhance the design with subtle details.
Picture this: Imagine your nails adorned with tiny heart doodles that radiate warmth and affection. The playful hearts evoke feelings of joy and togetherness, making each nail a little celebration of love. The overall design is simple yet deeply charming, perfect for a festive spring look.
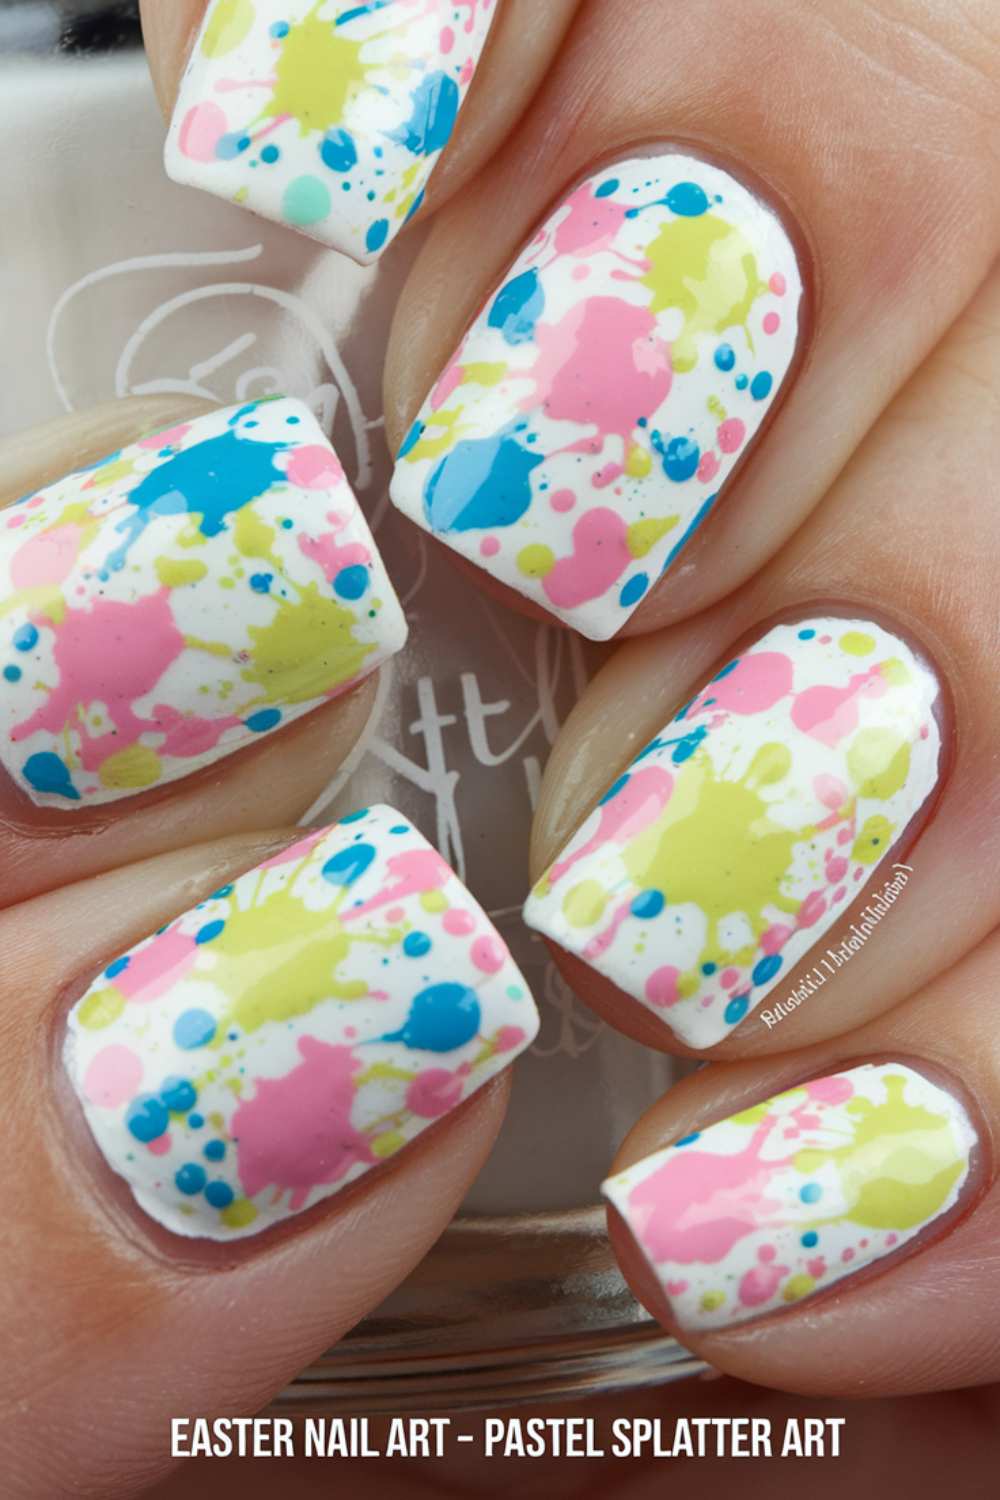
17. Pastel Splatter Art
Create an artsy, splatter effect that is as spontaneous as it is stylish. This design brings a creative, free-spirited vibe to your Easter nail art.
Step-by-step
Apply a pastel base coat and allow it to dry completely. Dip a small brush into a contrasting color and flick it over your nails to create a splatter effect. Repeat with different colors if desired, letting each layer dry between applications.
- Start with a pastel base coat on all nails.
- Flick contrasting polish to create a splatter design.
- Layer different colors for a vibrant effect.
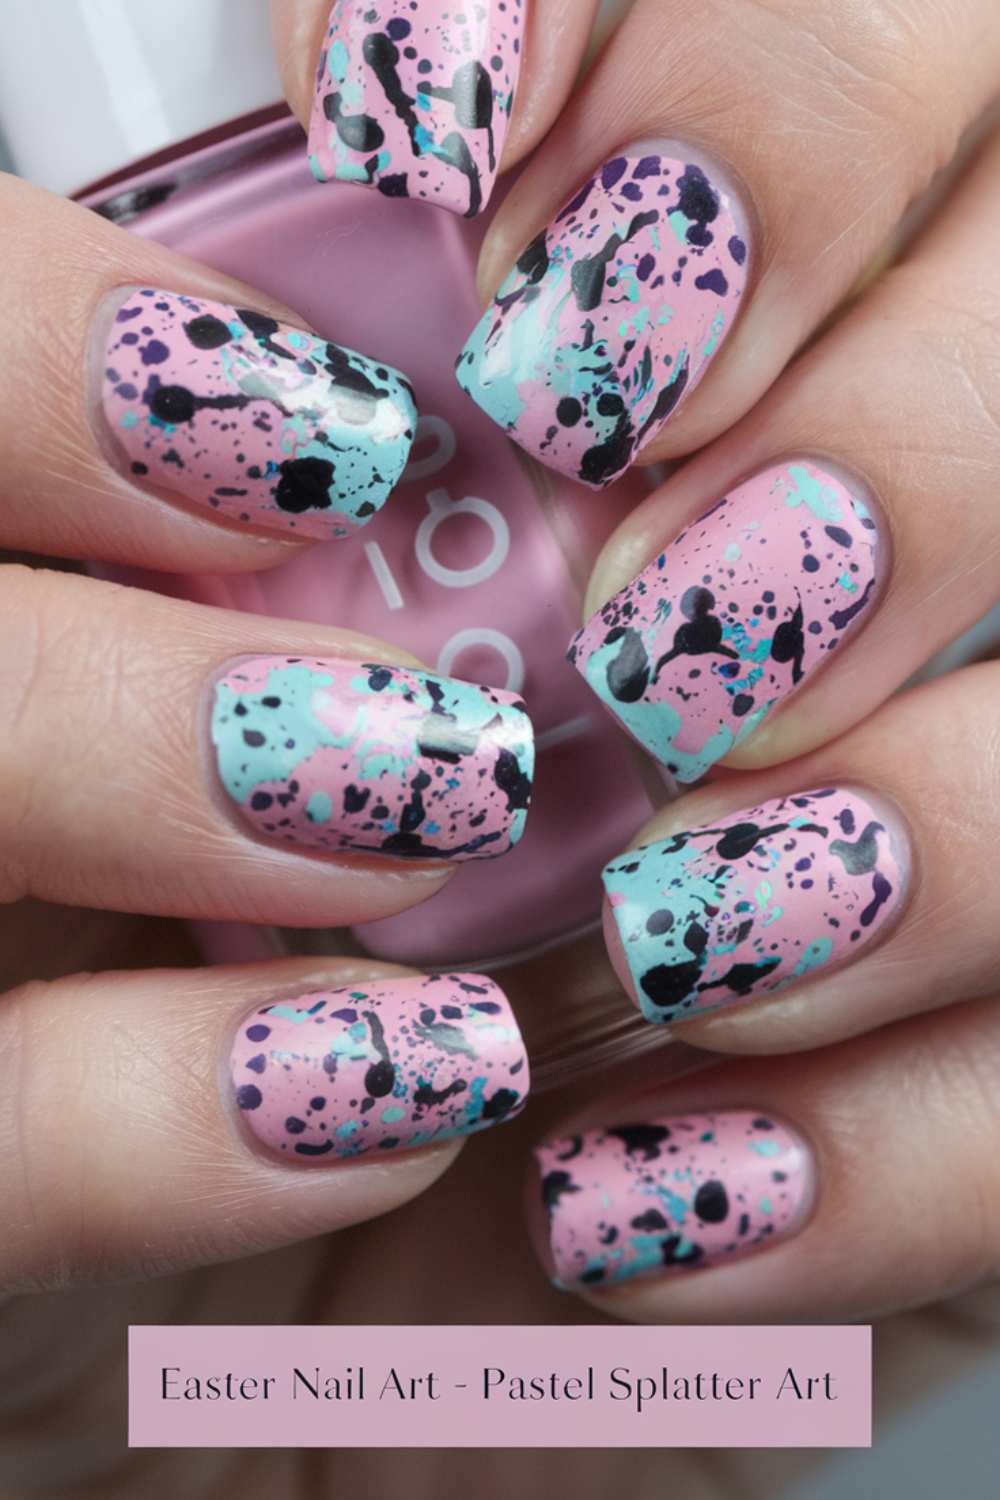
Picture this: Picture a burst of creative energy on your nails, where every splatter is a splash of artistic expression. The random yet beautifully blended spots create a dynamic look that feels both spontaneous and chic. This design captures the essence of artistic freedom and playful experimentation.
18. Minimalist Easter Dots Nail Art
For a clean and simple style, minimalist dots can deliver a striking Easter nail art look that’s modern and easy to achieve.
Step-by-step
Begin with a crisp, neutral base coat and let it dry. With a dotting tool, place a series of small dots in a clean pattern on one or two nails. Use a single contrasting color to keep the design streamlined and elegant.
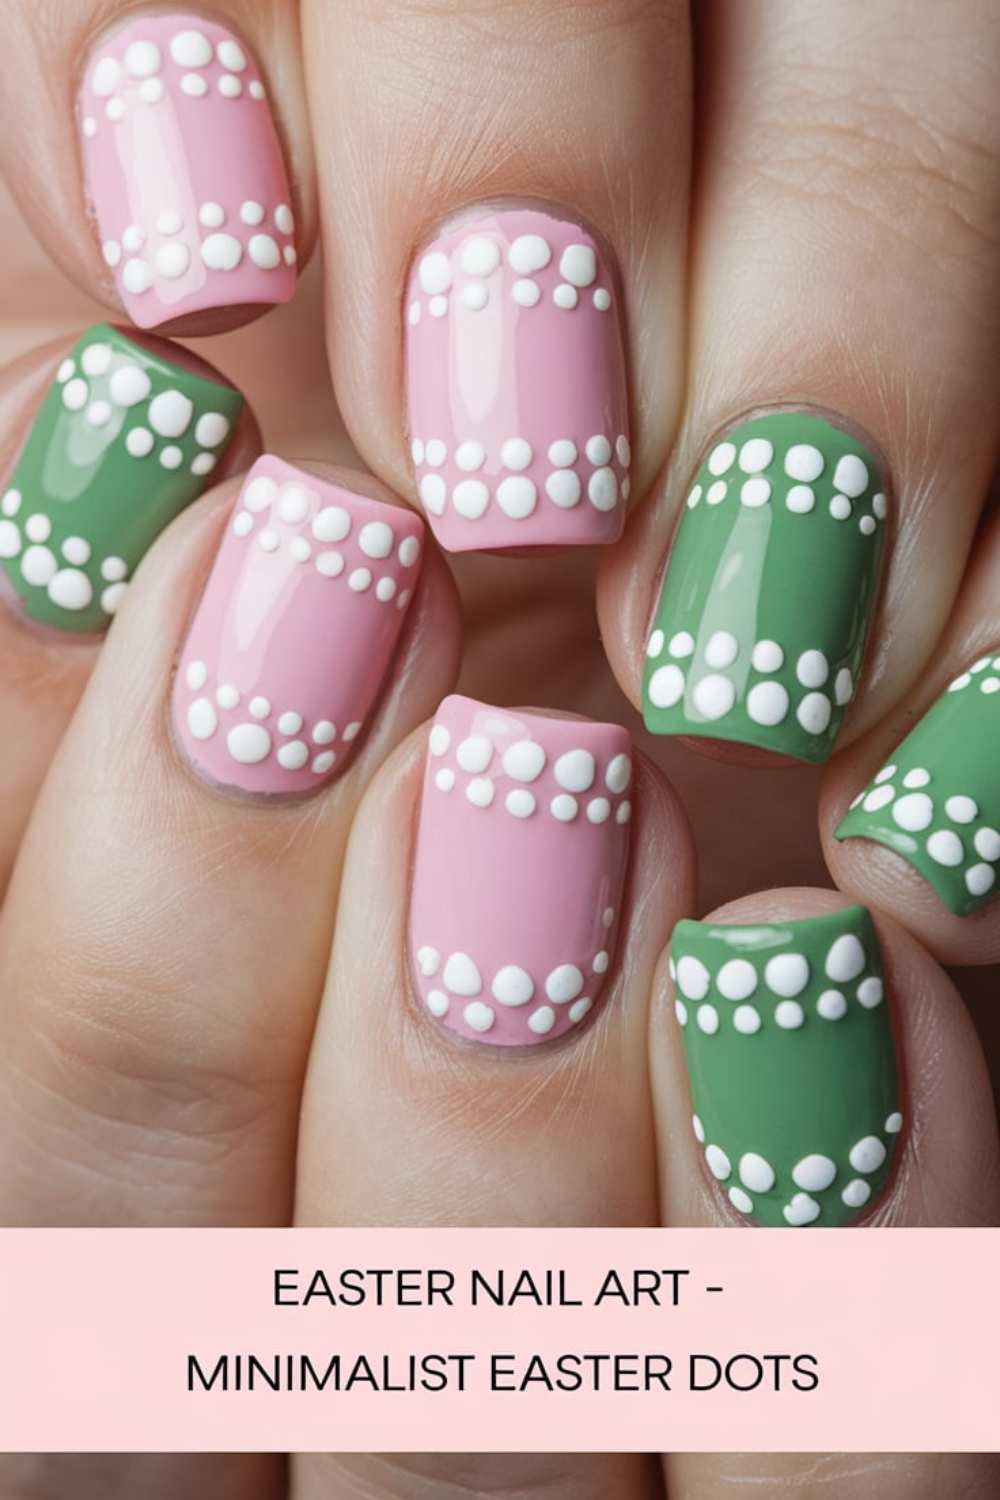
- Apply a neutral base coat on all nails.
- Use a dotting tool to create a series of dots.
- Keep the pattern simple with one contrasting color.
Picture this: Imagine a minimalist design that speaks volumes through its simplicity. The evenly spaced dots create a clean and modern look that is both refreshing and sophisticated. Each nail exudes subtle charm, proving that sometimes less truly is more.
19. Easter Bunny Silhouettes Nail Art
Make a bold statement with Easter bunny silhouettes that capture the whimsy of the holiday. This design is both creative and fun, offering a standout look on your nails.
Step-by-step
Start with a bright base coat on your nails and let it dry completely. On one or two accent nails, carefully paint the silhouette of a bunny using a contrasting color. Refine the edges with a fine brush to ensure a smooth, defined look.
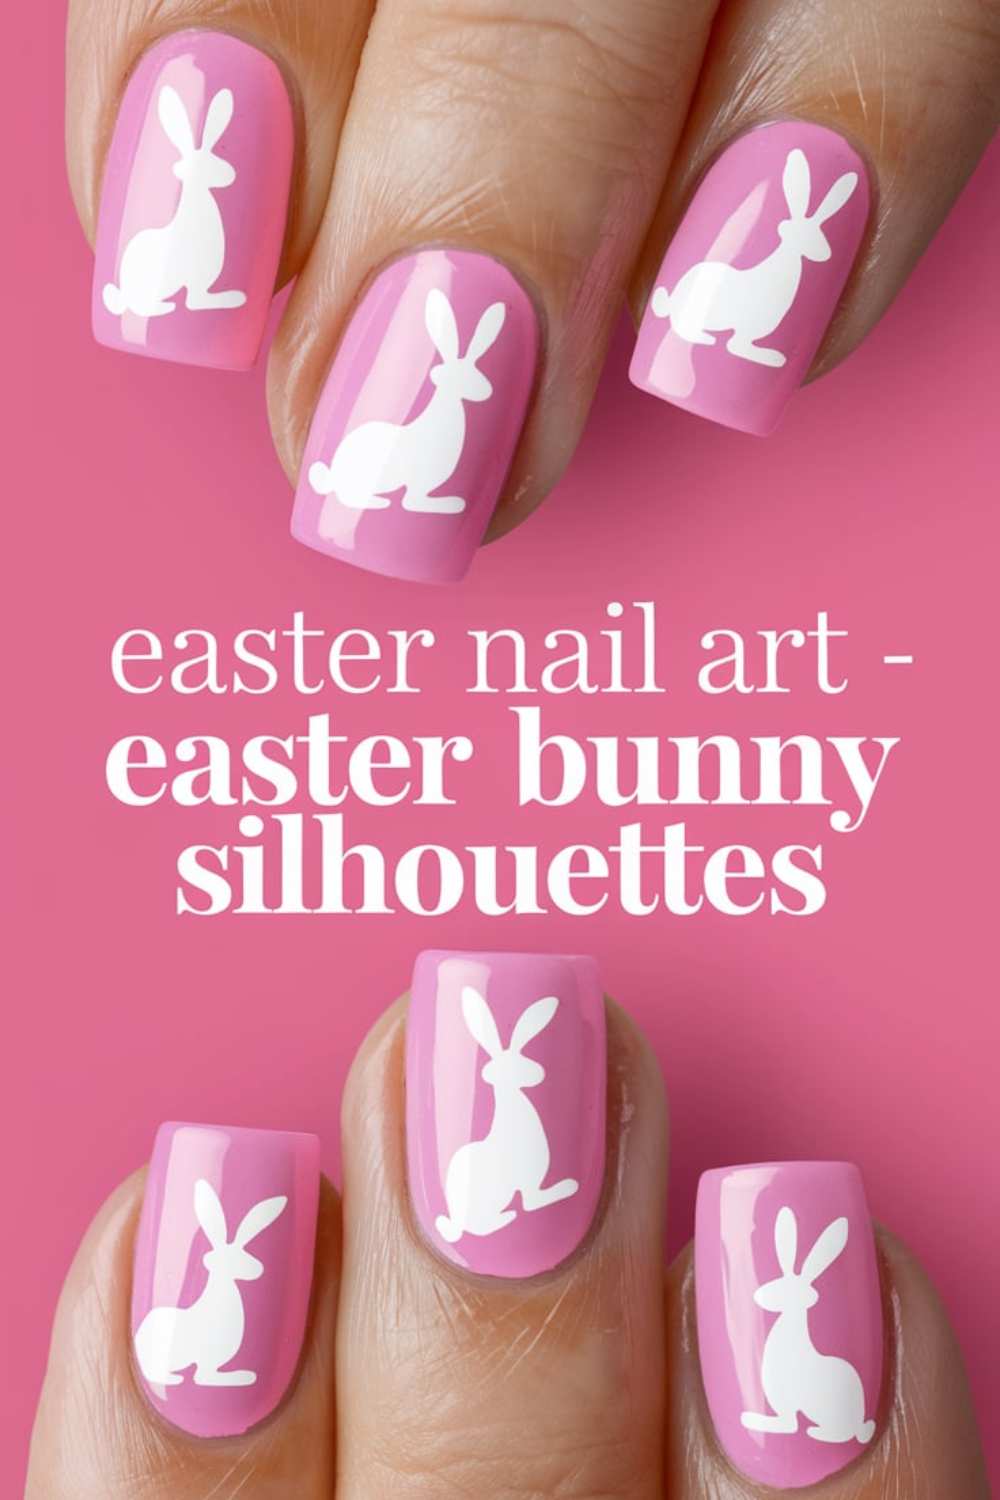
- Apply a bright base coat on all nails.
- Paint bunny silhouettes on selected nails.
- Refine the design with a fine brush for crisp edges.
Picture this: Picture your nails boldly displaying the silhouette of a playful bunny, capturing the essence of Easter in a simple yet striking design. The contrast of the silhouette against the vibrant base creates a dramatic effect that is both charming and fun. This look is a perfect mix of modern art and holiday spirit.
20. Easter Celebration Mix Nail Art
For the grand finale, combine multiple elements to create a nail art design that truly celebrates Easter in all its colors and motifs. This design is a playful mix of pastels, patterns, and festive symbols.
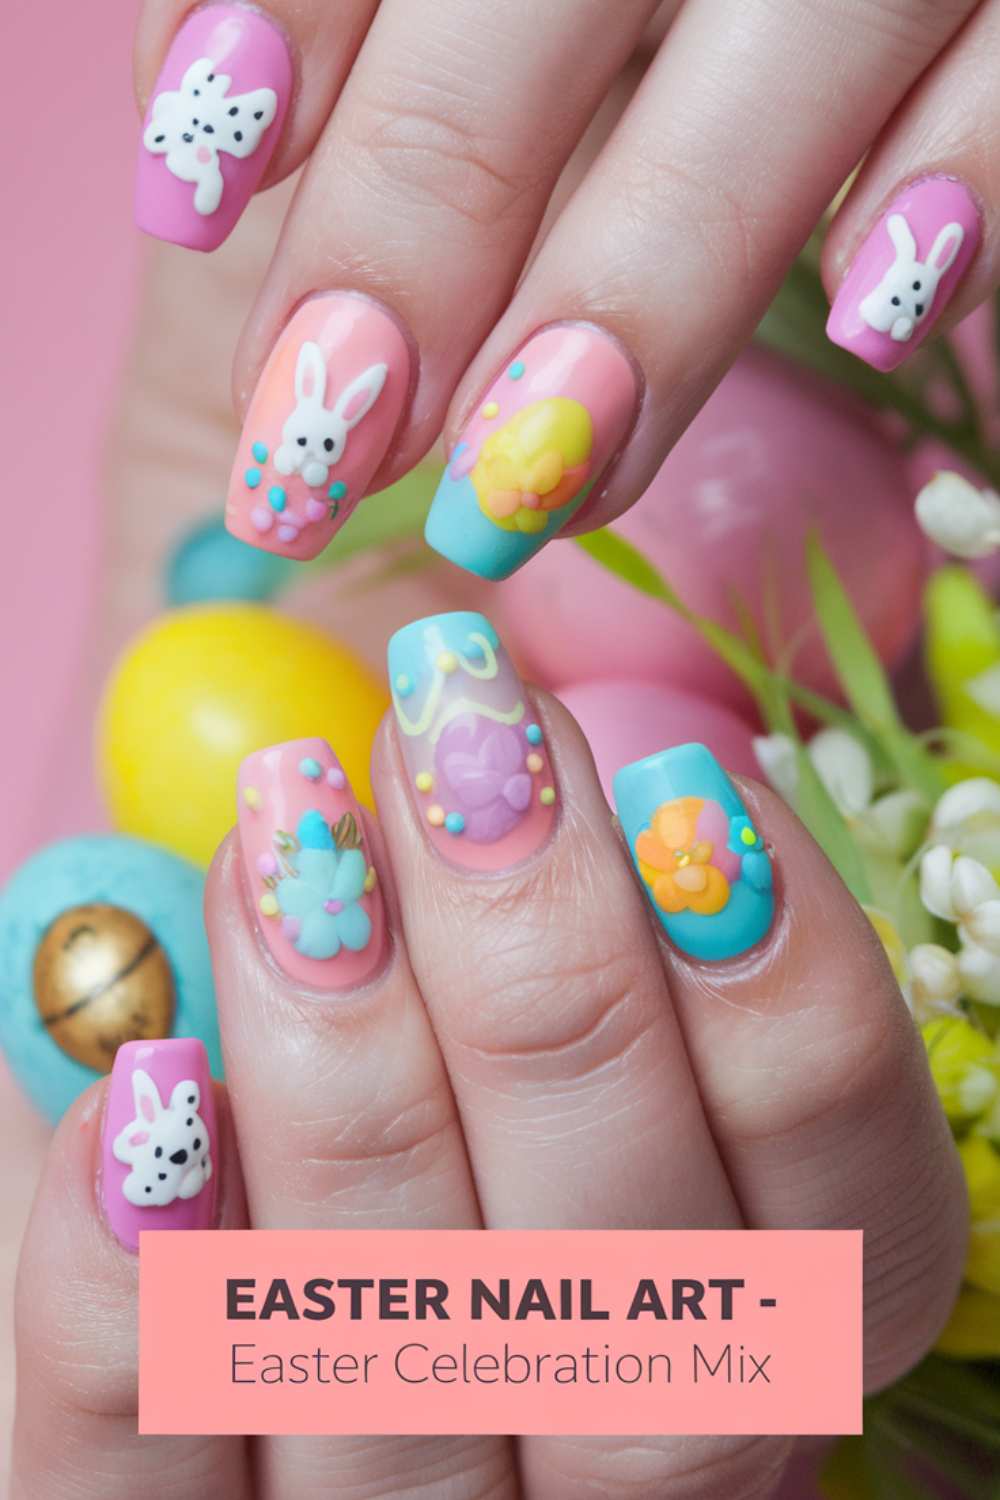
Step-by-step
Start by applying a pastel base coat on all nails and let it dry. Choose one nail on each hand to serve as a mini canvas for mixing different Easter elements, such as eggs, bunnies, and hearts. Use a variety of colors and fine brushes to add layers of design details, and finish with a top coat for shine and durability.

- Apply a pastel base coat on all nails.
- Select accent nails to mix multiple Easter motifs.
- Layer elements like eggs, bunnies, and hearts with different colors.
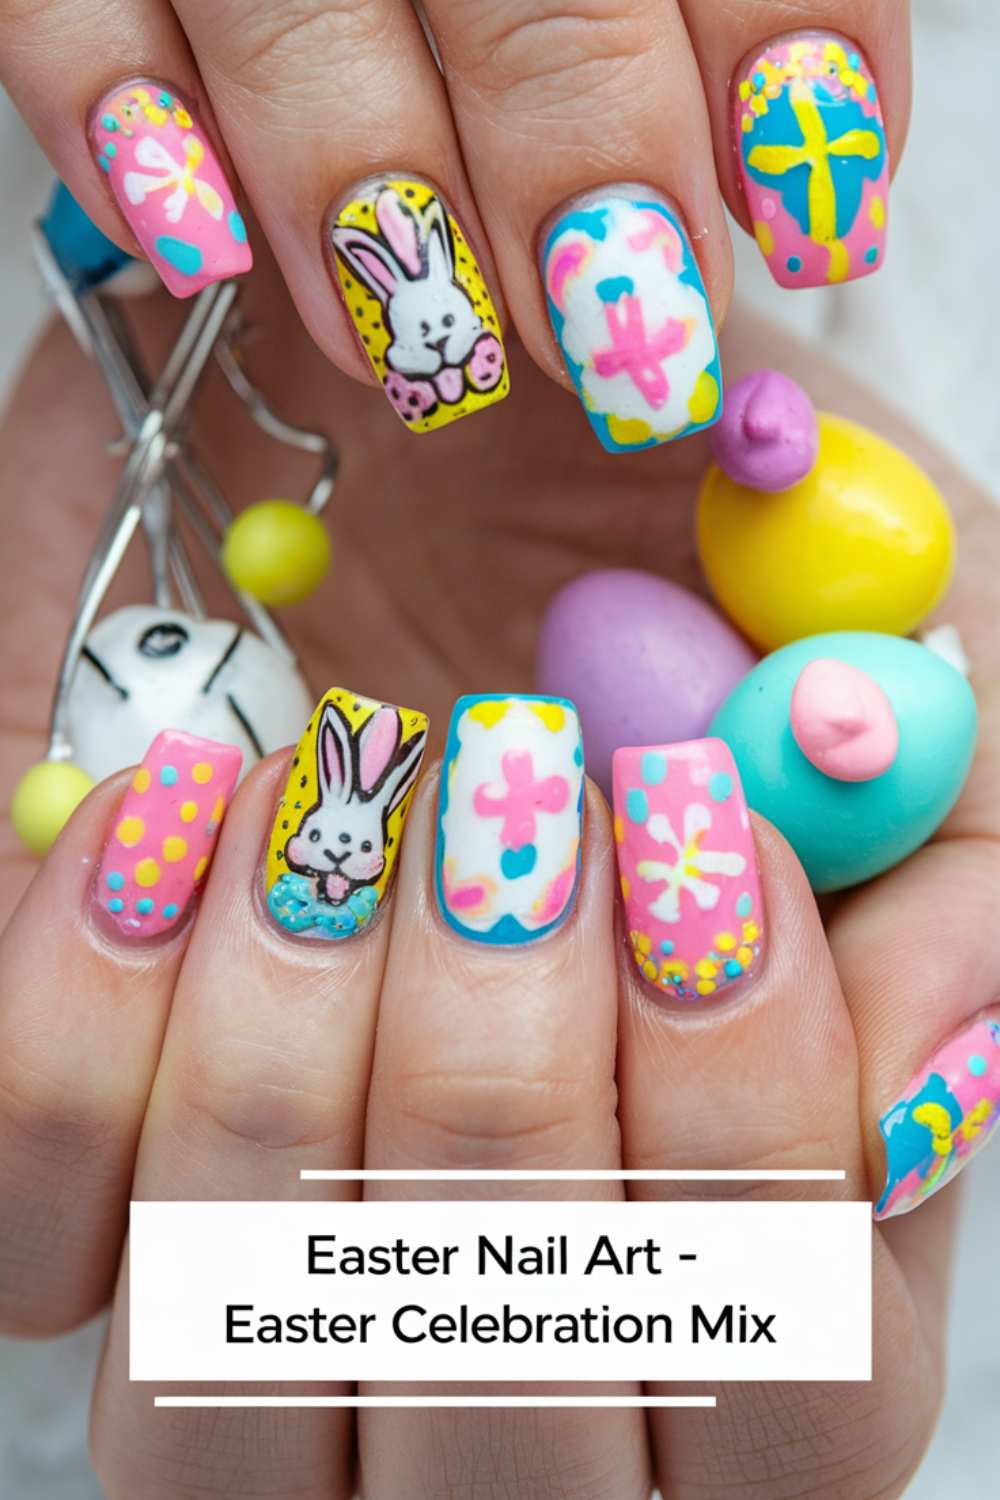
Picture this: Imagine a masterpiece at your fingertips where every nail is a celebration of Easter. The mix of playful motifs and vibrant pastels creates a festive tapestry that bursts with energy and creativity. Each detail is a tribute to the joy of the season, making your nails a true work of art.
Other Articles


